New to me 1980 XS650... Time to dive in

DeftQuiver

XS650 Enthusiast
Messages
54
Reaction score
0
Points
6
Location
Salt Lake City
Hey Everyone,

First off, I just wanted to say thank you all for your part in creating what has to be one of the best motorcycle forums around... Although I love the XS for numerous reasons, the quality of this forum and its members played a huge part in my decision. I'm coming at this with very limited experience, but I've spent a ton of time reading up on this forum, And I plan to reference the posts I'm using to do my work as I go. My goal in this post is to both document what I need to do (to keep myself honest) and to compile some of the awesome threads and information so that some of the other new guys can more easily stumble upon some of the spectacular information I have found.

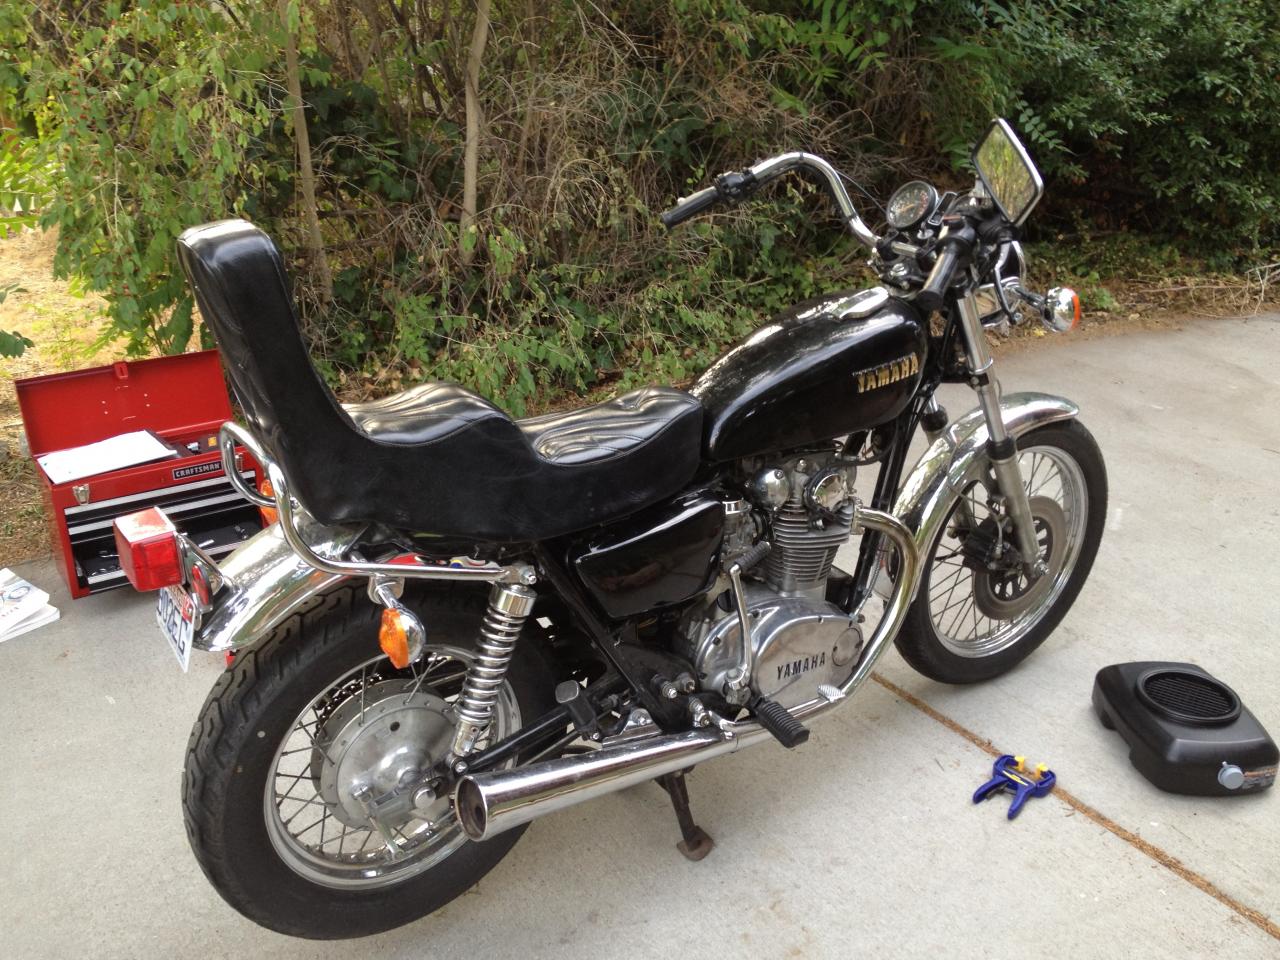
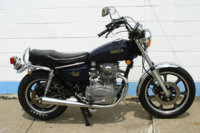
So now for the bike... I recently purchased a 1980 XS650 (Pics when I get home). It's actually in really good shape already, but I want to do some mild cosmetic changes, and get it into flawless mechanical shape. It's pretty much just been sitting around while I've been waiting for parts, but here's what's planned so far...

First and foremost, I'll be following this thread when I get home today...
http://www.xs650.com/forum/showthread.php?t=367

* Oil: When I change the oil (15/40 Diesel oil), I also plan to remove the sump filter to see if it's been damaged. If not, I'll probably throw it back in... If it's been damaged I'll probably be buying a new one from Boats.net and following the thread found here

* Battery is new

* Compression: I'll be checking the compression tonight and will post back with my results... Procedure found here

* Timing: TCI :thumbsup:

* Carbs: Gas tank looks really clean inside, and I actually already cleaned the carbs and they appear to be in great condition. I used this article as a guide:
http://www.xs650.com/forum/showthread.php?t=3
I also plan to install an inline filter tonight rebuild the petcock at some point using this post:
http://www.xs650.com/forum/showthread.php?t=20662&highlight=petcock (This one just popped up yesterday so I figured I'd give it a try... Thank you gggGary)

I've got a ton more planned, but this post is getting long, and this should be a good start. Thanks again for all the information... you guys rock.

Deft
 
Ok... So first off, here is the bike:

full


full


full


Now for the progress...

*Oil... Turned out to be a bit tougher than expected. I'm gonna need to go get a 27mm socket and a breaker bar...

*Compression: 140psi on both cylinders

Now for the issues:

full

This bolt came out.. and not in the good "it screwed out kind of way". It was stripped and came out with a sleeve of aluminum wound around it...
full

Any suggestions?

It also seems like it may only be firing on the left cylinder. I'm gonna check for a spark on that side tomorrow... I'm hoping it is an issue with the coil (since I have another one laying around).

Anyway, I should have more tomorrow.
 
Thanks for the suggestion, but the carbs have already been cleaned. I'm not 100% sure it's only firing on one cylinder, but I'll be testing some things tomorrow... I'm hoping I didn't have a spark plug ungrounded when I was compression testing or something.
 
hey, watch out for that side cap on your oil catcher, if you tighten too tight, it cracks. had five quart ooze all over my garage after changing the oil in my econoline overnite.
there is more threads than cap.
that, sir is a clean bike. ditch the bars, get a standard seat, and good to go, in my opinion.
also, get the bolts out of the risers, and get cap screws instead(allen bolts) works the same, but half as ugly.
thats a good list of links you found. if only all noobs knew how to use the search function.
you should plan on getting a lower oil filter anyways. 99% sure the one in it is ripped already. but keep it, and patch it, then the next time you take the "new" one out, and find it ripped, patch that one, keep it handy, and put the patched one in you fixed before.
 
Thanks Angus. I totally agree on getting rid of the lay-z-boy and swapping those bars out. I actually already have some drag bars I'm waiting to get on there. As for the oil, I've been debating just doing one of the oil filter mods in that link I posted, but I agree on expecting to replace that sump filter.

Deft
 
A heli-coil repair kit for the stripped bolt. I've used my kit on 2 engine bolt repairs and have another kit for shortening the 4 turn signal stems and another for spark plug hole repairs.....looking to do 4 more signal shortenings soon. A little pricey on the initial purchase but well worth it.

Also out of habit I usually check the heat on my headers after the initial startup....back of the fingers, real quick, lets you know if both sides are firing.
 
Last edited:
Real tidy bike, I Like these Specials, all metal and not plastic like the later models.

Your bike is an 80G Special II. The seat is the same as the 78SE/79SF/79SII Specials and is hinged, (not a clip on like the 80SG and later models, Mikes doesn't sell these ). The 1st pic is the 80G Special II, the other 2 are the 78/79 SE/SF
 

Attachments

  • xs650G-2.jpg
    xs650G-2.jpg
    203.6 KB · Views: 75
  • normal_b8bc_20.jpg
    normal_b8bc_20.jpg
    73.2 KB · Views: 85
  • IMG1441-S.jpg
    IMG1441-S.jpg
    36.3 KB · Views: 87
Ok, so it turned out that the issue I was having was related to the coil... I got the new coil on, and here's a video of the bike idling and revving a bit. Any comments on the sound would be appreciated.


I also snapped a picture of the spark plugs after a quick ride. They were put in about 2 days ago, and this is the first time I've really ridden it since... It looks to me like the bike is running a bit rich, as I said earlier... I'm a bit new to this.

full


Another thing I noticed was that the left cylinder (when sitting on the bike) was running about 20% hotter than the right. Carb sync? Both the plugs looked similar, so I don't think it's a mixture issue.

I also changed the oil, but didn't have a gasket to replace the one on the sump, so I didn't take a look at that yet. Oil didn't look too bad though.

It is feeling a bit shaky cornering for some reason. Any suggestions as to what might be causing that would be appreciated. I can't say for certain, but wouldn't be surprised if there was a totally smashed swingarm pivot bearing. I have a new metal one, but I don't want to get into that until I have a chain and sprockets. Anything else I might want to take a look at.

Deft
 
A heli-coil repair kit for the stripped bolt. I've used my kit on 2 engine bolt repairs and have another kit for shortening the 4 turn signal stems and another for spark plug hole repairs.....looking to do 4 more signal shortenings soon. A little pricey on the initial purchase but well worth it.

Also out of habit I usually check the heat on my headers after the initial startup....back of the fingers, real quick, lets you know if both sides are firing.

Thanks for the suggestion... I have no problem "Investing" in tools :thumbsup:
 
your prolly rite about the swing arm. a loose chain can do that too. out of sync carbs can also. if it does that accelorating out of a corner, or slow roll on, look to the syn. one cylinder is putting power down and dragging the other along, then the dragging, non-firing cylinder kicks in, then all is smooth. Dont mess with the plug situation yet. do some maintanence, clean out the carbs, do a few mods, then just ride it. better rich, than lean, but if it fall on it face at high rpm's under load, step down one size from whatever main jets you have now. but frankly, those plugs arent too bad. looks like they are burning clean . alittle soot is good. just dont want the soot wet .
 
Awesome, I'll probably bust out the manometer and sync the carbs tomorrow. That would explain why one cylinder is running hotter as well. I hope it will sync ok though...when I was cleaning the carbs, one of the butterfly plates was a little chewed up (very slight, but looked like someone might have marred the bottom edge with a screwdriver or something). Other than that is appears to be running pretty well lately... I might carry an extra set of plugs around with me though in case I foul them.

Thanks again,

Deft
 
Real tidy bike, I Like these Specials, all metal and not plastic like the later models.

Your bike is an 80G Special II. The seat is the same as the 78SE/79SF/79SII Specials and is hinged, (not a clip on like the 80SG and later models, Mikes doesn't sell these ). The 1st pic is the 80G Special II, the other 2 are the 78/79 SE/SF

Thanks for the info Skull. I think i'm going to try to make a seat, but that would explain why I was so confused when I looked into ordering one.
 
A heli-coil repair kit for the stripped bolt. I've used my kit on 2 engine bolt repairs and have another kit for shortening the 4 turn signal stems and another for spark plug hole repairs.....looking to do 4 more signal shortenings soon. A little pricey on the initial purchase but well worth it.

Also out of habit I usually check the heat on my headers after the initial startup....back of the fingers, real quick, lets you know if both sides are firing.

So I'm not all that familiar with Heli-coil repair kits... If I were going to get one, all I'd need is an M6x1 kit like this right?

http://www.amazon.com/1-00-Perma-Coil-Thread-Repair-Kit/dp/B0002KL3PY/ref=sr_1_2?s=automotive&ie=UTF8&qid=1343069364&sr=1-2&keywords=helicoil+m6

Also, I've got the clymer manual, but I can't for the life of me find the torque spec on the valve cover acorn bolts... If anyone has an idea, it would be greatly appreciated.

Sorry for the insane amount of replys... I've been a bit scatterbrained lately.
 
Looks right, though mine is a Helicoil. Get the correct drill bit if it doesn't come with the kit. I probe the hole to be fixed with a nail or similar to mark the depth to drill. Mark the drill bit to the depth and then go for it. Keep the bit centered to the hole. Go easy.Once you hit your depth mark stop. When you cut thread for the coil just take your time. I cut a bit and then back out to clean the threads then go in for more....no hurries. The cutter won't cut thread all the way to the bottom of a blind hole....s'ok, you should have plenty of thread for the coil to work properly. Knock the catch piece off the bottom of the coil once it's inserted and fish it out..... small magnetic screwdriver should do it, heck, a q-tip with grease on the end should work.
The torque specs are low on the torque scale.......have to check for sure.....mebbe the same as that 10mm headed bolt at the back of the engine, the one that's always hiding when you take the top end down......
Now, focus........ha!

Awesome, thank you for the tips. I'll be trying to get a hold of one of these things this week. I'm curious as to how much torque I'm able to get out of a short 10mm open head wrench, cause I was really surprised when it came out stripped.

I synced the carbs yesterday, and it seems to be running/feeling beter... It could probably still use a new chain, sprocket, and swingarm bushing, but it looks like you were dead on Angus :thumbsup:

On the agenda for this weekend... I'm planning to swap out the bars, new clutch cable, SS brake lines, Brembo master cylinder, new brake pads, and possibly a new seat... Oh and building a garage door and moving my buddy in. I may be getting a bit ambitious :wink2:
 
Oh and just to save myself from a trip to the hardware store... does anyone know if the threads on those intake valve cover studs are fine or coarse? They look coarse to me.

Deft
 
Try picking the aluminum out of the stud threads....might get lucky.
Looking at torque specs.....6 mm cylinder head bolt is 7 lbf
Cylinder head side cover crown nut 6mm for years '79 to '83 is 6.5 lbf.....for the 8 mm crown nut, same years is 9.5 lbf.
Best to have a torque wrench and use it religiously.

And a torque wrench that will read below 10 ft/lbs :doh:

Anyone have a recommendation on a good torque wrench...? I don't want to spend a ton, but I would if it's worth the extra.
 
Back
Top