scottish hardtail build

SILVERFOX

SILVERFOX
Messages
42
Reaction score
0
Points
6
Location
PERTH ,SCOTLAND
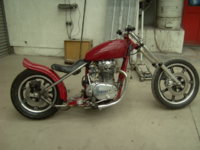
been wanting to build a hardtail for a while now but its very hard to get a cheep donner bike over heer you would pay £1000 + for a half decent one so decided to use the one i have, as much as i would like to keep it, but its for a good cause
picked up a frame in birmingham, 690mile round trip for that, and orderd a hardtail from t.c bros USA which i now have after it got lost in post
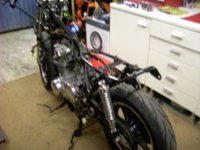
to start with im going to use this

PICT0701.jpg

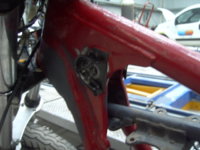
and this

PICT0699.jpg

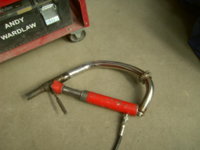
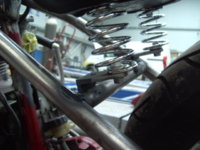
and this
PICT0862.jpg
 
made a start the other day by welding struts to connect all the engine mounts so they dont move. and hope to weld in the hardtail in a few days time. im not going to build a jig im going to use a car-o-tronic. its abit of equipment use every day at work to measure car chassis but i can also use to measur any thing that i can clamp to my bench i will post some pics and you will see what im rambiling on about.
 
sat morning no overtime so decided to fit hardtail im going to use a car-o-tronic its a computerised measureing tool that i use at work to repair and realine vehicle chassis and bodys. what ever i clamp to my bench a car ,van, or truck i load the vehicle details into the car-o-liner and it will know all the measurements for that vehicle, all i do is show it 4 points that are not damaged and it will work out where every other point should be. i used a different setting called comparitve there you can select one point on one side and it will show you where that point is on the other side uesing a center line .i know its as clear as mud
PICT0894.jpg

took measurments to let it work out the center line then i can measure any point i like
PICT0896.jpg

then set to work cutting rear end of
PICT0901.jpg
 
all cut off and cleaned back to good metal so i only have to fit once but measure lots of times it dosent take much heat to move things so its tak weld all connections and weld small parts at all points and work your way around until its all stiched up
PICT0907.jpg


PICT0914.jpg

didnt take that long to do started at 9am and was back home for 3pm

PICT0915.jpg
PICT0913.jpg
 
any one have pics of rear brake peddle mounts and any ideas on where to put electrics coil, battery im doing this all on my own. no other bike builders around my area so all pics and ideas would be greatfully receved cheers:)
 
Made a start to the strip down of my own xs i will be sad to see it go as iv had it for 14yrs and it,s been good to me and never let me down to bad but if i want to go down this road i have no choice
going
PICT0949.jpg
going
PICT0959.jpg
gone
PICT0974.jpg
 
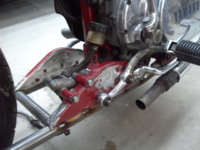
been working hard on the bike the last few days. as ive said this is a first for me and every time i fit or make a part it interfears with something else. used old frame foot rest mounts cut shorten and welded onto the lower rails then heat and bend foot rests to fit with brake and gear leaver had to weld a nut onto frame for rear brake peddel stop all went well but alot of fitting and trying on and of. this interfeard with the exhaust so had to reshape and reposition lower and weld on new mounts pleased with the progress so far pics to follow
 
Think iv sussed out how to post pics
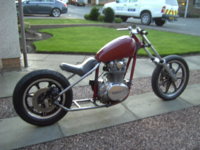
hears pics of progres so far and a mockup of how i want it to look , i think, a bit of time had to be spent on foot rests to get them level

PICT0997.JPG

PICT0998.JPG

PICT1006.JPG

PICT1005.JPG

PICT1008.JPG

PICT1015.JPG
 
that's looking very smart Silverfox - the profile of the bike reminds me of an old BSH t-shirt logo! I also like what you've done with repositioning the original uglyplates to be able to keep the rear brake. That's problem-solving for you.
I am running an FZR600r rear wheel which allows me to run a 160, but it has involved a whole heap of mods to get the sprockets lined up - I think the older FZR600 rear is an easier swap and there should still be a few of them kicking around.
 
Back
Top