PA46 cam chain guides/tensioners

cruzin

XS650 Addict
Messages
394
Reaction score
11
Points
18
Location
michigan
Ive looked at the materials for making cam chain guide/tensioners and found PA46 as the best material these days. The engine I just rebuilt had the front guide worn and the chain was grinding into the metal of the guide. Why not make a new guide totally from the best material available today and not use metal as it backer. New materials are better for heat and oil but what about bending. Could a guide made totally from plastic hold up for this use? Ive checked on a piece of this plastic but it is very expensive. I have a ton of HDPE in the shop but no PA46. Any one have a small sheet of this PA46 and want to experiment?
Any thoughts on this topic.
 
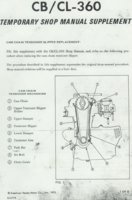
I seem to recall that the Honda 360 front slipper (guide) was solid plastic, supported only at the ends.

Honda360-Tensioner.jpg
 
cruzin
The idea certainly has merit, but the cost? How many do you think you could get from a
24" x 40" sheet? What would be the shrink (lost material from process)?
Could the back webbing be larger(than the molded metal backing) to help with impact from the chain?
Could this PA46 be used in a 3D printer so material from milling wouldn't be lost?

I agree that the improvements in plastics and process's should make this viable.
 
I'm wondering if you could just make new pads for the original aluminum bases from that stuff? Maybe U shaped so they could be fit over the original base and be riveted or screwed to the sides? Or maybe a combination of JB Weld under the whole length of the face and screws/rivets through the sides.
 
You would be cutting away a lot of costly material. The market will only pay $70-90.
The cost of one (OEM) from your favorite supplier.
 
Here's another idea - how about substituting/adapting one from another model? The SR500 front guide might be a viable candidate. It uses the same cam chain and as far as I know, front guide failures on them are not an issue. Maybe it's because their base looks to be steel and that bonds better to the rubber/plastic strip? The cost is also inviting - $22 and change.

http://www.boats.net/parts/search/Yamaha/Motorcycle/1981/SR500H/CAMSHAFT-CHAIN/parts.html

I happen to have some SR500 parts motors laying around. I'll have to look at that guide.
 
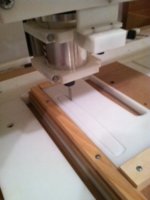
You can make the back side wider than the metal part. have to cut this stuff with a fine blade band saw. You dont have a lot of room on the sides to make it wider. I measured about .060 on each side of a motor I got tore down. We talked about 2 blind fasteners buried inside it for mounting the front guide. The back tensioner would just remove the rivet where it pivots and put a new rivet in. Might be able to get upwards of 72 pcs from the stock. And as far as just replacing the material on the metal backing that may be possible also. But its fairly thin and the rivets would have to be deep enough to make it last for some time. And there would be quite a bit of chips for waste but it may be possible to re use in a 3d printer to make some other type of guide. As soon as my brother gets the parts drawn up and does the g code and makes a bed fixture for it Ill cut some out of some hdpe I got here and post some pictures. My brother is pretty excited about it and he dont even have a motorcycle just like to run that cnc.
 
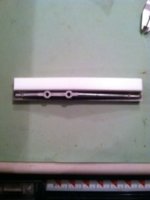
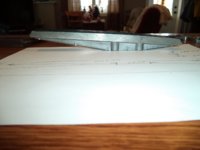
My brother cut the prototype tonight for the front guide and a nest so it can have the bolt holes added at the proper angle. He used HDPE because of the lack of PA46. I brought one home to make sure that it will slide down in the cylinders. The parts are thicker than stock both in the width he left out a lot of the tapered areas.
 

Attachments

  • photo.JPG
    photo.JPG
    12.5 KB · Views: 325
  • photo 2.JPG
    photo 2.JPG
    9.6 KB · Views: 297
Is there someone that could give me an accurate measurement of a new front cam chain guide? I have used ones and my only new one is buried in my new motor. I could order one for 42 bucks from Mikes but someone may have a new one waiting to be put in.
I need the measurement while the guide is laying flat on the 2 bolt holes with the holes on the flat surface straight up from one or the other bolt hole may be the one that is the deepest in depth Just need to know which one. We based our depth of the guide from a used one and if we make one thicker or thinner than oem we could change timing by pushing the chain farther into the cavity. Any help would be appreciated. thanks.
 
Last edited:
Sure Brian that would be great. If you can take a picture of where you measure it at that would be great or just explain to me where you take the measure at. thanks
 
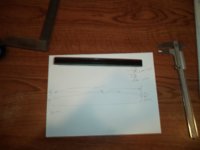
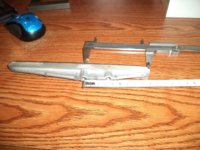
Here are some shots of the guide;

Basically it measures 6 mm high and 20 mm high at the other end when measuring from the table top up to the bottom edge, which is the only thing flat and straight from end to end.

The overall length is 205 mm with a 35 mm spacing between bolt holes.

The black guide coating has a 2 mm height on the sides.

The surface of the guide where the chain rides is a very big arc from end to end. If I had to guess, over a distance of say a 200 mm span the arch would be 2 mm high in the center or at the 100 mm mark. Gives you an idea of the arc size which could be calculated into radius.

So the guide surface itself is not only angled but arched as well.

The bolt holes are perpendicular to the mounting surface and approximately 90 mm from the low end to farthest bolt hole.

Looks like a 4 degree angle between mounting surface for the bolts and that straight edge of the guide which is the lower side edge. Height of the guide side face is 9-9.5 mm to a thickness of 11.8 somewhere over the center of the bolt hole nearest the center of the guide.

Think you can make any kind of sense of all that.

You really need a guide to measure yourself to get any kind of accuracy.


.
 

Attachments

  • DSC00397.jpg
    DSC00397.jpg
    96.2 KB · Views: 205
  • DSC00396.jpg
    DSC00396.jpg
    97.1 KB · Views: 200
  • DSC00395.jpg
    DSC00395.jpg
    98.8 KB · Views: 203
  • DSC00394.jpg
    DSC00394.jpg
    103.8 KB · Views: 194
  • DSC00393.jpg
    DSC00393.jpg
    89.1 KB · Views: 219
  • DSC00400.jpg
    DSC00400.jpg
    240.6 KB · Views: 209
Last edited:
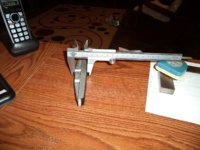
Hi Brian, in picture 3 looking at it from the side you can see the 2 threaded holes where it gets bolted through the cylinders. The left hand hole where it is the thickest can you line up your calliper in the center if the hole at the angle that the bolt screws in and measure to the top of the laminate and tell me how high it is off the table top. We have all measurements and arc but I did not know how much the plastic has worn down. But from a given point like center of the tallest bolt hole all other measurements can be adjusted. Thanks this is a great help.
 
Here you go;

24.3 mm total distance

less the 2 mm guide side height

22.3 mm to the base of the guide where the chain rides.

,
 

Attachments

  • DSC00405.jpg
    DSC00405.jpg
    248.2 KB · Views: 219
Back
Top