Klub Foot,
I briefly used a different design PC board with a part number of 1006. That board uses a different rotor, that is, the polarity of the magnets is the opposite of previous and current models. If the PC board has that number on it, then I may have sent the wrong rotor to replace the one with the missing magnet.
Other wise, the PAMCO is just a switch that turns the coil on and off, controlled by the magnet passing over the sensor. It either works or it doesn't, so if you are getting any spark, then the PAMCO is working. It should be the same for the coil. Both plugs fire at the same time, so it is unlikely that the coil is bad as well, but you could check the resistance to be sure.
So, that leaves the advance mechanism and advance rod, which has recently been replaced. If it was not installed properly, then all sorts of problems can result.
Check the installation instructions on the web site
www.yamahaxs650.com for the advance mechanism. Note in particular that there are three locating pins, including one for the advance plate to cam. Sometimes, that pin is not installed at all, resulting in a random position of the timing.
Here is a check list to test the coil and PAMCO as well:
Testing the coil:
1. Using the lowest scale on the meter, measure the resistance between the primary terminals with the wires removed. Should read from 2.5 to 4.5 Ohms.
2. Using the highest scale on the meter, measure between one of the primary terminals and the center core of the coil. Should be infinite resistance. (open)
3. Measure between one of the primary terminals and one of the plug wire terminals. Should be infinite resistance. (open circuit)
4. Measure between one of the plug wire terminals and the core of the coil. Should be infinite resistance (open circuit)
5. Measure from one plug terminal to the other. Should be 15,000 to 20,000 Ohms
Testing the PAMCO
1. Use a voltmeter and check for battery voltage on each of the red/white wires with the key and kill switch are turned on.
2. The dual output coil has to have both spark plug wires connected to a spark plug at all times.
3. To test for spark, connect one of the spark plug wires to a spark plug that is grounded to the engine.
To test for spark without having to turn the engine over, do this procedure:
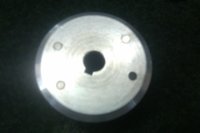
1. Remove the PAMCO rotor.
2. Remove the locating pin in the advance rod.
3. Reinstall the rotor, but without the pin.
4. Replace the nut holding the rotor on loosely. This will allow you to spin the rotor to produce a spark without having to turn the engine over.
5. Connect one of the spark plug wires to a spark plug that is grounded to the engine, but not installed in the engine.
6. Make sure that the other spark plug wire is connected to a spark plug in the engine.
7. Turn on the ignition switch and the kill switch.
8. Spin the rotor while looking at the gap in the spark plug for a spark.
9. Turn off the kill switch and the ignition switch.

 Yes, those were the days. Just a Gerber Baby food lid and a shank from a bolt and about 6 beers and I had my very own electronic ignition!!