Is this from the motorcycle junk yard of Santa Fe? I loved living near that place.

No, I bought this bike from a dealer in the Denver area, I believe the bike had been there for the whole time before I bought it and had it shipped to Phoenix, where I live.
 
You can't mix the 2 bearing up, on the 650 anyway. The top bearing has a smaller I.D. and won't fit all the way down on the stem. The races are another story. They're very close to the same size .....

bBRFxPp.jpg


I take care not to separate the race and bearing. Mailman found matching numbers on his but I'm not sure they're all like that.
 
Last edited:
I take care not to separate the race and bearing. Mailman found matching numbers on his but I'm not sure they're all like that.

Yes, I've seen photos of different brands of bearings and I got lucky. There's not a lot of room on the edge of the race for a number, but there it was in super tiny print.
 
Steering head bearings Part II
The installation,
The first thing I did today was drill and tap my steering head for a 6mm grease zerk fitting.
IMG_4854.JPG

IMG_4867.JPG

Then I moved on to installing races and bearings. There was a lot of advice regarding freezing the races and such but after going to the All Balls website and reading their tutorial I decided to just try doing it with everything room temperature, and it worked just fine.
I greased the steering head shaft where the bearing was going to be driven on to, and smeared some grease around the steering head where the races were going in.
On the steering head stem, first put the factory grease seal back in that I saved earlier.
IMG_4855.JPG

Then the seal supplied with the All Balls kit. Smear a little grease on it first.
IMG_4857.JPG

Then the lower bearing that I have packed with grease. I took one of my old ball bearing races and inverted it so the thin inner lip is pointed down and pressing on the inner race of the bearing. Then I am driving it down using a one foot peice of PVC schedule 40 , 1 1/4" pipe.
IMG_4859.JPG

IMG_4860.JPG

IMG_4861.JPG


Now onto the races. I used the same set up to install races into the steering head, only I flipped the bearing over so that now I'm using the flat side of the bearing to drive the race in.
This photo shows the race already installed.
IMG_4865.JPG


The race in the top of the steering head is not recessed so a hammer and a block of wood is all you need there.
After that I started working on my " grease saver" , this was a fun little project, that I thought came out really well. After getting it on, I cut a hole for my steering lock to fit in.
IMG_4868.JPG


But at this point I ran into a snag. Here is a photo looking down into my steering neck. Notice on top you can just see the grease zerk protruding into the neck and the other side is the steering lock. When I tried to fit the steering stem into the neck, the grease saver hose hit the steering lock, and if I tried to push it in, then the steering lock would bind on the hose. I reluctantly removed the grease saver and it went right in.
IMG_4870.JPG


I then finished assembling the steering head, and corked the opening in the bottom of the steering stem so grease won't come out. That's a hard black plastic wine cork, smeared with silicone caulk and pushed in.
IMG_4873.JPG

IMG_4877.JPG

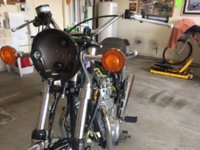
I got most of the front end assembled just finger tight and reached a stopping point for tonight.
IMG_4880.JPG


I still have to get brakes and cables , handlebars, switchgear, instruments all back on, and I still have some wiring left to repair.
But I have a long weekend and I intend to have her running again in a day or two. Stay tuned!
Later Bob
 
Last edited:
Nice work as always Bob! Great meticulous attention to detail, and all done in an Art Gallery!
 
Geez Mailman! You took this to another level of neatness and way to save grease. Way to go!
 
Excellent photos - Well done!! Once you ride the bike the bearings will probably need to be tightened up a little bit more. The indicator for the bearings being a little loose is the front end vibrates/judders when braking.
 
Truth be told, I never tried the "grease saver" on a Standard, just a Special. The Special doesn't have it's steering lock through the side of the neck, it's external, so it isn't an issue. Maybe the best that can be done on a Standard would be a partial "grease saver", installed from just below the lock slot down.
 
Today I got everything tightened up, I got the handlebars and instrument cluster back on and re installed the switchgear and front brake caliper, hooked up my clutch cable and throttle cable.
( By the way, right after I mounted the front brake lever, I gave it a good squeeze, BEFORE I I had the caliper installed on the disc! Why do I do things like that? Somebody kick me. :doh: )
The original grommets in the headlight bucket were dried out and distorted, so I found some replacements at Lowes.
IMG_4879.JPG

IMG_4881.JPG

IMG_4883.JPG

I got the headlight bucket mounted up and started threading the wiring back inside of it. I found that some of the wiring blocks were hard to squeeze in through the round holes. If I pulled the grommets loose, I could push all the wiring through, then install the grommet. Much easier.
IMG_4885.JPG

I also took 5Twins VERY good idea of routing the two handlebar switch wiring harnesses through the two lower holes on the headlight bucket. This is the way the harnesses should've been routed in the first place. Much more sensible.
IMG_4886.JPG

So that brings me to this point.
IMG_4887.JPG

I have repaired a lot of wires, replaced some bad ones, shined up all the connections, got rid of a lot of crap. But I still have to try to somehow make this rats nest a little neater.
One more day and I should be done. Hopefully there won't be any electrical fires in my immediate future. Hahaha!
Later Bob
 

Attachments

  • IMG_4884.JPG
    IMG_4884.JPG
    206.9 KB · Views: 239
Last edited:
Well done Bob. Nice work as always.

( By the way, right after I mounted the front brake lever, I gave it a good squeeze, BEFORE I I had the caliper installed on the disc! Why do I do things like that? Somebody kick me. :doh: )

Bet they were fun to pry apart. I read from 5Twins I think, to stick a block of wood between the pads when caliper is off, just in case. Not going to say I'm glad I had read that or anything. :rolleyes:
 
Bet they were fun to pry apart. I read from 5Twins I think, to stick a block of wood between the pads when caliper is off, just in case. Not going to say I'm glad I had read that or anything. :rolleyes:

At 5Twins suggestion, when I removed the caliper from the bike I wedged cardboard between the brake pads, so they didn't completely close, but I still had to crack the bleeder to pry it open enough to get it back over the brake disc. :D
 
Steering head bearing replacement is DONE!
Got all the wiring back together this morning, boy was I glad I tagged all the wires and their respective plugs. Had to do a lot of reconfiguring to make room for the headlight.
Then I replaced all the instrument lights with new bulbs, and I also have all new bulbs for the turn signals and brake light.
I threw the battery back in and tested all my lights, then started her up and tested my kill switch. Everything is working like it should, so I took it out for a test ride.
What a remarkable difference in the handling, I'm so glad to have this job done. And by the way my Harbor Frieght bike jack was invaluable for this job.
I still get a little squirm in the back from my swingarm bushings but that's a job for another day.
I'm taking a break from working on my bike for a while. I just want to ride it!
See ya when I get back!
Bob
IMG_4183.JPG
 
"All work and no play makes Jack a dull boy!"
IMG_4934.JPG

Work work work, it's REALLY interfering with my fun.

Finding my ( yet another ) intake air leak.
My bike was running so sweet, I was really ready to just ride it for a while and enjoy the fruits of my labor, but....the last time I took it out, I noticed when I started it I could hear the tell tale squeak of an intake leak and my bike started exhibiting all the signs of having one, erratic idle, hanging rpm ,especially when it got hot.
I tried finding it but was having difficulty.
So today I thought I would try a little something and I think it worked pretty well. Here is what I used, a length of 1/4" tubing, an ear plug and my flashlight.
IMG_4920.JPG

I stuffed the ear plug in my left ear so I wouldn't be confused by ambient noises, I started the bike and with one end of that tube stuck in my right ear and my flashlight I started probing around looking for the leak. To my amazement it let me home right in on it. When you get the end of that tube anywhere near the leak the volume jumps right up and it doesn't take long to zero right in on it.
I found it on the inside of my left carburetor.
It appears to be leaking in exactly the same place as where my right carburetor had a leak, the gasket around the enrichener cover.
I made a little video of it , holding the end of the hose right to the microphone on my phone, but it's weird, the phone somehow compensates for volume level. The recording doesn't show the rise in volume that your ear really picks up on.
On my other carb , the body around the enrichener was pitted and had imperfections.
IMG_4932.JPG

I expect I'll find more of the same on the left carb. I fixed that by cutting a handmade gasket and doubling the gaskets up to fill imperfections.
But this will involve pulling the airboxes and carburetors and all that goes with that, and I just don't have the time right now.
Jacks a dull boy.
IMG_4935.JPG

Later,
Bob
 
YOU are an impressively thorough and skilled motorcycle mechanic Bob - I will be using your steering head bearing post as my guide.

....and....since we're on the theme of Jack....

Jack_don't worry - be happy.JPG
 
Back
Top