1978 XS650 Special Project

Since I have a new one, I did this to it. Not trying to stop flow to that side but to slow it down so flow distributes across the rest of the screen more than stock. I will keep the old one and maybe mod it to be usable again following some of pics provided by 5Twins.
Aluminum I had was thin and I did de bur the holes I drilled in it.
I think what I have should put most of the flow moving across the magnets to pick up any ferrous material
IMG_8125.jpg
IMG_8124.jpg
 
That looks pretty good. Some guys attach their guard permanently to the filter but I like them to be removable so I can inspect the screen underneath for tears. I also like taking it off when I clean the filter.
 
That looks pretty good. Some guys attach their guard permanently to the filter but I like them to be removable so I can inspect the screen underneath for tears. I also like taking it off when I clean the filter.
I've seen the screw in filters on the bottom of the sump ( MOD ) would / does that negate the need for the internal filter?
 
I've seen the screw in filters on the bottom of the sump ( MOD ) would / does that negate the need for the internal filter?
Yes. Mine has the Smedspeed conversion but there might be other similar offerings.


PICT2192.JPGPICT2193.JPGPICT2220.JPG


You lose the internal filter, the oilways are routed through the machined block and a HiFlo filter screws on under. IMHO this is the best upgrade I've done on the bike, a modern fine filter working with current-day detergent oils. And no worry about the original filter ripping apart. Peace of mind.
 
Yes. Mine has the Smedspeed conversion but there might be other similar offerings.


View attachment 257599View attachment 257600View attachment 257601


You lose the internal filter, the oilways are routed through the machined block and a HiFlo filter screws on under. IMHO this is the best upgrade I've done on the bike, a modern fine filter working with current-day detergent oils. And no worry about the original filter ripping apart. Peace of mind.
Very interesting. Smedspeed doesn't appear to support on line ordering. Any idea how much they're charging, that's assuming he's still making the filter conversion? Thanks.
 
The chap who started Smedspeed, can't recall his name, is a member of this forum. The business is now run by Rick Forte so I would suggest a call or email - contact details here: https://www.smedspeed.co.uk/contact.html

Don't know about current prices but in 2019 I paid £110 for the sump conversion, on an exchange basis, that price included a HiFlo filter.
Thanks, probably near double that figure now.
 
Ever put something back together then think? did I xxxxx? In this case it was the bolts holding down the sump filter.
I put it all back and then was like. Did I tighten those bolts holding the sump filter down or were they hand tight.
Sure enough, pulled it back out and they were not fully tightened.
spotty time available this weekend but I was able to finish some things. As I went along thing were slowed down as I found items I wanted to clean well and grease if needed. I brushed on some rust reformer over some places the frame flaked off paint that was hard to get to previously.
  1. All motor mount bolts
  2. condenser and coils
  3. Install new points harness and place points assmebly (points not yet adjusted)
  4. Put rear tire back on and set Drive chain tension
  5. Installed Exhaust. Pushing the cross over back together was easy as I bent the metal back on the 4 parts at the clamp so it would not require force to put back.


This morning as I was finished installing points, I was going to set the static timing/dwell using a meter but did not start cause I did not have time to finish.
I did double and triple check I had the right going to right and left going to left.
I had pulled all the mounting hardware on the points bracket to clean off so I had good metal to metal contact where needed.
Main things I have left to do is:
  1. Static timing.
  2. Install Carb & airbox
  3. Set Clutch adjustment
  4. Install tank
  5. Start!
  6. Adjust timing
  7. Adjust idle fuel mix
  8. Sync carbs
I also looked at the intake valves, I had yet to take a pic of those. I thought they were ok, maybe someone else can comment

IMG_8222.jpg

  1. IMG_8221.jpg

IMG_8220.jpg


IMG_8217.jpg
 

Attachments

  • IMG_8222.jpg
    IMG_8222.jpg
    231.9 KB · Views: 17
Finished the static timing. I don't know if this is a common method but what I did was this:
I pulled the points wires from the harness.
I put the multi meter on continuity with the beeper.
Instead of a light bulb w/ power on and plugs disconnected I did this all w/ no power (battery was not installed)
I set gap so that the continuity started at 180degrees from where the continuity broke, So the beeping started at about 11 oclock on the rotor. Then off at about 5 oclock. DId not matter where it turned on/off so long as it was 180 degrees. That's my rough start. that was my rough calculation of where I needed to set the static dwell (gap) but maybe I got that wrong?
Then I adjusted the Right Timing to the right mark from the F and then did the Left.


Wish I had the camera rolling when I first hit the start button cause it took only a second to get it started on the first try.
After I stopped the camera, I shut the fuel off and walked away happy to just call it a day and relax, then came back and grabbed the timing gun to check timing. Idle was a tad off and my digital dwell meter still sucks as it said my dwell was 68 degrees on both cylinders. I'll have to get another dwell meter. This one is a cheap multi meter from amazon that had the 4-8 cyl dwell on it. It worked at first, but when I used it before pulling the engine, it was reading way high then also. I set the idle down lower, then revv'd the engine. CONK! what the heck? . Started it and then rev CONK!. Looked at my translucent fuel line and no fuel. oh, forgot to turn the petcock back on. did that rev'd fine. Still had it on the kick stand so it wanted to walk on me w/ my foot holding it. Ok, call it a night ending on a positive note. I skipped setting up the clutch so need to go back to that after adjusting timing.

 
Just could not stop thinking about the dwell meter reading 68, then it struck me 90-68=22.
Double checked that I was supposed to put red to points where the coil hooks up then black to ground.
Then walked out to garage. YUP, I had the Red wire in the COM port of the meter and the black into the other.
Had no effect on continuity of course.
Switched the leads, started the bike and was hovering around 22.0 degrees!
 
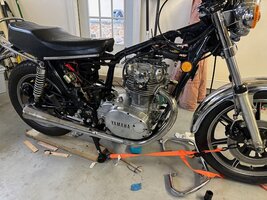
Just about ready to test ride.
I"m really happy about how the Timing turned out. I think it was 5Twins? that said to target the right F mark?
After the static timing, the dwell was where suggested at 22.5
I only had to move the rotation of the disk to get the right side to the right hash mark, the left was spot on w/o doing anything.
Engine is idling excellent. I adjusted the idle mixture a tad leaner doing it by ear. I could stand to use my colortune though I feel that is best done when the weather is warmer.
I need to block off a couple hours for a test ride in case I want to address an issue.
Today I tightened up a loose engine mounting bolt
Adjusted Timing
adjusted idle mixture
Sync'd carbs (only needed 1/16 of a turn)
Put the points and Alternator cover plates back on
I'm really happy where the timing came out on the adjustment. With that stretched chain, the timing was all the way CW to get the timing right w/ a wide points gap. Now I'm smake dab in the middle of the adjustments for the timing and on the wide side of the spec for the points gap/dwell but still looking good.
I have to believe that now I have the timing chain replaced, the valves timing are where they should be for the crankshaft timing. That has to make an improvement. Test ride will see.
Oh, and I did something a little experimental today if anyone can spot it?


IMG_8255.jpg
IMG_8248.jpg
IMG_8256.jpg
 
Yes, my timing plate did the same as yours on my '78 when I replaced the timing chain. It went from being almost out of adjustment to right back in the middle of the adjustment range. The new timing chain can and will last much longer than the 15 to 20K miles we find them worn out at if you keep it properly adjusted AND replace your type D tensioner with a type E. I think the type D tensioner plays a big part in wearing out the chains on the '76-'79 models prematurely. It has no lock nut so every time you replace the acorn cover nut, you may inadvertently be making your adjustment tighter. Also, you should check the chain tension more frequently than the manual's 4K mile adjustment/check schedule. You should check it about every 1000 to 1500 miles. Since this corresponds with oil change time, I make the chain tension check part of that routine.
 
so, its been starting and idling really nice.
Took it for about 5 miles of riding in the residential neighborhood this afternoon.
When I got back, it was sputtering like the video
After dinner I came out and shot this video after starting cold and then letting it idle a few minutes.
It was NOT like this before the ride.
What should I look at first?
I will say that prior to the engine pull for the cam chain work, I had air box on and now I have the Uni Pods black w/ red covers.
Those were still on when I got it running and started the ride.
Its only on the right cylinder

I have my own thoughts on what I should be looking at tomorrow but will seek advice from others.
thx!

 
Last edited:
Sounds like the idle mix is a tad lean. Does it clear up when you rev it? You could try readjusting the mix screw, but It sounds like the pilot sucked up a bit of matter and is slightly plugged.... that is if it's just at idle?
 
I agree with Jim. It's pretty common for a dirty set of carbs to plug up again after cleaning. Try as you might, you don't always get all the gunk out, and things plug up again, sometimes several times, lol. It's usually the idle circuit so I'd be checking the pilot jet for blockage, maybe just partial, but that's enough to cause issues. Remove it and try to look through it, to see if you can see light. Blow it clear regardless. I'd also blow air through it's mounting hole to insure it and the passageway from the main jet area that feeds it is clear.
 
so, had a little bit of time before leaving this morning.
Found the carb intake boots were not tight. Tightened them then adjusted idle mixture richer.
I had tuned it by ear while it was cold (bad idea) the other day. I used my colortune but ended back where it was before I had messed with it the other day.
Seemes to be much better but need to sync again and ride it to know for sure.
If it does not maintain itself, I'll pull carb when I pull the tire next week to get a new one and check the pilot passages.
I did spend a LOT of time on the cleaning and clearing passages as this carb was NASTY from sitting.
thx
 
So, SOP for me for bringing a bike back to life is progressively longer rides and then inspect for something to address.
Took for 10 mile ride on the main road outside the housing community which is about 35-45mph.
All was good. Pulled plugs after it cooled and looks acceptable. Left side still tad richer than right but both look good.
Will take a longer ride next time.
Got a 1982 tensioner off ebay for $29 shipped. Should be in this week. Full assembly including the rear tension guide and the chain. Won't need most of that but I'll be curious to compare the chain to the one I pulled off the bike for academic purposes.
 
successful 20 mile ride this afternoon. Great weather for Christmas day for a ride.
Left exhaust tapping a bit too loud so will check that tomorrow.
I still have the rear tire that came with the bike and I checked it with a durometer meter and its at 90! Way too hard.
I knew this rear tire had to go but no more riding till rear tire is changed. Will match the dunlop 404 that's in the front.
Will pull tire tomorrow to drop off for the install.
 
Last edited:
Back
Top