David M
XS650 Enthusiast
For you old pro's out there, this may seem like it's way over-kill. But, I'm trying to get the engine out by myself with the following criteria "
1) don't bugger up my back
2) don't break any expensive bits
3) use the same method to replace the engine without scratching a newly powder coated frame
4) more things that I can't think of at the moment.
So, what I did was :
a) screw four big hardware store hooks into the ceiling
b) attach a hardware store turnbuckle and bit of chain to each hook
c) attach a piece of 3/4 inch plywood to the end of each piece of chain ( plywood was used, rather than dimensional lumber because it has no grain. No grain means it won't tear apart under the weight.)
d) tie the engine, front and rear to the plywood with a good strong bit of clothes line cord.
I assumed that since the engine weighs about 120 pounds, each hook, turnbuckle and chain likely wouldn't carry more than 1/4 to 1/2 of the engine's weight.
Once everything was connected, I :
A) tensioned all of the turnbuckles
B) removed all of the engine mounting bolts
C) tilted the top of the engine to the right until it cleared the frame
D) adjusted the turnbuckles and lifted on the plywood strips until the engine slid out the right side of the frame
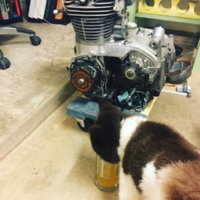
E) unscrewed the turnbuckles until the engine's weight was supported by the old tire and board seen in the photo's
F) removed the two left side turnbuckles and chain, routed them back out of the frame, and re-attached them to the hooks in the ceiling
G) put tension back in the turnbuckles but to keep the engine balanced but leaving most of the weight on the tire & board on the floor.
This went extremely smoothly and all of my goals were met.
Note that the engine was tied to the plywood about 1/3rd of the way along the plywood to leave room to move the frame away.
I'm sure there are many other ways to do this, but this worked for me and hopefully it will ease someone else's anxiety about engine removal if they'd like to try this method as well.
Once I make an engine stand, I'll hoist the engine back up and drop it only the stand.
1) don't bugger up my back
2) don't break any expensive bits
3) use the same method to replace the engine without scratching a newly powder coated frame
4) more things that I can't think of at the moment.
So, what I did was :
a) screw four big hardware store hooks into the ceiling
b) attach a hardware store turnbuckle and bit of chain to each hook
c) attach a piece of 3/4 inch plywood to the end of each piece of chain ( plywood was used, rather than dimensional lumber because it has no grain. No grain means it won't tear apart under the weight.)
d) tie the engine, front and rear to the plywood with a good strong bit of clothes line cord.
I assumed that since the engine weighs about 120 pounds, each hook, turnbuckle and chain likely wouldn't carry more than 1/4 to 1/2 of the engine's weight.
Once everything was connected, I :
A) tensioned all of the turnbuckles
B) removed all of the engine mounting bolts
C) tilted the top of the engine to the right until it cleared the frame
D) adjusted the turnbuckles and lifted on the plywood strips until the engine slid out the right side of the frame
E) unscrewed the turnbuckles until the engine's weight was supported by the old tire and board seen in the photo's
F) removed the two left side turnbuckles and chain, routed them back out of the frame, and re-attached them to the hooks in the ceiling
G) put tension back in the turnbuckles but to keep the engine balanced but leaving most of the weight on the tire & board on the floor.
This went extremely smoothly and all of my goals were met.
Note that the engine was tied to the plywood about 1/3rd of the way along the plywood to leave room to move the frame away.
I'm sure there are many other ways to do this, but this worked for me and hopefully it will ease someone else's anxiety about engine removal if they'd like to try this method as well.
Once I make an engine stand, I'll hoist the engine back up and drop it only the stand.


") That sounds pretty clever, actually.
That sounds pretty clever, actually.