Intro, first bike, first build, cafe ...etc.

itsatoy

XS650 Addict
Messages
200
Reaction score
1
Points
16
Location
Columbus, Ohio
Custom '81 on the cheap. Intro, first bike, first build...etc.

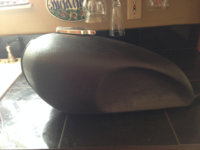
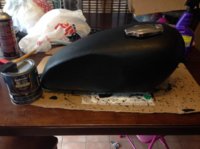
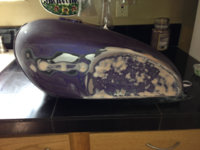
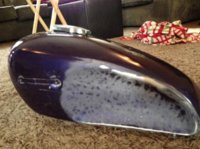
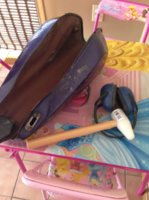
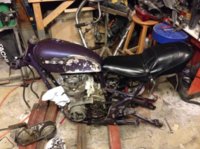
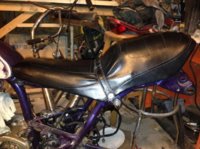
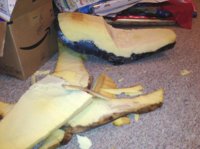
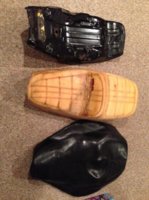
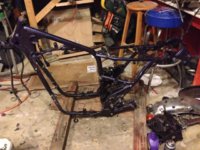
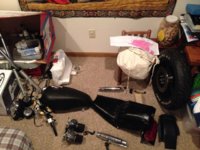
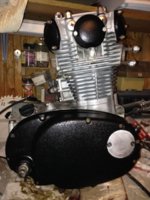
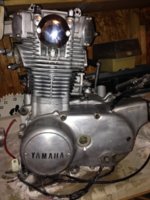
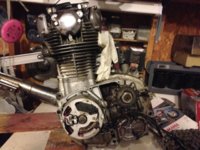
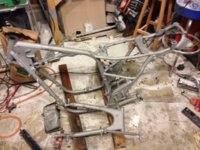
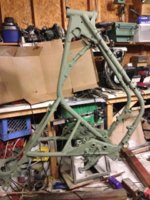
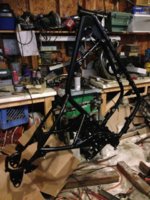
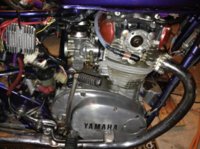
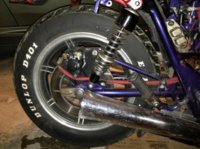
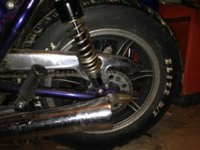
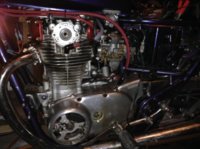
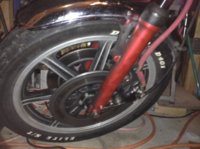
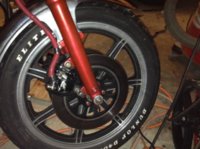
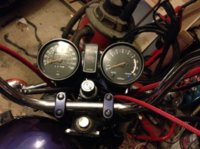
Hello xs650.com, great resource. I have been lurking for a little while before I bought my bike. As the title says first bike/build here. Total know nothing, clymer manual is supposed to arrive today. A little background, my Dad rides an old Norton with the Shiloh Riders down in East Tennessee and my Brother-in-law has a custom bike shop (I don't know what forum rules are on advertising so I won't list their website) but cash flow has prevented me up until this point from getting one of these toys for myself. I love the british bikes and went with xs650 over cb750 because I like the classic styled engine better. I found what I thought was a pretty good deal after the first snow on a '81 xs650SH titled runner with some upgrades for $1k. Seems a bit cobbled together so I'd appreciate it if some of you aficionados could scan my photos and let me know what I'm dealing with. PO didn't give the bike much attention since his daily rider is a ZX9R. He did list a new stator, rotor, brushes, rectifier regulator, battery and obviously the dual disc front brakes and maybe even the rear disc were add on's. I'm sure other things have been swapped out since I've got a redundant neutral light indicator, sheathed cables and of course the wonderful paint job including the frame :banghead: . Petcock leaks so he added another cut off. Lots of leaks and no tuning, mish mash of old and new connectors and left over wiring etc. I've got the seat, side covers, cam and alternator covers off poking around.

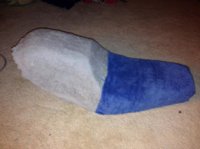
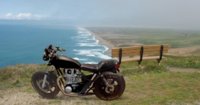
Plans are to get it dependable by next season, hopefully under $500. Then probably slowly customize to a black on black minimalist cafe style over the years after that. I hope to do the engine work myself so I can become self reliant. I will definitely rebuild the petcock and carbs first thing.

Any advice, identification, criticism, hello's... whatever is appreciated. Thanks everybody :thumbsup: .
 

Attachments

  • IMG_3053.jpg
    IMG_3053.jpg
    58.6 KB · Views: 355
  • IMG_3058.jpg
    IMG_3058.jpg
    57.2 KB · Views: 321
  • IMG_3057.jpg
    IMG_3057.jpg
    52.2 KB · Views: 306
  • IMG_3056.jpg
    IMG_3056.jpg
    290.6 KB · Views: 339
  • IMG_3055.jpg
    IMG_3055.jpg
    44.6 KB · Views: 318
  • IMG_3054.jpg
    IMG_3054.jpg
    41.1 KB · Views: 309
  • IMG_3059.jpg
    IMG_3059.jpg
    43.7 KB · Views: 299
  • IMG_3060.jpg
    IMG_3060.jpg
    46.8 KB · Views: 266
Last edited:
Hi

Welcome. It doesn't look too bad under that er hmm, interesting paint job ;)

Get reading in the Tech section as there are lots of useful threads there including one about just buying your bike and now what?

There are plenty of helpful people on here with a fantastic array of knowledge on these bikes.

Paul
 
Thanks Paul, I have read through and printed the guide you linked to as well as the one from 650central. Also the FAQ from mikesxs, manuals from biker.net, a couple of wiring diagrams, and improvements from xs650.org.au. I've been scouring google and youtube for a couple of months. Lots of good info out there on the xs650.

Oh and wow the paint is really interesting isn't it. somebody candied over a bunch of random pieces and the purple is kinda pearl/color shifting. I thought for a minute it was the xs650H with the indigo blue paint but I have found some spots that show the black paint underneath. Really makes me wonder what the person that did this was like. If bikes could talk right.
 
Last edited:
Small point here. I think it is a '80 model. And that really doesn't make a difference till you get to the carb specs.
a> no sight glass in the right case
b> '81 had drum brakes
 
Hmm, good point on the sight glass but the frame and engine both have 4m4 serial numbers. Isn't that an '81 SH. Also the title says its an '81. Are there any other ways of determining?
 
They used the plastic floats in '81 and on so go with jetting and float level for that year.
The home soda blaster IS a handy way to clean them. Knocks the crud right off.
 
Well, the frigid winter has made for slow goings in the garage but this is what i've gotten done so far. Waiting for a buddy to come over and help me take out the engine then I can take the frame and my brother in law will let me use there sandblasting booth.

So first set of pictures is the tank. I hammered my own knee dents and painted with bed liner. I know I just ruined it for most of you with one of those decisions or the other but I like it. I just watched a youtube video and went at it. Easier than I thought. Filler, prime, paint... Primer showed flaws of course but since I was going with bed liner I skipped another round of sanding and all that. Turned out pretty good I think. I just sat the cap on there for the picture.

BTW, for anyone interested in bed liner for your frame or whatever I found bed armor to be easy to find and also the only DIY version that was UV and gas resistant. bedarmor.com lists:
Formulated with DuPont™ Kevlar©
Will Not Fade or Deteriorate with UV Exposure
Rust and Corrosion Resistant
Flexible, Impact-Resistant Coating that will Not Peel, Chip or Flake
Maximum Adhesion to Metal, Wood, Concrete and other Surfaces
Gasoline and Chemical Resistant
Water-Based Polyurethane Coating is Easy-To-Use and Low Odor
Provides a Textured, Non-Skid Surface
Durable, Rubberized Finish Extends Truck Bed Life

I would recommend the roll on version. Just paint it on and dab it with a sponge or lint free rag to even it out. There are also some big chunks of solids that I kind of whisked away with the brush on each coat.
 

Attachments

  • IMG_3359.jpg
    IMG_3359.jpg
    255.3 KB · Views: 269
  • IMG_3356.jpg
    IMG_3356.jpg
    37.4 KB · Views: 261
  • IMG_3347.jpg
    IMG_3347.jpg
    40.5 KB · Views: 266
  • IMG_3331.jpg
    IMG_3331.jpg
    292.2 KB · Views: 263
  • IMG_3287.jpg
    IMG_3287.jpg
    45.7 KB · Views: 308
  • IMG_3285.jpg
    IMG_3285.jpg
    42.9 KB · Views: 283
Last edited:
...and the seat.

Carved down the foam and stretched the stock vinyl over it. Came out pretty nice I think. That king and queen seat it came with was terrible, IMO.
 

Attachments

  • IMG_3338.jpg
    IMG_3338.jpg
    58.1 KB · Views: 248
  • IMG_3341.jpg
    IMG_3341.jpg
    56.2 KB · Views: 251
  • IMG_3337.jpg
    IMG_3337.jpg
    36.8 KB · Views: 215
  • IMG_3335.jpg
    IMG_3335.jpg
    47.7 KB · Views: 231
  • IMG_3137.jpg
    IMG_3137.jpg
    52.6 KB · Views: 240
Knee dents look like they turned out good. As for a cafe seat ummm..not so much. I've seen guys cut up old gas tanks and shape them up for the rear cowl. Hhb did one that turned out crazy nice.
 
Thanks for letting me know what you think. Yeah, I don't really think it could be called a cafe seat. But do you think its uglier than it was before? It's lower and narrower. Better shape I thought but if everybody thinks its ugly I want to know. Im just trying to get the best I can with what I have and the way the seat attaches on the xs. I do want to be able to take a passenger and I'm not really following any motorcycle style dogma. Just probably closer to a cafe than other styles.
 
Last edited:
Woohoo! Engine out. Feels like a big milestone. The done pile is also growing.
 

Attachments

  • IMG_3393.jpg
    IMG_3393.jpg
    125.5 KB · Views: 234
  • IMG_3395.jpg
    IMG_3395.jpg
    119.3 KB · Views: 250
Almost done with engine cosmetically.

Before,

Soda blasted,

and painted.
 

Attachments

  • IMG_3417.jpg
    IMG_3417.jpg
    112.6 KB · Views: 245
  • IMG_3411.jpg
    IMG_3411.jpg
    107 KB · Views: 240
  • IMG_3394.jpg
    IMG_3394.jpg
    116.4 KB · Views: 231
Got the last coat of bed liner on the frame.
 

Attachments

  • IMG_3393.jpg
    IMG_3393.jpg
    125.5 KB · Views: 222
  • IMG_3462.jpg
    IMG_3462.jpg
    123.5 KB · Views: 233
  • IMG_3498.jpg
    IMG_3498.jpg
    133.4 KB · Views: 211
  • IMG_3503.jpg
    IMG_3503.jpg
    126.6 KB · Views: 265
I smashed my finger pretty good putting in the races for the tapered bearings so I "photoshoped" my parts together to get a peek at the future.
 

Attachments

  • Image 4-25-14 at 11.10 AM.jpg
    Image 4-25-14 at 11.10 AM.jpg
    71.8 KB · Views: 273
Back
Top