Project XS650 - Restoration

cbs95

XS650 Member
Messages
5
Reaction score
0
Points
1
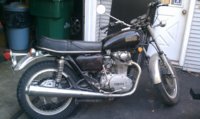
So I picked up my first XS650 a couple of days ago as a project bike to help learn more about the inner workings of a motorcycle as well as provide myself with a new project (I restored my 1979 Glastron in the past)

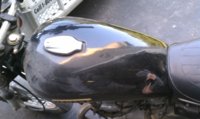
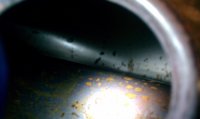
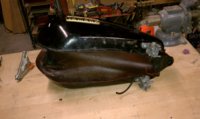
The bike is a '78 that has definitely seen better days, the previous owner kept it in a garage for the past 10 years with nothing done to it. When I picked it up the tank still had some old gas in it, the tank had a large dent in it and the left side cover was missing. I came across this great site in the midst of doing some research on the bike and decided to add in my own project in the hopes that I may get some advice from the experts here :D

Any suggestions on the restoration, especially the order in which to do things, would be greatly appreciated.
 

Attachments

  • IMAG0258.jpg
    IMAG0258.jpg
    313.8 KB · Views: 185
  • IMAG0267.jpg
    IMAG0267.jpg
    303.1 KB · Views: 159
  • IMAG0268.jpg
    IMAG0268.jpg
    298.1 KB · Views: 182
i started with cleaning the carbs on mine, put some carb cleaner down the gaslines and let it sit for about half an hour, then take them apart and start cleaning, id get it running first thing is it was me
 
Pressure wash all the crap off it so you've got something clean to work with. I'd get it running, even if it's just so you know it hasn't got any nasty noises and then photograph everything, especially if the whole thing is coming to bits.

I tend to box every thing up with what needs to be done, paint, chrome, powder coat etc and then send out what will take the longest to do and then just get stuck in to everything else. cleaning polishing, repairing etc.

Good luck with it. :thumbsup:
 
Thanks for all the good ideas! Just doing a little cosmetic work (cleaning of the dirt and grime) before I start getting into the nitty gritty. Excellent thread Maddog, I appreciate the link.

The general consensus is to clean up a bit of the main components and then make sure the bike runs so you can go from there. Next step looks like taking off the gas tank and draining the 10-year old gas.
 
August has been a pretty busy month, closing out all the summer plans and getting ready for fall. There hasn't been as much work done on the bike as I would have liked but at least it is slowly moving forward.

Gas tank has been removed, old gas emptied and tank prepped for removing the rust inside. The side cover has been completely redone; filled in scratches and dents, sanded and repainted. Will post before and after pictures down the road a little.

I have heard a couple of different methods, but does anyone have suggestions for removing the rust from the gas tank?
 
That dent might not be as bad as it looks, but why not get a new, rust-free tank? In the end, it won't cost much more than the cleaning, repairs, coating you'd do to your current tank. How bad is the rust?
 
Yep, I am repainting the gas tank, kind of a necessity after fixing the decent sized dent in the gas tank. I will take a look at the kerosene flush considering I haven't actually heard of that one.

I have thought possibly about getting a new gas tank bbillington, but I don't think it is in such a bad shape that it would need to be replaced at this point in time. Not to mention the fact that a "new" one is still going to be fairly pricey. I am looking to do this on a fairly low budget and a new tank would eat up a lot of the amount.

The rust isn't too bad actually, thankfully while the gas in the tank was quite old, it at least was fairly full and therefore kept the rust down to a minimum. The rust is basically where the gas wasn't. The nice part is that the petcocks are in pretty good condition.
 

Attachments

  • IMAG0327.jpg
    IMAG0327.jpg
    299.5 KB · Views: 131
  • IMAG0337.jpg
    IMAG0337.jpg
    303.8 KB · Views: 154
  • IMAG0343.jpg
    IMAG0343.jpg
    301.2 KB · Views: 152
No worse than that I'd use a sealer that included a prep/etch stage and be done with it.
 
That tank is a keeper as far as rust but that's an awful big dent, I'd use the tank for a Get r going tank and post on the classifieds here to find a better tank to paint. I like to use some pb blaster in the plug holes and in between the valve springs to improve the chances the valves and rings are free. Compression test and check for spark before a start attempt.
Looks like it will clean up nice, might as well order a new throttle cable.
 
Thanks for the advice! So do you think that it wouldn't really be worth it to spend the time to fix or fill the dent? Also, what is the reasoning for getting a new throttle cable?
 
Yeah that dent is just more work than the tank is worth. It is unlikely you will ever get the lines right and I'm a cheapass. Your first pic appears to show two kinks in the throttle cable?
 
Some thing strange about that first pic of the tank. The gas cap is on the wrong side. Both of my later tanks the cap is on the right not the left.
Leo
 
The standards have a cap thats centered on the tank and opens from the rear, hinge in the front. Key goes in from the rear.
The Specials have the cap offset to the right about an inch and open from the front, hinge in the rear. Key goes in from the top.
Leo
 
Back
Top