Project XS650SF, Back From The Dead.

Wirenutt

XS650 Addict
Messages
124
Reaction score
465
Points
63
Location
Mike in Central NY
Last July (2022) I bought a '79 XS650 Special from Brian in Erie, PA. I live near Syracuse, NY, so it was an 8-hour round trip to bring it home. I have an '80 that sat for 30 years that I brought back and now ride, a '76 that had multiple issues from being "repaired" by some Bubba with a Crescent wrench in one hand and a beer in the other. 1st gear in the transmission was broke, so I fixed that with parts from spare engine I have. Bubba also had the starter gear case apart for some unknown reason and forgot a spacer and wave washer, so the starter acted as if the wishbone spring was weak. After several disassemblies and spring replacemets/adjustments, with the clutch cover still off, I noticed when trying to start, (ignition disabled) the little gear coming from the starter gear case wasn't spinning, which gave me my "eureka" moment. Now she starts and runs as good as new.

I love these bikes (obviously) and I've started on the '79. It's mostly complete, but apparently had sat since 1984? At least that's the date on the inspection sticker. I'll use this thread to document what I do to restore this bike to running and roadworthy condition. Someone may learn something from my knowledge, my experience, my work, and probably my mistakes. My goal is to have a decent-looking bike that runs and rides like it's supposed to, and one that I won't hesitate to go on a 200-mile ride on a Saturday. These pics are of me bringing it home. More to come as I find time.
 

Attachments

  • 294042752_3241199186123135_1509903895035436325_n.jpg
    294042752_3241199186123135_1509903895035436325_n.jpg
    317.4 KB · Views: 62
  • 294309476_358051699664184_5766149028727281097_n.jpg
    294309476_358051699664184_5766149028727281097_n.jpg
    74.3 KB · Views: 63
Last edited:
This is the first batch of pics I took after getting it on my lift and doing a visual examination. As you can see, I have a decent, generally complete XS650 to start with. It needs TLC, but working on a bike in my garage with SiriusXM tunes playing over my Klipsch Heresys is my happy place.

First two pics - numbers match! Serial numbers show it as a '79 Special. I'll have to check the title, I thought it was a 78!
Right side lower engine
Right side upper engine
Front caliper
Front tire looks like 44th week of 1980?
Rear tire cracked and must be replaced. I knew I'd be replacing both tires, that was in the plan all along.
Fuse box no good. I have spares.
From front left - note front caliper hanging from zip ties. I assume it's seized.
Right hand control with missing start button
Battery box/under seat area
Inside the tank. Looks pretty good.
Inspection sticker
Dipstick with nasty looking oil
Engine/carb from the right side.
The seat. I have a new stock cover for it waiting to be installed.
Right side from the rear
Left side from the rear
Wiring on the rear fender
Bottom of the fuel cap. May or may not replace rubber seal.

Next up - air box and carbs coming off and checking compression and leak-down. Do I have a viable top end? Or is the engine coming out?
 

Attachments

  • 20230806_194814.jpg
    20230806_194814.jpg
    281.7 KB · Views: 51
  • 20230806_194759.jpg
    20230806_194759.jpg
    224.9 KB · Views: 55
  • 20230806_194734.jpg
    20230806_194734.jpg
    281 KB · Views: 45
  • 20230806_194732.jpg
    20230806_194732.jpg
    251.3 KB · Views: 50
  • 20230806_194723.jpg
    20230806_194723.jpg
    232.1 KB · Views: 52
  • 20230806_194704.jpg
    20230806_194704.jpg
    209.9 KB · Views: 51
  • 20230806_194606.jpg
    20230806_194606.jpg
    216.8 KB · Views: 50
  • 20230806_194501.jpg
    20230806_194501.jpg
    331.4 KB · Views: 52
  • 20230806_194451.jpg
    20230806_194451.jpg
    149.9 KB · Views: 46
  • 20230806_194839.jpg
    20230806_194839.jpg
    304.5 KB · Views: 55
  • 20230806_194853.jpg
    20230806_194853.jpg
    241.6 KB · Views: 51
  • 20230806_194447.jpg
    20230806_194447.jpg
    118.5 KB · Views: 51
  • 20230806_200220.jpg
    20230806_200220.jpg
    201.4 KB · Views: 54
  • 20230806_195110.jpg
    20230806_195110.jpg
    262 KB · Views: 44
  • 20230806_195029.jpg
    20230806_195029.jpg
    182.2 KB · Views: 50
  • 20230806_195022.jpg
    20230806_195022.jpg
    199.5 KB · Views: 46
  • 20230806_194941.jpg
    20230806_194941.jpg
    200.3 KB · Views: 49
  • 20230806_194932.jpg
    20230806_194932.jpg
    216.9 KB · Views: 51
  • 20230806_194921.jpg
    20230806_194921.jpg
    343.5 KB · Views: 49
  • 20230806_194918.jpg
    20230806_194918.jpg
    250.1 KB · Views: 54
Last edited:
That' a 78 SE. Major differences between the 78E Standard and 78SE Special. Motor and carbs, front forks, guard, caliper and front brake rotor are the same pretty much every thing else is different.

have a look here
https://www.xs650.com/threads/xs650...workshop-manuals-and-other-information.30569/
You're right, of course. I changed the title of the thread to reflect that it's a 79 Special. And I knew that, but I've been working on a 76 for a year and the Special status left my brain. No excuse.
 
Last edited:
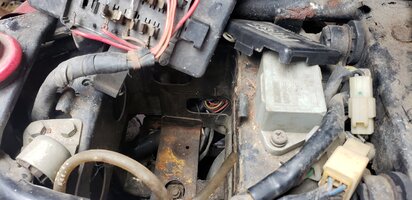
On to the next day. The air box comes off and I notice it's missing both access doors, filters, the rubber crossover boot is basically dust, and the right side battery box/airbox mount is gone. I dig through my spare parts and I find the mount and both doors. I put the rubber boot on order from MikesXS, and the air filter elements are out of stock. No biggie. I also order the two little rubber cushions that the side cover hangs on. The right sides are there, lefts are missing.

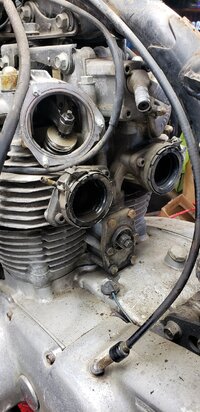
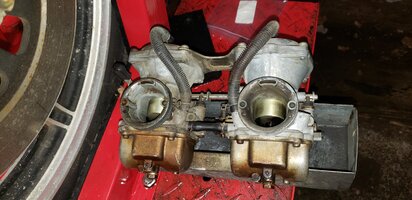
The carbs come off next. The slides aren't stuck and the butterfly valve operates. Nice. Set them aside for rebuild later.

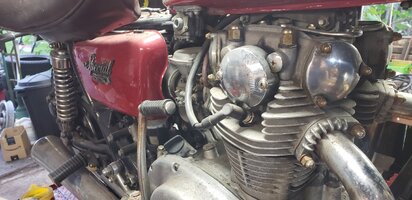
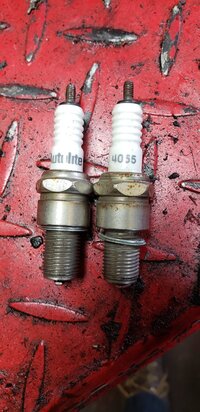
Now onto checking compression. Pushing the kickstarter through a couple of rotations reveals good compression. We shall see. Remove the plugs, which were hand tight, and find they are Autolite 4055? Maybe just stuck in there to prevent water getting in and rusting? If so, it worked. But new plugs go on my order.

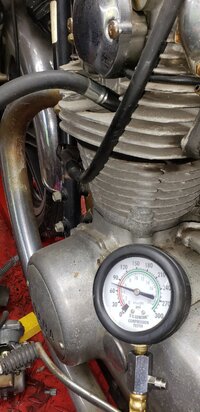
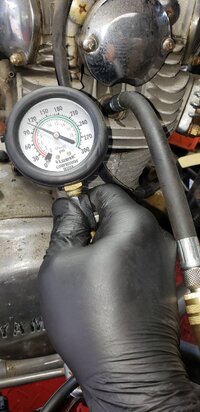
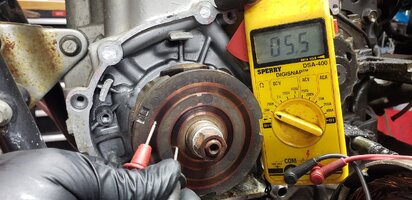
I pull out my "General *something*" Chinese compression tester out of its case, and screw in the appropriate adapter into the left plug hole and pop the quick-connect onto it to connect the gauge. Using a 12V battery, I clamp the ground onto the frame an touch the other clamp to the starter side of the solenoid. Away she spins without protest and it reads... 70 psi. Uh oh. I know a good engine will show 150+ psi. I squirted some oil down the hole and went over to the right side. 110 psi. Double uh oh. I squirt some oil down that hole and go back to the left side. I spin the starter again and I notice I can feel the rubber hose of the tester pulsing on each compression stroke. Then I remembered I used this tester on a known good engine and got low readings on that also. I think the hose is absorbing some of the compression by bulging instead of passing it to the gauge. I got another tester I have and try again. 140 psi on the left and 160 psi on the right. Good numbers, but too much discrepancy between the two sides.

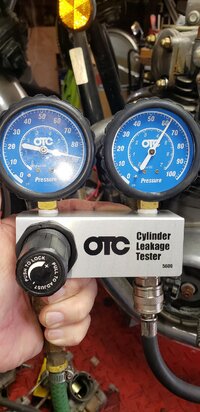
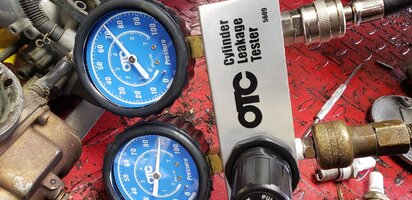
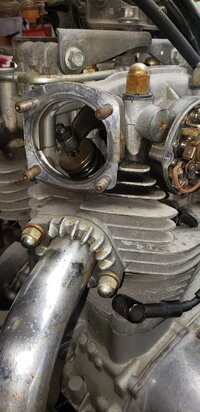
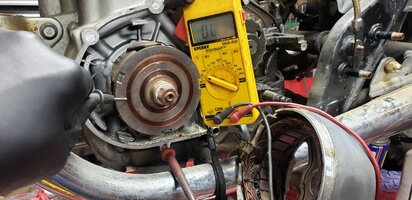
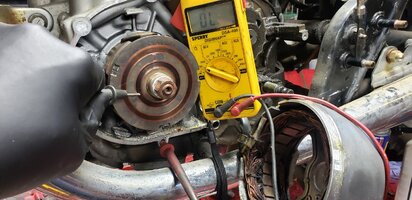
I break out my leak-down tester, hook it to the left cylinder and crank the pressure up to 90 psi, and I can hear and feel a rush out the right intake port. My back pressure gauge shows about 62 psi, so more than 30% leak down. Not real bad, but not right. I take out my plastic mallet, remove the lash adjustment cover and whack the rocker arm a few times and I get about 72 psi back pressure. 19% leak down. Better, but not good enough. I rotate the crank to get the intake vale open, squirt some WD40 onto a soft bristle bottle brush and scrub the valve face and the valve seat as best I can through the plug hole and the intake port. After getting everything our of the cylinder with a towel and compressed air, I try again and I get 5% leakdown, which is acceptable. A compression test shows 155 psi on the left cylinder. There was some rust and/or carbon holding the valve open slightly, and the brush and WD40 dispatched it.

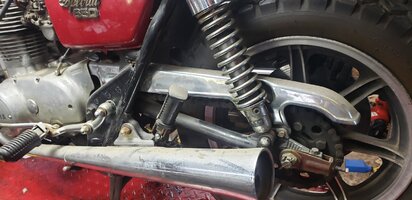
I check valve lash and the intakes are a little tight and exhausts are a little loose. I make the adjustments because I'm picky.

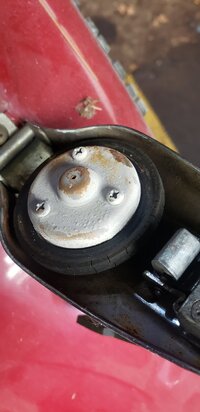
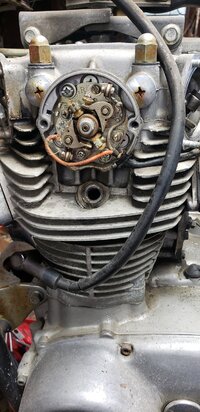
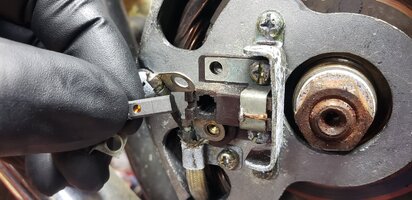
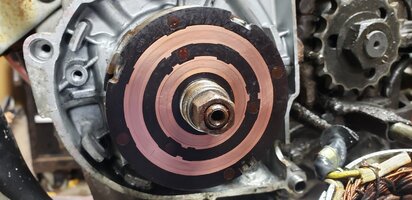
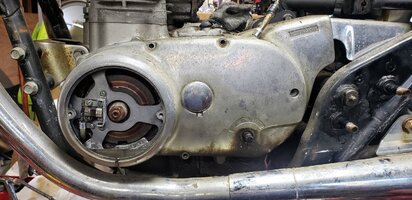
Checking the centrifugal advance, I find it sticking, so I pull off the weights and remove the shaft, and reassemble using a dab of light grease. that seems to have fixed that, we'll see with the timing light when I get it running. While apart, I take the points cam to a wire wheel to knock off the little bit of rust on it.

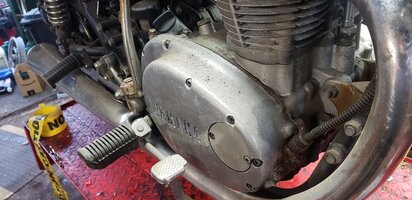
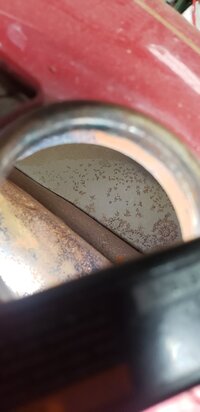
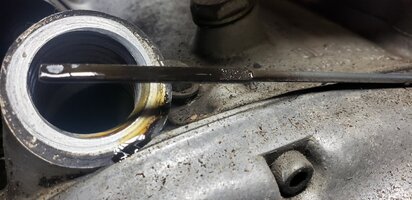
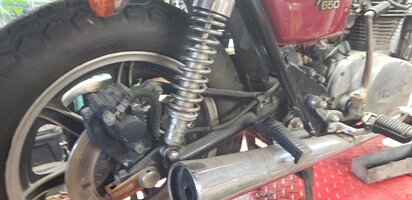
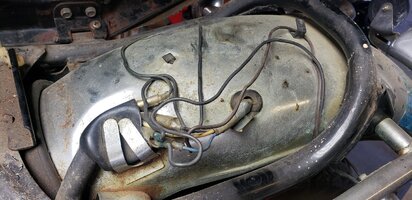
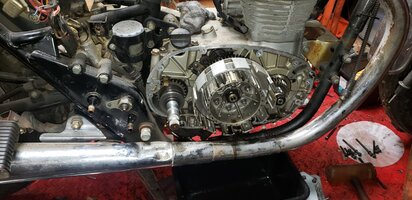
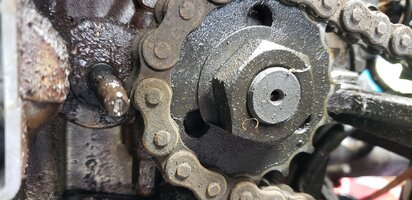
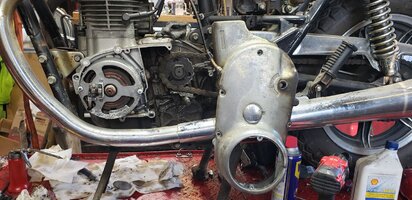
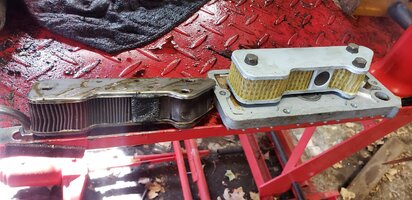
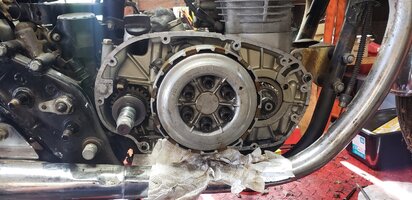
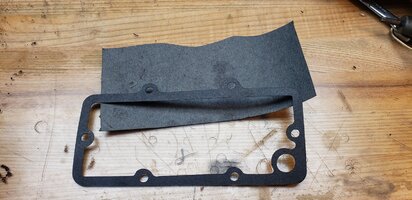
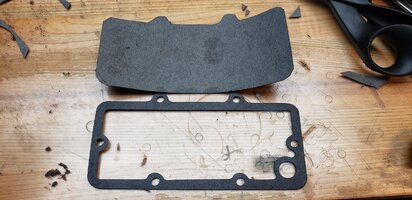
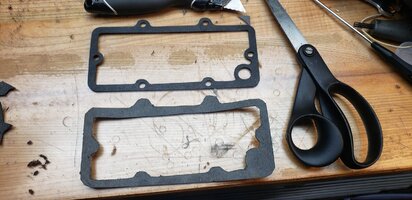
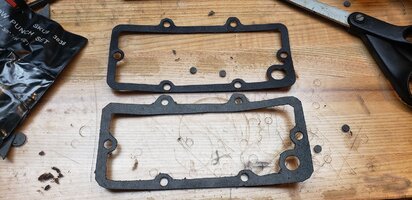
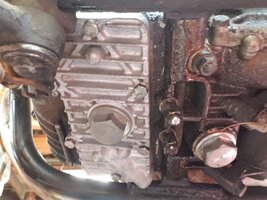
Next, I drain the oil and pull the sump cover off to inspect the suction screen. The screen is surprisingly intact. I fired up my ultrasonic cleaner to get it warmed up for the sump cover and other parts to follow. Next off come the right footrest, kickstarter lever, and brake lever so I can pull the right side cover to check the clutch. I notice a lot of grunge around the kickstart shaft, so I add a seal to my order. After removing the right side cover screws, I rap the cover a little with my plastic mallet, and the cover comes loose, but rips the gasket. Add a gasket to the order. I use an impact driver to loosen the clutch screws (I order the allen screw kit for the clutch) and pull the clutch plates. Clymer's manual says the plates should be .140" with a .122" lower limit. All my clutch plates measure .120". I happen to have a new set of clutch plates on hand, and they measure .118". I consult my Yamaha manual and it specifies .118" with a .106" lower service limit. My Haynes manual says likewise. If you just have a Clymer manual, ignore the clutch plate thickness spec. My clutch is perfectly good. I'm still considering pulling the clutch hub and basket to check the thrust bearing and make sure it all looks good, but, honestly, everything looks and feels good. I may still do it to check that the shift lever pawls at the shift drum are centered. It'll depend on what mood I'm in when I go out there to do it. It appears the engine has not been opened since new, so since I don't have to worry a "Bubba" has had his dirty dick beaters all over everything buggering it all up, I may just put the clutch back together and button it up when I get the gasket. Sorry to my friends not in the US, we still use the barbaric inch system. We had the chance to get our act together in the late 70's and adopt the metric system, but for whatever reason, we failed.

I did clean the sump cover, and I fit a new screen to it before putting it back on the engine case. I cleaned the right side cover inside and out, and had the oil pump apart and all looks good there. The right side cover is waiting for the gasket and kickstart shaft oil seal, and that can go back on.

The pics are in random order, but you can understand the context of most of them from the text above.

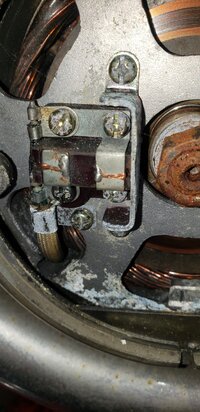
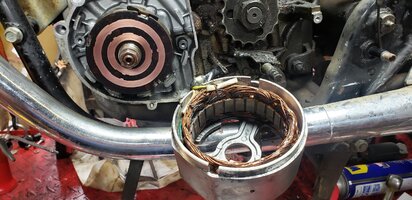
Next, I'll reassemble the clutch, then set the points and static timing, check the alternator brushes, the rotor resistance, the stator resistance, replace the pushrod bushing and seal, and then probably start rebuilding the carbs.
 

Attachments

  • 20230812_122756.jpg
    20230812_122756.jpg
    319.4 KB · Views: 43
  • 20230812_124921.jpg
    20230812_124921.jpg
    259.6 KB · Views: 43
  • 20230812_125159.jpg
    20230812_125159.jpg
    245.3 KB · Views: 40
  • 20230812_132454.jpg
    20230812_132454.jpg
    245.5 KB · Views: 37
  • 20230812_132616.jpg
    20230812_132616.jpg
    336.1 KB · Views: 43
  • 20230812_141012.jpg
    20230812_141012.jpg
    307.2 KB · Views: 42
  • 20230812_141016.jpg
    20230812_141016.jpg
    348.5 KB · Views: 43
  • 20230812_141033.jpg
    20230812_141033.jpg
    294 KB · Views: 38
  • 20230812_141041.jpg
    20230812_141041.jpg
    309.5 KB · Views: 44
  • 20230812_170431.jpg
    20230812_170431.jpg
    296 KB · Views: 49
Last edited:
Most of the rubber bits from Mike's are junk. I used those sidecover tab rubbers and they only lasted a few years before they went bad and split. Originals are still available from Yamaha, pricey but they'll last darn near forever. I still have some of the originals on my '78 and they're still good. Others have been replaced with N.O.S. originals and the rest will be too when they eventually wear out (if they ever do, lol).
 
Ok, so I thought I had a '78 XS650SE, but the VIN/serial numbers decode it as a '79 XS650SF. Yet, the title says it's a '78. See the photos. So, WTF is it? The build date on the neck is 6/78, so is it a '78? It's my understanding the new model year builds started in August. So a June '78 date tells me it's a '78, but the chart below says the serial number is too high for a '78, that the '79s started with serial number 150000. Even the title says the number is 153449, same as the engine and frame. Now solve that one! I say it's a '78, and the chart below is wrong. I got the chart here: https://thexscafedotcom.wordpress.com/2011/09/29/xs650-model-year-model-code-engine-number/

I also added photos of my carbs and the right side of the engine with the side cover off and the clutch apart.

I also find some confusion as to what airbox was used what years. My SG has the plastic airbox with a white plastic airbox crossover with o-rings, and my 76 has the metal airbox with a rubber snorkel-like part connecting the two halves. Some diagrams show it with the snorkel, some with the plastic with o-rings. Babbitt's Online even shows a '79 with the plastic airbox and o-ringed plastic crossover. The snorkel is unavailable OEM, so I'm stuck with what MikesXS sends me.

I did order the OEM rubber sidecover dampers per 5T and air filters from Partzilla.
 

Attachments

  • 20230814_210213.jpg
    20230814_210213.jpg
    306 KB · Views: 47
  • 20230814_210222.jpg
    20230814_210222.jpg
    279.8 KB · Views: 41
  • 20230814_210507.jpg
    20230814_210507.jpg
    236.8 KB · Views: 44
  • web.jpg
    web.jpg
    173.2 KB · Views: 46
Last edited:
Well, it appears Yamaha started producing the '79 Special model earlier than usual. If it was a '78 model, it would have a headlight on-off switch on the right handlebar, and you don't have that.
 
The '78 and '79 Special carb and airbox parts drawings are wrong, have been for years. They show BS34 carbs and their matching airbox. None of that came along until 1980.
 
Well, it appears Yamaha started producing the '79 Special model earlier than usual. If it was a '78 model, it would have a headlight on-off switch on the right handlebar, and you don't have that.
You're right about the headlight switch, I didn't notice that. So I assume it was sold as a '78 based on the date on the neck, (hence the '78 title) but mechanically it's actually a '79. Is there any other way to determine '79 vs '78, in case the right control pod had been changed (which is actually doubtful)?
 
My '80SG is titled as a '79. Back in the day it was a fairly common practice with motorcycles to title them in the year produced, not the model year. Don't ask me why.
 
The production date, (August/july), of the ID chart is not set in stone. I have seen (confirmed ID), of a model a early as June and as late as October. Vin # dictates unless some one has changed the VIN. Nothing is beyond the realms of possibilities.

To make ure you do get the right information through part manuals, download them from TheXScafe and cross reference the part #'s and look at your bike. The only way to do it unless you take our word for it. Did post that ID chart for you in the link provided that i also pointed out/state the Aug/July date is not set in stone.
 
So, the bottom line is, I have a bike built in June of 1978, titled as a 1978, but is really a 1979 physically and mechanically. I worked at an auto parts plant for 31 years and there were changes made over the course of a year that were announced as new when the new model year started, but the changes had been made months before. I even bought a new car in 1995 that was titled a 1995, but was really a 1996. A real pain to buy parts for because so many things changed. For instance, the rack and pinion unit was damaged by a tow truck driver, so I ordered a 1995 rack and pinion, went to put it in and it wasn't even close. I went to the parts store with the old unit and they matched it with a 1996 unit.

Now that I know for sure it's a '79, I can order parts with confidence they'll fit.
 
I don't think there's much difference between the '78 and '79 Specials. Other than the lack of that headlight on-off switch, nothing comes to mind. The wiring harness may differ slightly because of that eliminated switch, but maybe not. Maybe they just pulled the switch but left the wiring. That would be nice, it would make it simple to put the switch back on.
 
Those clutch plate specs you found are for the very early models. They had thicker plates (3.5mm). The later bikes had thinner ones (3mm). The '78-'79 BS38 carb set is very nice, the best of the 38's in my opinion. They are smoother in the lower rev range compared to your '76 set because the needle is spring-loaded and meters more precisely.
 
Today, I reassembled the clutch, but without the allen screws I'm waiting on. I made a sump cover gasket from another gasket I have - I forgot to put it on the Partzilla order. No big deal, a few minutes with scissors, a razor knife, and a hole punch and I had it done. They are cheap, but I'm not paying shipping for one gasket. I mounted the sump cover and torqued the bolts to 7 ft-lbs (84 in-lbs on my wrench) and boy they felt like they wanted to strip. But they didn't, so on to checking the swing arm bushings - just have the bike on the center stand and grab the back of the back tire and push and pull side-to-side. Mine has a noticeable movement and I even hear a light clunk when I move it. Go to TC Bros and order a set of bushings for $30.

Next, I remove the left footpeg and shifter and remove the left side cover. Clutch pushrod seal seems to be leaking (big surprise there!) and I already have a new seal, bushing, and one-piece pushrod ready to go in when I reassemble. I pop the master link off the chain and pull the chain off the bike and drop it in a tub of kerosene. Checking the sprockets, they are the factory sizes, 17T front and 34T rear, and they look pretty good, a little bit of wear, but plenty of life left.

Because I don't want to kill a new battery once I put it in, I'll need to do some checks on the charging system. I pull the alternator brushes out and they are both about half-used. I remove the stator so I can check the resistance of the rotor, but mostly because I need to clean the slip rings. I could have checked resistance via the brushes if I needed to. The rotor shows 5.5 ohms ring-to-ring which is perfect. I believe spec is 5.25 ohms, ±10%. Checking each slip ring to ground shows an open circuit, also perfect. I clean the rotor slip rings with some #0000 steel wool, and wipe it down and blow it off with compressed air, screw the stator back on and call it a night.

I'm not installing the side covers until I bring them to a friend for him to polish; he's all set up for it and says he needs some practice, so I'll oblige!
 

Attachments

  • Outer brush.jpg
    Outer brush.jpg
    313.9 KB · Views: 41
  • Inner brush.jpg
    Inner brush.jpg
    220.7 KB · Views: 38
  • Checking rotor resistance.jpg
    Checking rotor resistance.jpg
    284.7 KB · Views: 43
  • Checking outer ring for ground.jpg
    Checking outer ring for ground.jpg
    283.8 KB · Views: 34
  • Checking inner ring for ground.jpg
    Checking inner ring for ground.jpg
    268.5 KB · Views: 36
  • Slip rings cleaned.jpg
    Slip rings cleaned.jpg
    202.9 KB · Views: 34
  • Ready to reassemble.jpg
    Ready to reassemble.jpg
    297.3 KB · Views: 38
  • Clutch pushrod.jpg
    Clutch pushrod.jpg
    303.2 KB · Views: 35
  • Left cover off.jpg
    Left cover off.jpg
    308.1 KB · Views: 37
  • Left side cover removal.jpg
    Left side cover removal.jpg
    327.5 KB · Views: 40
  • Old&New fliters.jpg
    Old&New fliters.jpg
    336.6 KB · Views: 40
  • Clutch waiting for allen screws.jpg
    Clutch waiting for allen screws.jpg
    316.8 KB · Views: 37
  • Gasket fab 1.jpg
    Gasket fab 1.jpg
    323.4 KB · Views: 40
  • gasket fab 2.jpg
    gasket fab 2.jpg
    346 KB · Views: 38
  • gasket fab 3.jpg
    gasket fab 3.jpg
    261.7 KB · Views: 34
  • gasket fab 4.jpg
    gasket fab 4.jpg
    339.8 KB · Views: 38
  • Sump cover back in place.jpg
    Sump cover back in place.jpg
    295.2 KB · Views: 39
Last edited:
If those brushes in your pics are the originals, they have plenty of life left. They appear to be factory because they have that wear indicator line etched into them, and there's lots of brush left before you get to it. For replacements, I like to use only originals. I think they're made better and last longer than many of the aftermarket ones. Yamaha doesn't sell them anymore but they come up on eBay all the time, and usually can be had for a good price (no more than the aftermarket ones and often less).
 
Your old original oil filter can be patched with JB Weld. I actually prefer the originals, I think they're made better than those new replacements .....

Sump Filters.jpg


If you take a close look at that new filter, you'll see the perforated sheet metal backing for the screen doesn't come out around the point that usually tears, so what good is it, lol ......

OilFilterReinforcing.jpg


I now add my own protection in the form of a sheet metal cover for that weak end of the filter. It's not a tight and complete seal but that's fine, I figure at least it will cut the flow and pressure way down at that end ......

SumpFilterGuard2.jpg


Each guard is a one-off and custom fit because I discovered the magnet on the back side is always in a different spot, lol .....

SumpFilterGuard5.jpg


The above pic also illustrates another shortcoming of those new replacement filters - their magnets fall out and need to be JB Welded back in place.
 
Back
Top