Project XS650SF, Back From The Dead.

Yeah, that OEM sump screen isn't ripped too badly, I do plan on some JB Weld action on it after I get it cleaned up real good. The OEM screen seems to have a lot more surface area to catch the bits that find its way to the sump.

As regards to the brushes, I scan ebay myself from time to time and I'll grab an OEM set if I run across it. I took the photo the way I did so people unfamiliar with these bikes can see what the the wear indicator is supposed to look like.

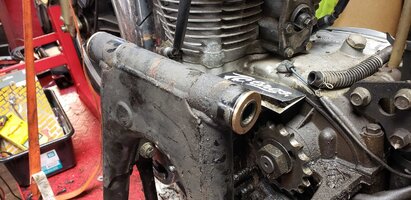
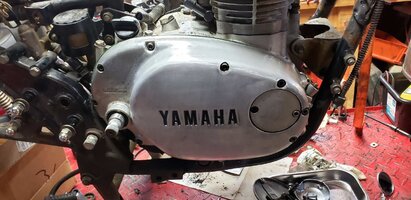
It appears a lot of the bike, especially the engine, are the way they were when it left the factory. The case screws looked "virgin," like they've never been off. The only thing I've come across so far that wasn't factory was RTV on the valve access covers.
 
If your charging rotor is OE, there is no question as to whether it will fail and leave you stranded. The only question is when. I recently had two good ones rewound by @Jim. One of them is to replace the good rotor on my XS650SH. My XS650SK has a rewound rotor in it. I bought it from @DonebySunday 21 years ago. It’s still magnetizing just fine.

I believe OE rotor failures are due to the wire insulation technology available at the time they were manufactured. I have not heard of a failed rewind, but I’ve played musical batteries at 650 Society rallies due failed OE rotors.
 
I believe OE rotor failures are due to the wire insulation technology available at the time they were manufactured.
First, thanks for the plug... :cheers:

I don't think it's so much the tech available at the time... more that it's just plain age. Even the newest rotor out there is 40yrs old... and some are over 50yrs. In the grand scheme of things, that's a pretty good accounting. They held up pretty good when you consider the "paint shaker" engine they're attached to.
 
So this week, I received the shipment from Mike's XS, and installed the allen head clutch screws. These come with aluminum spacers/standoffs that attempt to mimic the shape of the OEM screws. The OD of the shoulder of the spacers are very tight in the ID of the springs, so much so that I had trouble getting them into the springs. The OD of the spacers are something like 0.050" larger that the OEM screws, so it's not necessary for them to be tight. They will work just fine, but it's one irritant that isn't necessary.

I fitted the gasket for the right side cover onto the engine after coating both sides with a little grease to hold it in place, and screwed it down. I should mention that I have all parts of the OEM clutch pushrod still out. The long section of the OEM 3-piece rod is aluminum, with steel inserts on both ends. Both the bikes I have running have the one-piece rod and are difficult to shift into neutral when fully warmed up, and I've read that's because the one-piece rod doesn't expand as much as the rest of the engine, which is why the aluminum section is in the OEM rod. What's the prevailing wisdom on that? On the one hand, the short piece coming out the left side seal is quite wobbly, and seems to cause abuse to the seal, causing it to leak. On the other hand, the one-piece rod doesn't do that, it's pretty rock solid coming out of the seal, but the bike is hard/impossible to get into neutral when hot. The XSs I've gone through for myself, always get the one-piece rod, so I don't know if the OEM arrangement solves that.

Since the swing arm failed the side-to-side wobble test, I ordered new bronze bushings from TC Bros and got the old plastic bushings out and put the new ones in. My tip to get the old bushing out - heat the area around the bushings to soften them up, and they will easily come out in one piece. I haven't put the swing arm back in yet, as other things have come up (lawnmower problems, untrasonic cleaner drain issues) but I should get to doing that later this afternoon. I want to clear all the old grease out of the swingarm pivot bolt before putting it in, and I also want to clean the swingarm better than I have it now. I've cleaned it since I took the pic, but it needs more TLC, plus a shot of paint.
 

Attachments

  • 369278803_1077088213275849_3943569169856236815_n.jpg
    369278803_1077088213275849_3943569169856236815_n.jpg
    340.8 KB · Views: 39
  • 367819855_220840807624633_3708700776433800808_n.jpg
    367819855_220840807624633_3708700776433800808_n.jpg
    253.2 KB · Views: 41
Last edited:
A couple of things to do while the swingarm is out - install a grease nipple in the bottom center to grease the new bushings .....

SwingarmGreaseNipple3.JPG


Your new bushings have a swirled grease groove running from top to bottom, or front to rear, and are designed to get their grease from the rear .....

SwingarmBushings.jpg


The stock grease nipples in the ends of the pivot bolt don't deliver the grease there but instead emit it about halfway down the length of the bushing. Something else you'll want to do is drill a couple more holes in the middle of the pivot tube (red arrows) .....


Pivot Tube.jpg


This will allow grease pumped in the ends of the pivot bolt to get into the center of the arm, and if you pump enough in there, eventually to the backs of the new bushings .....

PivotTubeModded2.jpg


PivotTubeModded3.jpg


This mod alone may be sufficient to get the new bushings greased, but I do both.
 
Yes, those sleeves in the Allen bolt clutch bolt kit don't fit into the stock springs. I always install aftermarket heavy duty springs anyway, which those sleeves fit into fine, and I'd suggest you do the same. You can find them quite cheap on Amazon. Just be aware that there are two different sets available, one for the '80 and later 6 plate clutch and one for the '79 and earlier 7 plate clutch.
 
Back
Top