Used to be a SG - now it's not

MartinNC

XS650 Member
Messages
29
Reaction score
8
Points
3
Hello everyone

First of all a big thank you to everyone who contributes your help is invaluable.

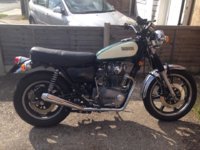
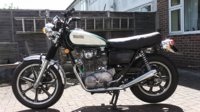
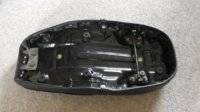
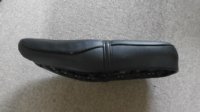
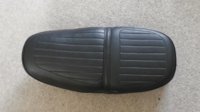
My bike started life as a XS650SG and was bought unseen five years ago through EBAY. It looked good in the pictures and the description of a rebuilt engine - how could I go wrong? I hired a van and drove the 150 miles to collect and oh...every piece of bright work was either corroded or rusty, but it did have a rebuilt engine! I had really wanted a Roadster but in the UK they are quite rare and demand a premium price. So over the next five years when money and time was good, I started to change it. The rebuilt engine was totally worn out. I will detail this in a future post. Anyway it started up at the weekend and it is now on the road with so far just a couple of issues, lagging speedo and slow throttling down. I think it could do with slightly larger pilot jets as I am running the standard 42.5 with xsJohn's needles but the engine pulls so well with no flat spots so this will need a bit of thinking. Anyway here are some pictures, the seat is still QD just modified pan and foam and the side panels are modified to be pull on, pull off.
 

Attachments

  • dads bike.jpg
    dads bike.jpg
    116.2 KB · Views: 211
  • S1120003.jpg
    S1120003.jpg
    222.2 KB · Views: 326
Attachment is a set of instructions that came with XSJohn's needles - he included a small length of stiff wire to open the stock pilots from 42.5 to 46. I think it was a piece of guitar string, but I don't know which one.
 

Attachments

  • XSJohn's BS34 needle instructions.jpg
    XSJohn's BS34 needle instructions.jpg
    319 KB · Views: 158
Thanks - I do have the instructions but did not want to alter the original pilots to start with. I have rebuilt the cards with new throttle seals but will check for air leaks and if this is OK, I will get some 45 pilots and try those. It's just a shame it runs so well other than this slight hanging
 
MartinNC,

The hanging idle (idle hover?) can be caused by weak advance springs as I understand that the '80 to '83 EU and UK models did not have TCI.

The other possibility is that the carbs need to be synced. The simplest way to sync the carbs is to adjust the center sync screw that connects the two throttles together to obtain the same sound from each exhaust at idle. In your case, wait until the idle speed settles down. I use this method exclusively now and don't bother with gauges.
 
Nice job on the transformation. 3 turns out with the pilot screw is about all you can do for the hanging throttle. If that doesn't cure it a larger pilot jet should. If it slightly hangs and it returns to idle. I think it is normal for the Yamaha jetting.
 
That is a fine looking SG you have there. I really like what was done to the seat. I'd like some more details on how it was modded so I can do the same to my SG!
 
one thought--if idle hangs, could be lean. If it pulls like nobody's business, lean carbs. Be carefull with those pistons. I would start going up on the pilots until they stumble, one size at a time. Use the jets that run best before the jets that stumble.
 
If he is running the XS john needles and a 135 main jet and proper float levels. The bike isn't running lean. Sounds like it's running good. I ran his needles when I had the BS 34 carbs on my bike.
 
I also have johns needles. They are a huge improvement . One of my other bikes has Canada needles in it, with same exhaust/intake, lazy pos.
 
Pamcopete, This SG originally came form the States and had TCI. Due to the fact that the rotor was only showing 3 ohms I made a PMA conversion with a Kawasaki stator and Yamaha flywheel and bought a Boyer (sorry!) for the sparks. Reading lots of posts, I am pretty sure I need to go up a size in the pilots. I did a very careful bench sync and the pressure form the exhaust feels the same. I will keep the forum informed
 
Right the seat
I got an old Roaster seat foam and laid it on the SG seat pan. From this I could see how much of the rear of the pan I had to remove, the shape is also very different. There was still a ski jump to the rear of the pan, so I flattened this down a bit with a couple of cut and shut joints along the side. I made a new seat rear modelling the lines of the foam and welded it on. The SG seat splays out and hangs down where your legs go so I chopped out this and welded in new sides. The foam now fitted in length and width but needed the relief carving into it. This I did with an angle grinder and flap disks - a long process. The seat cover is a Roadster and is secured with a spike strip ( I wish the spikes went up and down and not left to right) but I didn't want to pop rivet it all the way round. It took more than one cover to get it right. My advice to anyone recovering a seat is to make reference marks on the base and cover so you can keep everything in line as you stretch the cover. No pictures of the process, but some of the finished seat.
 

Attachments

  • S1130001.jpg
    S1130001.jpg
    157.9 KB · Views: 170
  • S1130002.jpg
    S1130002.jpg
    200.4 KB · Views: 168
  • S1130003.jpg
    S1130003.jpg
    184.1 KB · Views: 192
Back
Top