Hey Pkovo---Check with the NSA they probably have the videoOn a serious note I hope you are ok. tim
Thanks. if they've got the vid, I'm sure they are laughing!
Hey Pkovo---Check with the NSA they probably have the video
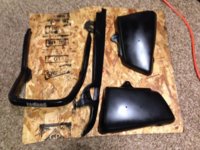
Last night I had the intentions of draining the oil, changing the oil sump filter, the oil crank case filter, and pulling my carbs if possible in prep for new intake boots this weekend.
I wanted to take a look to see how my clutch pushrod seal was holding up (and it appears to be free of any leaks), but while in there decided it'd be a good time to change the gasket on the gear train cover - as I'm fairly confident its been leaking (hard to tell with chain lube that gets flung off down there dirtiying up everything).
I'll be honest, I did not do much research on what was behind the cover. Bike was on the center stand (engine still in frame...) and what I thought would be a half hour project turned into a 2(+) hour struggle. Finally ended up taking the gear train off (wish I had done it far earlier than I did...) and even then, was a total pain getting the gasket to seat properly while getting the locating pins on the cover/engine to sit properly. Ended up getting each bolt just barely threaded to ensure the gasket was at least held in place, and then started the very long, slow process of turning in each bolt 1/8th to 1/2 turn at a time in a star pattern to seat the cover. I couldn't get my torque wrench in there so I just did everything by hand with a small wrench (a ratcheting box wrench would have been a nice thing to have.). Didn't break any bolts, so hopefully its set. Was almost wrapped up and realized the gear train wasn't put back on, so I had to back off the middle bolt, stick the gear train back on, and rebolt it up.
It never ceases to amaze me how long some things take, at least on the first go-around. Maybe its just me, but I was far under prepared and under-beered for the what I got myself into.
 How sweet it will be to go back to simple bikes like an XS650. Good news is the land yacht seems to be fully operational, it did 40 miles tonight, stereo blasting, cruise control set, seat and bar heaters on medium. I starting thinking I might wander below and get a beer out of the galley..... A few serious lever grabs showed the ABS is functioning correctly and with the power brakes really hauls that pig down from high speed in a hurry. Burp. First brake test was down my steep gravel driveway in the rain last night, grabbed a big hand full of front and it stopped the bike quick and straight!
And I decided to let someone else have that advancer!!!
Oops...typing too fast.
Exhaust .008, so I get them to .006; timing good, carbs way off....hmmm. so I adjust them and they stay in sync, check for air leaks...good, and still stumbles. Also, bike feels weak?
Pull the spark plugs, left side looks great. Right side covered in soot/black. I replace it and bike fires great! Strong and sounds good. So now I'm wondering if the air/fuel screws are off...so I do dead cylinder test and left side is great at 2 1/4, but right side is way too rich...I get it down to 2 turns and seems good. No more blacked/sooty plug and bike pulls strong.
But this doesn't address the charging issue, so I test the rotor...not great 3ohms ring to ring. Stator, good...rectifier, corroded wires, and looks fried...regulator, ok.
So I think I'm in the market for a new rotor and likely get a combo reg/rec.
So I suppose a mixed bag of a day. Lol
Sorry for the long post.
Those combo rec/reg units are quite expensive. Its much,much cheaper to buy a 3 phase rectifier from Ebay, and also use a nos automotive regulator.