Why wont u start!

frank

XS650 Enthusiast
Messages
56
Reaction score
0
Points
6
Location
Chandler AZ
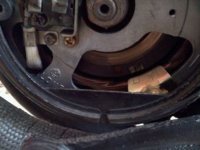
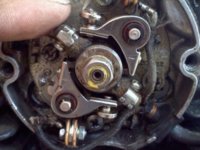
Ok its Frank once again! After having my carbs cleaned and rebuilt and lubed up the cam rod this thing still does not want to start. When lubing the cam rod I paid close attention to how it came out and put it back in the same way with the little tab things pointing up. Before this thing would start after two kicks and now I've been kicking since yesterday afternooo and all I get is a couple of putts then back fires! I have spark in both cylinders so I know that much. What else could it be! Reaching out again fellas!
 
have half a tank in the thing! Also cleaned out the petcock and screen. Check the bowls and there is fuel in them also.
 
When you pulled the advance rod to clean and lube it you may have corrected a 180 degree out of time condition. Try Swapping the plug wires left to right.
 
I get nothing. Just one loud pop! When i put them back to there original position it almost wants to start but shuts down after a couple of rotations. In other words i get a putt putt putt vroom pop and it shuts down? Sorry about the sound effects there but just want you to get what i'm talking about HA HA.
 
here are some pics of the timing marks and points. Timming marks look right on and the top set of points are open and the bottom set are closed
 
That i did NOT do. I made sure i was careful when inplacing it. Cant seem to upload pictures for some reason?
 
Here are some pics finally of the timing marks and points.
 

Attachments

  • timming marks3.jpg
    timming marks3.jpg
    20.1 KB · Views: 221
  • points3.jpg
    points3.jpg
    30.5 KB · Views: 233
make sure you're not 180 off. on the compression stroke the points (for that cylinder) should just start to open at the F mark. use an ohm meter to static set the points.

taking out the advance rod probably changed the timing
 
If the P.O. had the rod installed 180° off, instead of fixing it he could have compensated for the screw-up by switching the wires from the points to coils. Ensure that the wire from the top points set runs to the right coil and the bottom one to the left.

It appears you have a 1980 or newer engine retro-fitted with points? Maybe you wired something up wrong.
 
Well it used to start just fine until i pulled the cam rod out but i cant figure out how i would be 180 out when i put it back in with the little pins facing up like i;ve seen in past threads. If u can see in my pictures there isn't a marking "F" all there is are two slash marks side by side then the "T" and a slash mark after the "T". Now when the timming indicator is on the second slash mark the top points are open. And when i do a full rotattion counterclockwise the and the indicator is at the second slash mark again the bottem points are open? I'm not sure how to static test the ppoints?
 
I think your problem is you don't know how to set timing and points correctly, lol. When the timing mark on the rotor is in the "U" range as in your 1st pic, the points should be JUST beginning to open, not wide open like in your 2nd pic. When the points are just beginning to open, you won't be able to see that with the naked eye, that's why you need the ohm meter or a small 12V test lamp to tell you. If your points are open like in your 2nd pic when you're in the "U" range, then your timing is way off and too far advanced. The points are actually starting to just open way before you reach that "U" mark. Read this thread, it should help .....

http://xs650temp.proboards.com/index.cgi?board=ID&action=display&thread=7984

Idle timing can be set anywhere between the 2 verticals of the "U" mark and be correct. The idle timing spec is given as a range of several degrees to give you this leeway. After setting idle timing, you need to check the timing again at full advance to insure it's not over-advancing. Over-advanced timing can hole a piston. Full advance with your alternator set-up is indicated by the left side of the drain slot at the bottom of the case opening. You need the to have the bike running and use a timing light to check this .....

Advance.jpg
 
You are right. I don't know what I'm doing and I need some sort of tech manual? Anybody have any literature on this. Points setting and timing setting?
 
Ok i did the test with the test light like informed to and the results i got was this.
First: put the lead on the top set a points and the light was already on. I turned the crank ccw until it shut off and it shut off right at 180 in other words directly across from the timing marks. so i turned the crank another 180 and it turned on right between the "u" and "T" so again i turned it and the light stayed on until i made a complete 360 and it turned off at the same place directly across the the timing marks then again turned it 180 and the light came back on between the "u" and the "T". Same thing acurred with the bottom set of points. Now i ask what is your prognosis on this?
 
You're looking for the spot where the points JUST begin to open. That will be indicated by the light turning on. You want that to happen while you're somewhere in that "U" mark. Turn the crank very slowly as you approach the "U" mark so you can see the exact spot where the light comes on. If it lights up before you reach the "U" mark, your timing is advanced, after the "U" mark, the timing is retarded. Between the "U" and "T" would be after the "U" mark and show your timing to be retarded a bit. Rotate the points backing plate clockwise to correct that.
 
Ok I'll do that tomorrow since i need to get ready for work. Now in your last post when attached that prior post it says something about two different adjustments. on the points backing plate i notice two large screws one on top and one on bottom. Do both need to be loosened to achieve this adjustement or just one needs to be loosened? vI'm referring to the screws that a flat head screw driver would fit into it?
 
Back
Top