Tracker Extraordinaire rescue

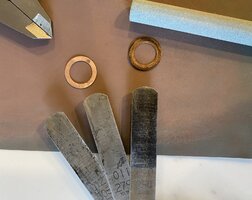
Looks like the left oil tube is touching the head. That's not unusual. They always seem to favor that side for some reason. Tubes are brass... they tweak pretty easy. Might wanna tweak that and get about 3-4mm clearance. Otherwise the vibes can rub a hole in it.


View attachment 264522

Yup! I had to do that exact same thing to my XS2.
 
Yup! I had to do that exact same thing to my XS2.

Thought that sounded familiar, so I had to look. Yup, yours was the same....


1711076554392.png


And then, RobinC piped in and his was the same...
Looks to be a lot more common than I remembered. And all on the left side.


1711076972348.png
 
Away from project currently but thinking about a puzzle to me.
On the timing / advance rod there are locating pins on each end.
The points cam orients on a pin.
The advance weight disc orients on a pin as well.
The mechanical weight plate is also secured in a position oriented to the camshaft by a locating pin.
But what actually orients the thru rod securely ?
I see I can spin the thru rod as it is not tightened by the 10mm nuts yet.
So what locks the points cam / the thru rod in a correct orientation?
 
👌 okay so that would change my assembly “plan” a little.
That shown 10mm nut would be tightened after the weights and springs are in position?
The advance rod would say “float” into its position with the weights actually confirming the rod orientation is accurate ?
Then tighten the nut ..
Edit~ I see how it’s the weights / tabs which are the orienting components now.
Thanks Jim, in my mind I was looking for a more secure component such as a key way or such but ya. ..
 
Last edited:
Been a while since I messed with one, but I don't think you tighten the nut using the weights to pull against. As I recall, those nubs can bend fairly easy.
I'm thinkin' you hold the nuts on both sides (points cam and advance) of the rod and tighten against each other. Like I said though, it's been a while. Maybe someone who's got a better (more recent) memory can chime it here...
 
👌 okay so that would change my assembly “plan” a little.
That shown 10mm nut would be tightened after the weights and springs are in position?
The advance rod would say “float” into its position with the weights actually confirming the rod orientation is accurate ?
Then tighten the nut ..
Edit~ I see how it’s the weights / tabs which are the orienting components now.
Thanks Jim, in my mind I was looking for a more secure component such as a key way or such but ya. ..
To be clear the disk the bob weights fit into is locked to the shaft by a pin, you can see the notch the pin engages just after 12 o'clock here.
1711144167683.png

The nut just keeps it in place. You can tighten the nuts on the ends against each other, don't go gonzo, a few have busted the shaft with oogy doogies. Since the pins can stick out of either side of the rod, DIY assembly with the timing 180 degrees out is VERY popular.
 
Got it, wasn’t remembering that the points cam “floats” and was stuck in a rigid mindset there..lol
I am still looking ahead at the mechanical advance plate mount and open to suggestions about tightening that strange large nut. It just looks tempting to tap it tight with brass?
IMG_6726.jpeg
 
Got it, wasn’t remembering that the points cam “floats” and was stuck in a rigid mindset there..lol
I am still looking ahead at the mechanical advance plate mount and open to suggestions about tightening that strange large nut. It just looks tempting to tap it tight with brass?View attachment 268381
That's how I do it. I seem to recall the nut has a specific side it goes on... though I couldn't tell you which side.... or even if I'm just pullin' stuff out my ass.
 
You are correct! Tho it is tempting to install the nut with that ring in cuz it looks like it has an alignment purpose, better not !
It fits proper with that ring rim out
 
The side play of the points cam / advancer thru rod seems excessive. Im poking feeler gauges on the advancer side and getting .016+ or more.
After scrounging around all the garage stuff, I have no shim. Hoping Ace Hardware , where I still find plenty of stuff , has a “shim” to be found tomorrow
IMG_6743.jpeg
 
Ace didn’t come thru this time so some creativity resulted in what I think is great.
An old used copper sealing washer from somewhere XS became a custom modified points cam side shim.
I sanded it down to about .011” and it’s copper so what can go wrong?
Now the thru rod free play feels much more appropriate to me. Still some thousandths there, wiggles.
IMG_6747.jpeg
 

Attachments

  • IMG_6746.jpeg
    IMG_6746.jpeg
    332.5 KB · Views: 11
Cleaned all the clutch components today in preparation for clutch installation.
Kick Starter mechanism is resisting installation of course. I’ve read threads, I do not have a kick starter to put on the splines so it’s being a tough go so far.
 

Attachments

  • IMG_6750.jpeg
    IMG_6750.jpeg
    369.9 KB · Views: 9
  • IMG_6749.jpeg
    IMG_6749.jpeg
    410.1 KB · Views: 11
the “Tracker Project” came to me in a very disassembled state.
the “Clutch Box” was a dirty one with a few mystery items in it including this shown unusual 6mm screw.
It’s dark in color and has that strong shank. It must a special purpose somewhere? Anybody recognize this screw ?
IMG_6753.jpeg
 
Back
Top