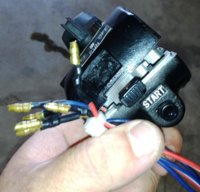
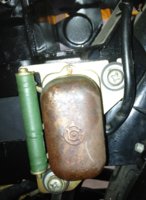
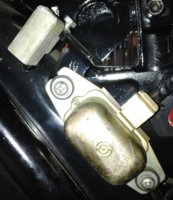
On the starter relay, or starter solenoid, you have the two large bolts that the cables attach to, you have two small wires coming out. One is blue/white, one is red/white.
In use power is fed to the red/white wire, the blue/white wires goes to the starter push button where when pushed it grounds the blue/white wire.
This powers the relay to close the contacts between the two large bolts.
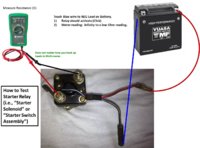
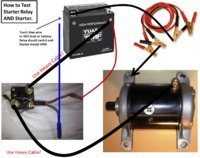
Now to test you relay hook your meters leads to the large bolts. Now with some extra wire hook the red/white wire to the positive on a 12 battery, hook another wire to the blue/white wire, touch this wire to the negitive on the battery.
The relay should activate, you will know by the click.
The meter should go from an infinity reading to a low ohm reading when you hear the click.
Now to test the starter you can hook a heavy cable. The ones off the bike will work fine. Hook one cable from battery positive to one of the relays large bolts, the other large bolt run a cable to the starter. Now use jumper cables to hook the negitive on the battery to the starter case. Now with the same hook up used to test the relay touch the blue/white wire to battery negitive.
This should make the relay click and the starter spin.
Leo