Any suggestions for new bike build?

So the bike neither sparks nor E-start nor kick start. I was getting a 4 at both primary coils and 16ish at the secondarys. Next steps?
 

Attachments

  • IMG_20240125_182945681.jpg
    IMG_20240125_182945681.jpg
    266.7 KB · Views: 20
  • IMG_20240125_183016312.jpg
    IMG_20240125_183016312.jpg
    247.6 KB · Views: 21
  • IMG_20240125_183118013.jpg
    IMG_20240125_183118013.jpg
    235.6 KB · Views: 19
  • IMG_20240125_183147060.jpg
    IMG_20240125_183147060.jpg
    199.6 KB · Views: 20
When you turn the key on do you have 12v+ on the R/W wire to the coils? Key and kill switch on run.
 
I am getting power to the coils but I'm getting a reading of 11.4. Would that be issue enough to cause a no spark? I'm losing power somewhere along the line here but is it substantial enough to produce this no spark issue?
Could the lack of spark be related to an issue with the run/stop switch? Could that have corroded and is somehow causing the bike to register that it should be off there
for cutting spark?
 

Attachments

  • IMG_20240125_201147007.jpg
    IMG_20240125_201147007.jpg
    206.3 KB · Views: 14
You’re going to need to use the wiring diagram to trace power to find that voltage drop. In the headlamp bucket your power in to the kill switch is brown and power out is yellow. I had a similar issue on my ‘75 and it was a dirty connection. Once I traced it all out and found it I haven’t had any issues since.
 
So I opened up the headlight and cleaned that connector that winged was referring to(the one I'm pointing to in the picture). Still no spark.
A side note, I just noticed a connector that doesn't seem to have a male counterpart. It's located near the condenser near the two coils. Anyone have ideas on what this is?
 

Attachments

  • IMG_20240227_120659333.jpg
    IMG_20240227_120659333.jpg
    235.5 KB · Views: 17
  • IMG_20240227_131038513.jpg
    IMG_20240227_131038513.jpg
    189.5 KB · Views: 22
So I opened up the headlight and cleaned that connector that winged was referring to(the one I'm pointing to in the picture). Still no spark.
A side note, I just noticed a connector that doesn't seem to have a male counterpart. It's located near the condenser near the two coils. Anyone have ideas on what this is?
If you had asked a few days ago…..
It might be for the background lighting in the clocks. I’m sorry, but I’m just not willing to go to the garage and get the book right now.
 
I done an exercise on the information posted and from the links.

Went to the diagrams and found the 75-76 one.

looked for a Green/white, (G/W), wire, Sky Blue, (b), and the other one is hard to tell, either Black, (B), or Blue, (L),

Found a G/W wire to the light checker........S/b wire to the Neutral switch and .............need to identify the other colour.

At least try to do use some of the information to find an answer to questions. I get it that it can b confusing
 
Ignition witch i notorious for voltage drop. May need to b taken apart clean contacts and greased. I use lithium grease.

Think 5Twins has a post on the 75-79 standard ignition switches, 74-76 and 77-79 are similar but slightly different. I don't have it bookmarked.
 
IIRC my 75 also had that open plug. I believe it does not have a counterpart. Since you have power to the coils see if you have voltage to the points. Are the opening and closing properly? Although I have not had an issue with any of mine you should also look at the condenser. To test condenser (not per book) you can isolate both points (piece of card stock),turn key on, set meter on DC volts, unhook condenser, and there should be a positive volt reading - red probe to wire, black to condenser case - that will disappear rapidly.
 
IIRC my 75 also had that open plug. I believe it does not have a counterpart. Since you have power to the coils see if you have voltage to the points. Are the opening and closing properly? Although I have not had an issue with any of mine you should also look at the condenser. To test condenser (not per book) you can isolate both points (piece of card stock),turn key on, set meter on DC volts, unhook condenser, and there should be a positive volt reading - red probe to wire, black to condenser case - that will disappear rapidly.
So I checked the points yesterday while holding the electric starter and both were opening and closing. I did the business card trick while cleaning with electric parts cleaner. I also measured with feeler gauges and I believe I did it properly. The .012 feeler gauge seemed to slip in with little resistance on one then I used the kickstart to turn the engine and measured the other and got the same reading. Clymer manual says .012-.016 is acceptable points gap. Will definitely try to test the condenser. How do I check voltage to the points though? I tried looking up some YouTube videos and couldn't really find anything that helped me.
 
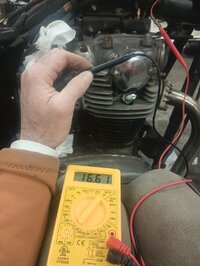
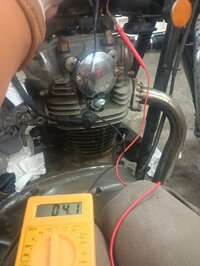
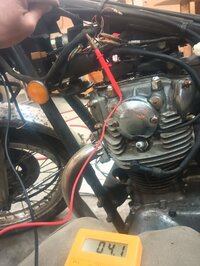
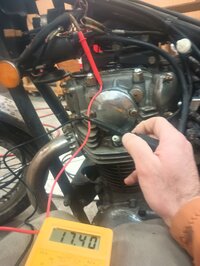
I have a weakness for keeping these old ladies original as possible, looking at your model - it looks like you have less work laid out finding parts as it all seem to be there. Here is a pick how the bike looked when I bought it and two after I restored it. I honestly spend very little money getting it to look nice, a lot of polishing / buffing and time. Had to find side covers (non modified) airbox, carbs and exhaust. Rebuild carbs, new gaskets new oil tires and seat cover plus a few other rubber / plastic parts. Was lucky to get a brand NOS gas tank among a bunch of parts and bikes I bought, otherwise no new paint or chrome - all cleaned up.
The previous owner had plans of making a cafe racer - I feel lucky to have spoiled that attempt.
Unfortunately you are almost as far north as I’m south on the east coast otherwise I would have entertained the idea of helping it off your hands or trade you for another ‘75 have sitting around however with quiet a few missing original parts :). Good luck whatever you do - did I mention “ nice find”
What did you use to clean the case covers? Mine didn't look quite as bad as yours started out, but the cleaned up version's not as bright and shiny. as yours are now. There's a coat of... something -- a film of some kind, maybe? Like a yellowed patch that's not cleaning up as well as the areas around it. Mother's Aluminum Polish is my next thought. That and a cloth buffing pad for the drill.
 
What did you use to clean the case covers? Mine didn't look quite as bad as yours started out, but the cleaned up version's not as bright and shiny. as yours are now. There's a coat of... something -- a film of some kind, maybe? Like a yellowed patch that's not cleaning up as well as the areas around it. Mother's Aluminum Polish is my next thought. That and a cloth buffing pad for the drill.
I use aluminum buffer sticks and a hard woven buffer wheel on my bench grinder, gradually changing to a softer wheel for the final polish. The yellow film ( I believe) is a factory coating, may a clear coat of some kind, can be hard to buffer off, may be a way to dissolve it but I haven’t found it :). Thus I buff the he’ll out of it, you can be pretty aggressive, even use nylon brush for the bench grinder to get the film off, it may make some scratches that then need to be buffered out. I have also used my vapor honer - it will give a dull appearance, but since it will be uniform it quite easy to buff up to look nice.
Most of all it takes time and it’s pretty hideous work. But what the heck - I’m retired so just take the time it takes and try to be patient.
 
The yellow stuff is the factory coating. Many here use a high grade paint stripper to remove it. Then it’s just a matter of sanding and buffing. It’s pretty robust stuff so look for a gel or thick aircraft stripper that will stick to the parts.
 
The yellow stuff is the factory coating. Many here use a high grade paint stripper to remove it. Then it’s just a matter of sanding and buffing. It’s pretty robust stuff so look for a gel or thick aircraft stripper that will stick to the parts.
I have sanded it with 600 grit wet and decreased the grit to 800, 1000, 1500 all the way to 2000 before polishing. 600 will knock the clear coat off pretty quickly. I don't recommend it, but I've even sanded it with paper coarser than 600. It's just elbow grease and patience.
 
Back
Top