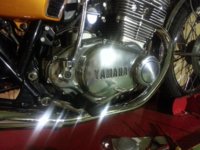
AUS TX500 Resto

A bike like that deserves a good restoration, and you da man! I'm pretty sure these were the 1st bikes that had 4 valve heads. You will find it very smooth for a twin, rivaling a four banger. Back in the 90's my old Yamaha dealer rode a nice TX500 everywhere, and he could ride whatever he pleased.
In the original press releases and reviews it is commented on that this is the first production bike with DOHC 4 valves per cylinder. However bikes were built way back to the 30's or further with the same technology. I think they qualified the statement by the fact it was the first one from the big four to mass build one.

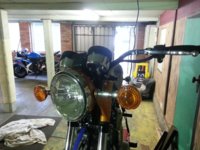
A little more progress of late. Indicators, headlight bucket installed and wiring looms connected and tested. Everything worked bar the flashing of the indicators which was only the flashing unit. $10 and walk to the local auto parts store and it was fixed, I even managed to fit it in the original relay housing.

For some reason the PO pumped a heap of silicone between the headlight and the outer chrome ring that fits on the headlight bucket. The only reasons I can think of is to stop water getting into the headlight bucket or to stop it from rattling around.
It has taken me several hours so far to clean with about 10% more to go.
20140502_214310[1].jpg

FB_IMG_13990311236005598[1].jpg

sorry for the sideways attachments, can't roate them.
 
Got some spare time today so took the opportunity to finish cleaning silicone from headlight and surround.
With that done and mounted I removed clutch lever and blasted the perch then painted. Then I wet sanded and polished lever. I could have purchased a new one and saved time and effort but this project is about doing as much as I can myself and recovering and restoring as much as possible. I also really enjoy the process of bringing something back to life.
20140505_160614.jpg

20140505_160453.jpg
 
Front brakes are now done. As mentioned a simplified system was the aim. Originally the line went from master cylinder, flex line, hard line, pressure switch mounted to lower tripple, hard line, flexible line, hard line to caliper.

I changed to master cylinder with a integrated banjo bolt pressure switch, braided line to caliper.
20140513_045613[1].jpg

20140513_045644[1].jpg
Also some small jobs to tidy things up like installing Hagon adjustable shocks, sourcing new split pins, rubber grommets, seat rubbers, bleeding brakes etc.

This weeks job is to order some mufflers and rear view mirrors and take it for a test ride once they are installed. If all goes well I will book a roadworthy inspection and hopefully get it registered.
 
MV I had a 1975 and loved it. Yamaha did replaced the defective head but that was my only problem. You could run with the twin 650's. I did replace the carbs with delOrto's. That was a great marriage. Have fun. Tony C
 
Not a great deal of progress this week due to front brake issues. The bleed process went well up to the point of getting a firm lever then the lever would no longer return. The lever spring was the only resistance. Obviously the master cylinder piston was not returning. After dissasembly of the master cylinder I found this.
2014-05-21_20.50.12[1].jpg
After a email to the supplier of the master cylinder with an explanation of what happened they had a seal kit in the mail the same day. So I am waiting on that to progress with the brakes.
 
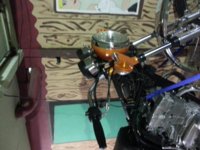
Another issue I wanted to tackle was the steering column lock. Ever since I purchased the bike over twelve months ago the lock would not engage for some reason.
After many measuerments and head scratching I recalled when I removed the tripple clamps to my surprise there were tapered bearings in the bottom clamp.
So it seems with tapered bearings the steering shaft sits 1-2mm lower in the steer tube.
I filed a taper in the leading edge of the lock shaft and now it works as it should.
2014-05-21_21.42.50[1].jpg

2014-05-21_21.43.11[1].jpg

This week I also recieved the mufflers which ended up looking ok. They managed to line up without useing brackets which I was hoping to achieve.
2014-05-20_09.36.26[1].jpg
 
Could not wait for seal kit to arrive so I purchased a master cylinder locally to keep this project moving as I had some spare time this week.

I thought I would rebuild the reproduction master cylinder once I recieved the rebuild kit and replace the temporary one sourced locally.
The fill and bleed procedure did not go to plan and I burned up two hours in the blink of an eye trying everything I know including, bench bleeding master cylinder, lever pumping with bleed nipple open, pumping and shutting bleed nipple on lever return, Letting it gravity drain with resorvior cap off and bleed nipple open, placing master cylinder below caliper and trying fill and bleed procedures again.

Still nothing. Fluid was just not being drawn into master cylinder.

I thought if I could pressurise the master cylinder it should work, so I removed the reservior from the master cylinder and used a syringe to force fluid into master cylinder whilst bleeding system.
20140527_132317[1].jpg
This seems to have worked although the lever is spongy my plan is to let it sit for a couple of days and let air bubbles migrate up to the master cylinder reservior. Then give it a final bleed and see what the lever feels like.
 
You should have used the syringe to pre-fill the brake line, while the brake line is on the bench.

That's how I do my brake lines and there is almost no bleeding required.

I had that idea too. In the above picture you can see the brake line disconnected from the caliper, at this point I bench bled /primed the master cylinder and brake line. Then re-connected and did the whole system with the syringe.
My inner pessimist is telling me the master cylinder is not that good. For $50 delivered it's probably no surprise.
 
After more time on this brake system issue of not being able to bleed effectively, I think I have come to a conclusion. The original master cylinder that was crusty and seized is 5/8, which I duly replaced with a reproduction period correct 5/8 master cylinder.
However 5/8 seems to be used on twin disk systems and 1/2 master cylinders were used for single disk bikes which mine is.
My conclusion is that with a larger master cylinder and smaller line volume with a single disk system a greater vaccum is in the system after the bleed nipple is closed and the lever returns. This vaccum is too great for the master cylinder spring to oppose the last 2 or so mm.
This was evident when looking into the resorvior while bleeding.
 
Mirrors arrived last week and roadworthy was done a couple of days later. Hopefully in the next two to three days it will be registered. As it has been off the road and de-registered for close to 10 years its history may be a problem but we will see.
 
After 4 visits to the dept of transport it is registered. The only problems found during the 50 or so klms of running to and from the dept of transport were an oil weep from the valve cover, spongy front lever and exhaust leak from header to muffler joint.
As I intended to retorque the head and check the valves I just brought that forward. After about 60klm ride today it seems oil tight now.
I decided to put the reproduction lever with the rebuilt master cylinder back on and it is far better and with the back brake it pulls up pretty well for a 40+ year old bike.
 

Attachments

  • 20140624_103320[1].jpg
    20140624_103320[1].jpg
    319 KB · Views: 212
image.jpg
After a few rides it was apparent the clutch was slipping with any more than 50% throttle. So a new clutch it was.
I ordered new friction plates and springs.
After removing clutch the plates were standard thickness however the springs were 1.5 mm undersize.
While I was in there I thought I may as well change them.

Now with new clutch and a carb sync she's a weapon.
 
Not much to up date with apart from a few odd jobs. The flasher relay went so went with a higher rated jobbie and since the whole bike is run from a single 20A fuse, I decided to feed indicator circuit with a separate fuse.
Obviously one thing to discount when the time comes to fault find.

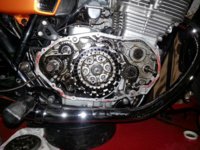
Tracking down a small oil leak was a challenge. It was originating from the left cover that unfortunately under this cover is the output shaft, clutch push rod, oil filter mounting plate and oil filter. Oh and the crank case breather drain goes through this cover also.
Making it hard to isolate is the wind/chain distributing the small amount of oil everywhere.

Checked the oil filter and base plate and both were tight, so I thought I would move on before removing and replacing gasket.

I mounted a makeshift catch can which showed nothing but a little condensate so I can strike that one off the list.
Next I checked the drive sprocket nut. Bingo, after folding the locking washer back it was finger tight.
Swing off a breaker bar and got another 90 degrees on it which stopped the leak
While I was poking around there I also found a small leak from the tacho cable entry to the gearbox so that is the next job, but in the mean time I am enjoying every minute on this thing and every ride is too short.
20140921_140415[1].jpg
 
G'day, I have a 73 TX500. Original unrestored with age related patina. Just fired her up after 15 years dormant and she ran like a bird. I am really interested in joining the group.
Cheers
 
Hi, I think I will see how she runs for the rest,of this year and take it from there. These bikes are much maligned and not really worth spending too much on unfortunately. Plus a bike is only original once.
It feels as smooth as and early 4 pot machine unless my memory is playing tricks on me!
Cheers mate
 
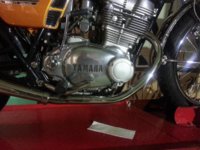
One of the things that was down the priority list early in the build was the timing or points cover. The one on the bike was pretty sad as it had taken the full brunt of a lay down at some stage in its life. I had been searching on and off since December 13 for a reasonable replacement. All the ones I could find were also pretty ordinary.
To my surprise I found a NOS item in the UK.
 
Back
Top