Bitty Budget Young Hardtail Tracker

cleoncleon

XS650 Addict
Messages
197
Reaction score
0
Points
16
Location
Hell, Arizona
Finally going to start a build thread; keep this project documented...

I'm going the Tracker route, Battery-less Hard-tailed tracker.
As of today, I acquired an engine <3 - 79' (2FO-XXXXXX).

- As of now, I'll be blasting her clean then tearing her down for checkup and 5th Overdrive install.

IMG-20120612-00413.jpg


For the hardtail, I decided on going with a David Bird's hardtail.
I placed the order about a week ago with dimensions of ZERO drop and ZERO stretch. Going for a real compact/short bike, want it to look stocky and full as ever, yet boney.. With a tall 5 - 6" Solo Sattle and Pillion Pad in rear.

Going Mid or/ a slight rear set controls and a 2 into 1 pipe.
Tank wise, I'm shootin' for a Lowbrow Wassel Style P-Nut with a Deep tunnel, want it sitting low, not high like a bobber.

Fenders front AND back... lol I love fenders, man.

Going to Install:
17-32 Ratio
5th Gear Overdrive
PMA - (Banshee Parts Convert) + Sparks Capa.
Pamco - If I can afford it right away, PMA is a must though. :)

Luckily I got the Early XS set of Wheels with the High Shoulder Alumin. Rims and Drum Rear , that I'll run. More aesthetics will come as the build progresses.
Mainly time for cleaning and selling of current parts, got a ton of em' while scrounging around for a project.

Started on the carbs last night, they're pretty much good to go, still broken down for blasting the bodies clean.. I'll be getting a little 20lb Pressurized Blaster Pot/Tank for this project. Want to blast down the engine/carbs/ some stuffs and do some carbon cleaning in the head w/ it.

These carbs, not sure which they are, but they are so much easier to mess with than the ones on my XS750, seemed to be designed 'better'? I like where the jets sit in the bowl.. More places for things to get gummed up, but clean, seems sound...

IMG-20120611-00409.jpg
 
Woo Hoo, welcome to the forum! I'll be looking forward to watching the progression. Lots of good info here as well as insightful assistance and sarcastic comments!
 
So, I've started with the engine breakdown. Got an eMail from Kyle @ LowBrowCustoms just updating me on the frame status, going smooth, should be here in about 2 - 3 weeks.

Engine wise, I have the entire Top End bagged up and Labeled, just got a few questions on the pistons and Points Spindle

Points wise, this little bushing that the points rub on, it looks flat on one side.. it's not perfectly round. Is that supposed to look like that?

PointsSpindleFlat.jpg


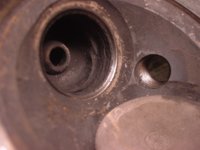
Jugs/Pistons Wise, how do the pistons look? haven't cleaned em or anything yet... NOR have I stuck some feelers gauges in there.. not sure what the tolerance should be.


Skirts don't look too scored, there wasn't any rust gumming them down, they moved quite easy. In-fact, the Left side piston, which appeared to have the most carbon built up, had pretty free tops and second rings. Oil rings an both look pretty stuck...

Pistons2.jpg


Pistons1.jpg


Barrels2.jpg


Barrels1.jpg


I got a new set of Rings and a 76mm (320 Grit) FlexHone on the way, so, those will deffntly be going in.. Still need to change valve seals as well... Rockers and Such looks good, didn't have any flat spots I could feel.

Im apparently playing a game of Hide and Seek with the Front guide... Im sure he'll turn up in the lower case.

GuidebeGone.jpg


I got one of these pressurized blaster pots... Tested it out with different brands of conventional Baking Soda, Arm and Hammer and the Walmart brand.. Those alone did quite a good job on a 1hp/26gallon compressor. The Arm and Hammer accutally wasn't as suitable as the Walmart soda which didn't have huge clumps in it to clog the blaster... I'm picking up some AMEX from HF tmrw, that should do the trick, if i remember correct it has an Additive in it to help it not clump together and clog. It also is a large hard grain of soda, should make for some even better blasting.

BlowGun.jpg


I swear, I'll have a Cylmer by the end of the week, its still in the mail.

- What do you think about those Pistons?
(also, I bent my Piston pin cir clips a little trying to take em out. If i bent em back straight with a few pliers can I just re-use em?)

- What do you all think about that Point bushing?


:D
 
^^ Yeah you're right... Pretty basic clip too, I'm sure Ace Hardware should have em'. I just hate waiting for small parts to come in from shopping online >:-( . Waiting on parts in general, I guess...
 
Sometimes I wonder if cle-cle is beat'n us to the sarcasm.

bitty budget? doesn't sound like it to me.
 
:D :D


PreG. - I guess I might not have a clue what they're 'called'.. Ive called bikes such foolish shit... I just refer to them as 'a bike' usually so as to not have to wear my dunce cap. But along these lines:

BIKE.jpg


BikeI.jpg


BIKEII.jpg


BIKEIII.jpg


The wil dude out here in AZ races these XS engines, he contacted me when I was looking for one, never went through, but we talked, his garage was basically full of different style hardtail frames looped/straight/ - Dropped/ with an XS650 or BSA engien shoved in em. Not only did they look amazing, he showed me a few picture of him in his day terrrorrizingggggggg a dirt track..

I just want to make it very ride-able in flat pack dirt (Alot of it here in AZ) not excessivly, just for like 1 or 2 go arounds lol... Tried, like a first timer, on my cafe and ripped my brand new Levi jeans off my body.. Rearsets and dirt are funny together.. :banghead:

A few runs to Cali and blasting down some backroad.. Bouncing around on a springyyy seat!! :)
 
First things first... I was a good boy this first 1/4 year; Santa came early... early as hell:

Xmas.jpg


Clymer still hasn't come in.. :banghead:
BUT! There aren't any torque settings in the Lower Case that I need worry about inside, from what I'm seeing it's the final nuts n bolts to hold the cases together.. no? If that's the case, I can get her back together..

Make shift Spring Compressor, I call it, 'Parts-Everywhere-Followed-by-Death.."

Sketchy.jpg


Blased off the Head/Jugs. I liked the look of the blasted look, but only for the Jugs/Head, rockers are gettin' a little wire wheeling to shine em up a bit. I truly love the wire wheel.. Thinking about Shinning up (dull machine shine, not 'chrome finish') The Rocker Cap of course, Tappet Covers, Side Covers, anddd Fork Legs.. Hubs too!

BlasterPit.jpg


HeadShiner.jpg


ShineyHead.jpg


I'll be cleaning more shit up... Gettin' everything ready for the frame, which still isn't here yet. Soon i hope!
 
While you were there did you clean up the head ports?
The points cam is lobed to break the points connection.
 
While you were there did you clean up the head ports?
The points cam is lobed to break the points connection.

Ahh okay, so the Point Cam is supposed to look like that? What an ugly looking part... haha

As for the head, yes sir, blasted everything I could, trying to avoid blasting the bearing races as much as possible.. But the ports are clean. Intake ones were fine from the start, the exahust... needed a decent wealth of blasting.

At any rate, just got home from the bar, I'd like to share some of my drink selections...

1/2 Guinness + 1/2 Papago White Wheat = My version of the smoothest Black & Tan.
1/2 Milk Stout + 1/2 Rouge Hazelnut Brown = I call this, Dark...
Rouge Chocolate Stout - I call this... Black.


^^ That explains why there is a post above this one with (8) periods to make it qualify as a 'post' only because i cant figure out how to delete it... and further explains my feeling of relentless confusion on the matter.... :/

:D
 
Last edited:
I just love looking at these ambitious projects you youngsters tackle. I keep putting off tearing my carbs apart to clean them cause I'm old and lazy. It's extra hard there in AZ too, I know how hot it can get inside the garage! I was in Gilbert for a while but I'm back in Western NY now. Keep hydrated with those premium beers and keep posting your progress...
 
cleoncleon,
Maybe you got this covered. Considering the investment your making I'm trying again to make sure. I wasn't asking if the ports were clean. I was asking if your clean up the casting disaster in the head ports particually the exhaust side. Maybe the single. no second most important preformance freebie you get.
As from the factory they have ridges. Smoothing those out helps.
Like I said you probably have it covered so I'll hush now.
 

Attachments

  • b 4 polishing.JPG
    b 4 polishing.JPG
    211.6 KB · Views: 200
  • after polishing.JPG
    after polishing.JPG
    188 KB · Views: 204
m309, Gilbert I think is 1 - 2 Degrees hotter than Glendale today.. Usually. I can see why you left! ;-). Im planning on a voyage over to NY in a few months. If im feeling frisky I might chug on the Xs over there. Are you close to the main city?

Ahhh okayy, I see what you mean now. Shit let me go look at em, maybe take a picture or two. When i blasted em, I spent quite some time in there, I would just hold the blaster in there and let the beads bounce around as much as possible. When i was done there didn't seems to be any rough spots in there, it was rather clean. But with it clean now, if they are there, I'll be able to spank em' real good! What did you use to smoothen them? Sand paper?

I have the mini like 1-2" wire wheel that i can send down there, but holy shit are those small bristles are damn stiff. It's almost too abrasive for anything Ive needed wire wheels for lol and it just a tiny drill bit wheel!
 
Get yourself a beer, this will be a fun one.

Alright fellas! quick detour. Took a trip down to the local graveyard today. Always a fine experience.

First off this guy... This if for the record! mere mortals must understand, parts diggin' in hard hard work! :

IMG22062012030907.jpg


The yard is huge. Fucking massive and has it's own secluded corner in Phoenix. You really feel like you're on another planet. Heaven some call it...

Walls and walls, mounds and mounds of all kinds of shit. Areas stacked so high and level of just carbs and heads you'd think it's naturally occurring..

IMG_3182.jpg


IMG_3187.jpg


IMG_3191.jpg


IMG_3201.jpg


IMG_3196.jpg


IMG_3195.jpg


Right outside that wooden container of junk was this wildddd XS650 Motor.
Looks to have been extensively raced and modified. Been sitting there a while.

IMG_3189.jpg


IMG_3190.jpg


Came across is Triumph? frame. Has the bolt on hard tail on it, looks like it could be an awesome platfrom for a build:

IMG_3192.jpg


IMG_3193.jpg


Got a lot of seat inspiration today too. This build is basically being built around the seat and fenders, probably the two items that stand out to me first on any bike, or a lack there of.. Springy springyyy, boing!

A bunch of Effi's / Triumphs / BSA's and shit I've never herd of. I wants:

IMG_3206.jpg


IMG_3199.jpg


IMG_3207.jpg


IMG_3205.jpg


IMG_3202.jpg


IMG_3204.jpg


IMG_3197.jpg


IMG_3198.jpg


IMG_3203.jpg


Back to the build... I did walk away with enough money to get some tacos this time around... found an awesome seat pan, $20. Looks new. Gonna get some 5"+ Springs off ebay.

IMG_3209.jpg


Engine wise, I cleaned her up and changed some shit out.. Got the Overdrive in there.
Changed like 1 seal :D and deleted a bunch of shit.. Didn't realize how much you could leave out with the Elec. Starter not there. i left the shaft and two gears, just incase...

Sump filter in my runner was cashedddd.. Luckily i had a spare in a parts block:

IMG_3176.jpg


I stayed with my religious belif of NOT breaking new contiuous chains to put intall em'. What makes the chain swap with an endless hard is that bracket holding the tensioner down. Has a wrist pin across it that held the motor in. After some reading and a few messages to Leo, I decided to cut out the middle pin. From what I've seen it has no use what so ever. Cut it out and now I can manipulate my Endless chains... Saved weight?!!? :laugh:

IMG_3168.jpg


But, there she is thus far, cases are clean and back together!

IMG_3180.jpg


IMG_3179.jpg


Next step is to continue cleanin/polishing off shit. Got a small polishing kit today from HF. $4.95, comes with both compounds, well both 'common' compounds and a few fluffy wheels.

Gonna Hone Cylinders and Lap my Valves tonight.

QUESTION TIME: in regards to whats next to make the Engine run.

1. Are there any OTEHR Magneto's / Flywheels I can use, other than the Banshee?
2. Who has successfully DELETED Base Gasket? Under the cylinder.. I have a full Gasket kit, but, I like the idea of this and its little benefits...
3. Could I POLISH or buff up a bit, my head? Under it, where the valves seat. Not the seats themselves, but the area around them.
 
Man.. I don't even have 2 pages on this thread.. ? Kallame-Weakkkk..
There's always bit done here and there but I just do one fat update in the beginning. :shrug:


Now that the frame is done (85%), things will be gettin' put on left and right, updates should come round quicker.

At any rate, the David Bird End-Section came in about a week and ahalf ago, took the exact 4 - 5 weeks once it was in production. Little few day wait to get into the queue, but once you're in, give it a few weeks.

I got it at 0" of Drop and 0" Stretch, so, Im trying to keep it pretty tight.
Hardtail are low to begin with, so, I decided to get the "highestlowest" for some more fun.

IMG_3266.jpg


Got in contact with my buddy Matt T., skilled metal fabricator that been buildin' for a while here. That's his 1200 Sporty. The guy has transofremed this thing about 4 times. Once as a Cafe w/ Offset Mono, like on those old ducatis.

IMG_3288.jpg


DSCN0066.jpg


Old KZ750 he's doin' up, 'leisure project.'

IMG_3291.jpg


At this point the 650 would have been stale, seeing as I cant weld.. he came through with another epic win and helped he get this girl all glued up.
Oh! And did I mention, he accepts payment in beer and laughs.. ?

The frame itself went in super easy. Took us about 2 hrs to get her all buttoned. Well, 85% buttoned, there's much still needed to measure and get ready for brake 'stuffs' , fedners, the lot... before we get to locking it all up. The frame dropped right in, hugged the hell out of the stock peice like a glove. DB has really made this easy for people to install, STRAIGHT and TRUE at that..

IMG_3287.jpg


IMG_3286.jpg


IMG_3283.jpg


IMG_3285.jpg


IMG_3306.jpg


IMG_3293.jpg


IMG_3304.jpg


The next few days will be Frame wise is some furthur cleaning of tabs and bits, get the engine done, and dropped in. Engine is doing good, it could use a new set of Rephased Cranks and and a bore, but it'll do for now with a blast with the Flex-HONE and new rigns.. Boltn the head up tonight hopefully. Stay tuned my dudes..

work work work...

Thought this was genius. Matt found this on a joy ride on the hog. The bum who had it prior probably had a good run with it.

IMG_3299sl.jpg


Got some engine updates and photos of the DB more finished with Gussets up soon..

:bike:
 
Last edited:
Back
Top