(BS series) Throttle Seals: Who's done 'em, who needs to?

Drill the heads off. Then using a bit smaller than the shank turn them out the bottom.
When you get the screw shank out look at the end with a magnifying glass and you can see the marks where they were staked at the factory. See the picture for reference. I'm not sure heat or penetrate cures a staked part.
You can get Allen heads for replacements.

Maybe when staking yours they gave it an extra whack??
 

Attachments

  • stake dimples screw shaft.jpg
    stake dimples screw shaft.jpg
    57.6 KB · Views: 491
Last edited:
Thanks again for the help, ended up drilling the heads out which actually pushed the stems out enough for me to get them with some needle nose pliers and manually twist them out the back side.

Ended up completely recleaning /blowing out the carbs with compressed air to make sure none of the metal shavings stuck around to cause me problems.

New shaft seals in, Allen head screws in with blue locktite, didn't have time to fire her up but just needs a carb sync and hopefully I'll be able to salvage a few more weeks of nice weather.
 

Attachments

  • 20140914_184238.jpg
    20140914_184238.jpg
    150.1 KB · Views: 566
  • 20140914_184256.jpg
    20140914_184256.jpg
    101.7 KB · Views: 536
This post is a great help.
All the bad stuff that you all cured has happened to me, but at least I have direction for the fix.
Now, here is a possible stupid question.
Am I wrong to think there are two throttle shaft seals in each carb? The parts manual PDF I have really only shows one, but I assumed when I ordered the seals that there was one on each side of the butterfly.

Thanks,
Matt
 
The shaft and bore run through the carb body completely, so there is a seal around the shaft on each side of the carb, 2 seals per carb, 4 seals total.
 
An old thread update; After 5 or more carb sets I now will only use the OEM seals, they have a ] shape, the open end faces out, like this ]-carb-[

Once the carbs are split, check for throttle shaft slop, the end of the shaft the cable attaches to is usually the worst. Early carbs have shorter bushings and more trouble with them being worn out. Sandy, dry areas are probably the worst on wear issues.
 
I need some help sourcing the outboard (throttle lever side) shaft seals for my early 71 XS1B Solex/ Mikuni carbs, as part of my shaft bushing thread:

http://www.xs650.com/forum/showthread.php?t=43326

The factory replacement seals, 256-14997-00, size: 8mm ID, 11.5mm OD, 2.5mm thick, work fine for the inboard side of the throttle shafts. But, the outboard shaft seals are unlisted in the early parts manuals (calls for 2 seals, not 4). They are steel-shelled u-rings, size: 8mm ID, 12mm OD, 3.0mm thick.

They have to be pryed out of the carb body:

full


They function the same as the inboard seals, with that u-ring shaped lip that faces outward.

71XS1B-Carbs-Seals04.jpg 71XS1B-Carbs-Seals05.jpg

I think that this is an old "Solex" thing. I've seen references on other forums (like VW) to M8x12 seals, apparently not uncommon, but no info on applications and sourcing.

My plan "B" is to fashion and fit an M11.5 x 12 - 3mm thin shell into the recess, and just use a stock seal in there...
 
Going cross-eyed from all the searching. Finally found that 1990 Mitsubishi EVO throttle bodies use the same seal. SKF 3030.
 

Attachments

  • SKF3030-DS.jpg
    SKF3030-DS.jpg
    104.5 KB · Views: 443
  • SKF3030.jpg
    SKF3030.jpg
    97.8 KB · Views: 410
Gave up trying to find those things. Decided to avoid 'unusual' repair parts, the regular seals are easier to get. So, executed plan "B".

Using an old valve as an install tool. An insertion driver for the ring is made from aluminum round.

full


Slick everything up with a thin coat of silicone grease. Put adapter ring on insertion driver, press it into the recess using just thumb pressure.

full


Adapter ring installed. Normal shaft seal fitted.

full
 
yes, i would really like to see that if you're still willing. i have new seals for my BS34's but have never changed out the seals.

Mikuni BS-24 carbs for my 1983 XS650 – replacing the throttle shaft seals
1] do you have a link describing the steps to replace the throttle shaft seals?

2] if not, then I imagine I will have to disconnect the brass throttle valve plates in order to slip out the throttle shafts from both carbs. From what I have read the threaded tips of the 2 screws that hold the valve plate to the throttle shaft have been dinged so that they will not loosen and back out all the way due to vibration. I have loosened the screws and they will not back out all the way. How are the screws removed without damaging the threads on the throttle shaft?

I have also read that another source of air leakage is a gap created by the misalignment of the brass throttle valve plates. In a youtube video regarding air leaks you're told to put a flashlight to the air filter side of the carb while looking at the valve plates from the engine side of the carb. My plates didn't need a flashlight; the identical gap for both carbs is somewhere between 1/64th to 1/32 of an inch. In the video it says to loosen the 2 screws and flick the throttle shaft to center the brass plate, eliminating the air gap. This I did but there was no change in the gap. Do you have thoughts regarding this?
Regarding the seal replacement process I would appreciate any tips and directions you all can give me.

Tx very much.
 
Mikuni BS-34 carbs for my 1983 XS650 – replacing the throttle shaft seals
1] does anyone have a link describing the steps to replace the throttle shaft seals?

2] if not, then I imagine I will have to disconnect the brass throttle valve plates in order to slip out the throttle shafts from both carbs. From what I have read the threaded tips of the 2 screws that hold the valve plate to the throttle shaft have been dinged so that they will not loosen and back out all the way due to vibration. I have loosened the screws and they will not back out all the way. How are the screws removed without damaging the threads on the throttle shaft?
I have also read that another source of air leakage is a gap created by the misalignment of the brass throttle valve plates. In a youtube video regarding air leaks you’re told to put a flashlight to the air filter side of the carb while looking at the valve plates from the engine side of the carb. My plates didn’t need a flashlight; the identical gap for both carbs is somewhere between 1/64th to 1/32 of an inch. In the video it says to loosen the 2 screws and flick the throttle shaft to center the brass plate, eliminating the air gap. This I did but there was no change in the gap. Does anyone have thoughts regarding this?
Regarding the seal replacement process I would appreciate any tips and directions you all can give me. Tx very much.
 
Last edited:
When you snap the butterfly plates closed several times to align them, you have to have the idle adjustment screw backed off so it's not holding the plate open at all. If it's set for a normal proper idle, you will always see that crack of light at the bottom of the plates. Back the idle speed adjustment screw off enough so you actually see a gap between it and the cable arm.
 
about the idle, tx 5twins.
what about putting in the throttle shaft seals/ removing the screws to free the throttle shafts?
 
Yes, the ends of the screws are peened so they won't back out. Some just remove them and hope for the best. Some grind or file the peened end off as best they can. Some drill the heads off the screws and remove the screw shaft out the back so the peened section doesn't pass through the shaft.
 
i just found this very informative video on changing out seals on a carb. the carb demonstrated on is not a BS34 or 38 but is very similar and the tips he shares are invaluable.
 
Removal of a stripped screw with hand drill.
You have already made the guide/ pilot hole by stripping the screw so centering the bit should be fairly easy.
Just remember it isn't at 90 degree and you need to angle the drill some if you are going to remain centered.
A 7/64 bit will cut the head off.
IMG_20160815_211358_245[1].jpg


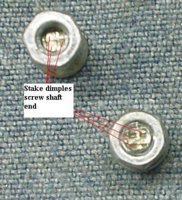
In the past I have had good luck in that I've always managed to step down two sizes with the drill bit and when the smaller bit grips/grabs/bites the screw it has turned/spun/threaded out the bottom. EZ PZ. Not so with this one. I think maybe the factory worker "staked" this one twice and the other screw (came reallllly easy) not at all.
The drill bit sizes I have to work with are 7/64 (will remove threads) 3/32, 5/64 and 1/16.
Step down one and you had better be sure of a steady hand. ANY deviance from center and you are taking off threads.
Step down to the smallest and any extra applied force will bend the bit and force it off center. They call it whipstocking or directional drilling in the oilfield.
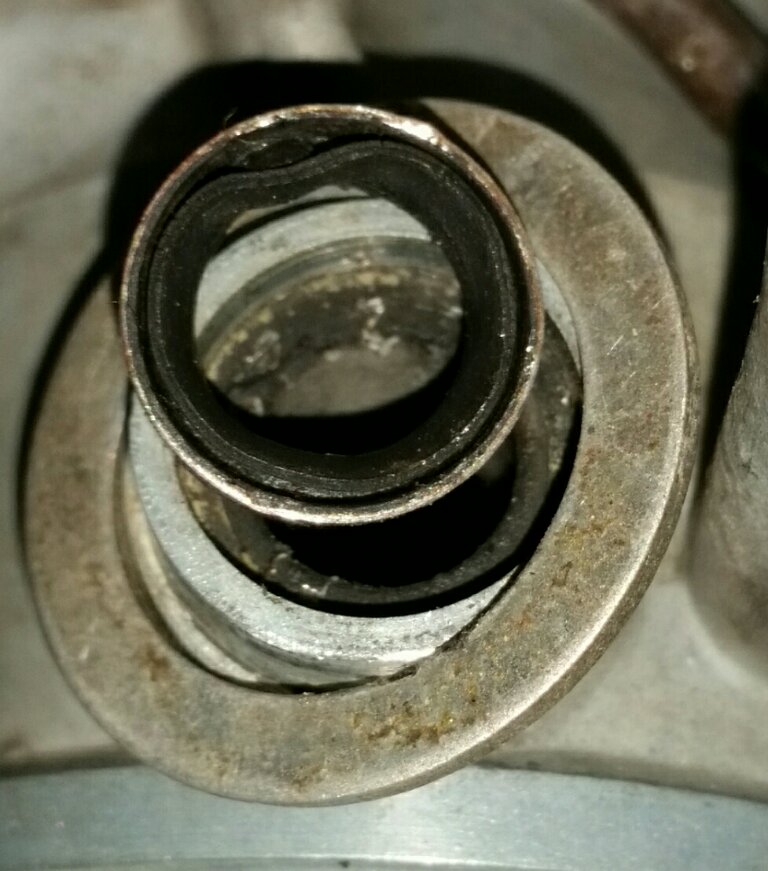
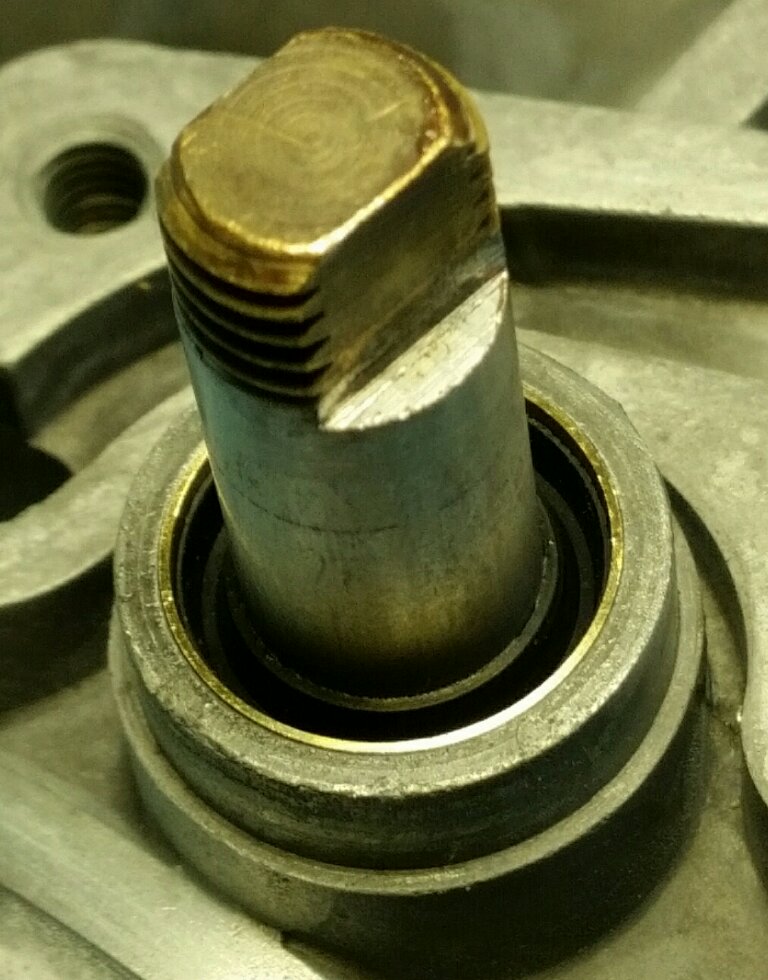
Using the 5/64 bit and going SLOWLY with a light applied downward pressure I had to drill almost completely through the screw shaft before it bit enough to spin the shaft/shank out the bottom. Still got off center some and took threads on a small portion. Notice there only two threads left and I would have gone completely through.
IMG_20160817_110050_258.jpg

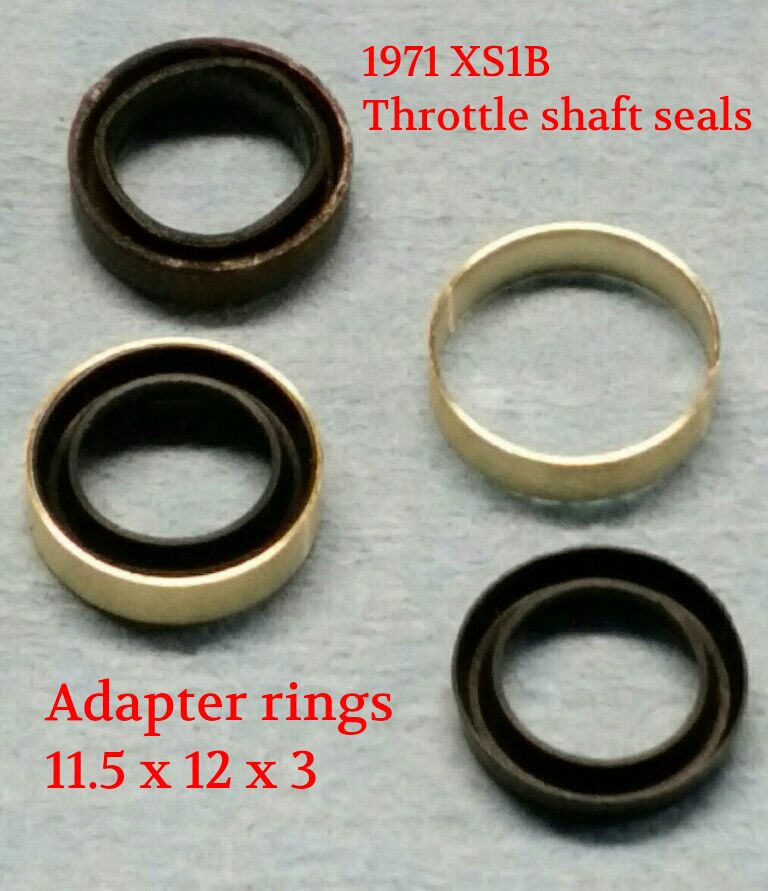
All ended well. The new screws tighten on the bar/shaft and didn't strip so with the new screws and seals I'm calling one done.
IMG_20160816_193921_835.jpg
 
So did you locktite or stake the new screws?

A recent adventure; this was broken off in a PLASTIC housing.

The LH drill backed it out, got lucky and I stayed inside the screw. Once the screw got hot the plastic let go of it and out it came.
 

Attachments

  • lh drill.jpg
    lh drill.jpg
    114.2 KB · Views: 322
Back
Top