-
Enjoy XS650.com? Consider making a donation to help support the site.
XS650.com receives a small share of sales from some links on this page, but direct donations have a much greater impact on keeping this site going.
You are using an out of date browser. It may not display this or other websites correctly.
You should upgrade or use an alternative browser.
You should upgrade or use an alternative browser.
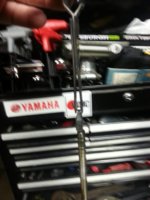
Clutch push rod upgrade.
- Thread starter Captmilk
- Start date
pristic
XS650 Addict
Search on here, there is a video that shows you how to replace the clutch pushrod parts... not sure on the clutch springs sorry.
sseres
XS650 Junkie
On the springs I find it easiest to mash them in with a t-handled Allen wrench and use my body as leverage and turn just a small amount until the screw catches, then use your torque wrench to get them set.
Polishing media for the rod, couple seals, tools to chamfer seal opening and seat seal, drill bits for drilling-out old bushing, flashlight, small magnet and q-tips to clean-out chips, cleaning/greasing agents for worm screw, spare ball to replace the one that pops out and rolls under the washing machine, six-pack?


cobrasneverdie
el guapo
where did you buy your upgrade from?
where did you buy your upgrade from?
I got everything on Mikesxs.net
cobrasneverdie
el guapo

hard_y_rd
XS650 Guru
Should you be able to push the clutch pushrod in by hand or should it be extremely hard to do. That is after everything is assembled.
hard_y_rd
XS650 Guru
After the rod is in, should you be able to engage the clutch by hand by pushing on the rod? I guess that's what i was trying to say.
Rod easily slides thru the seal, but to push in to disengage the clutch takes 600-800 lbs (ouwch!)
hard_y_rd
XS650 Guru
O.K, Cool. When i tore the motor down i couldn't push it and i thought something was wrong. Just didn't know that the little worm was that strong.
Just so happens I was study'n this the other day, this is from my `71:
30lbs to pull clutch lever, 4:1 ratio to cable, makes 120 lbs in cable, 8:1 at worm, makes 1000lbs at pushrod.
30lbs to pull clutch lever, 4:1 ratio to cable, makes 120 lbs in cable, 8:1 at worm, makes 1000lbs at pushrod.