First time owner and first post

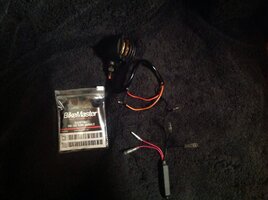
Incandescent headlight with LED tail and turn signals is fine. LED turn signals will require a no load flasher.
Is a no load flasher the same as these? The orange on the blinker is running and red is the flasher/blinker. So far only get the running to work going into the blue wire at the rear connector. No blinker yet.
 

Attachments

  • image.jpg
    image.jpg
    259.3 KB · Views: 28
Is a no load flasher the same as these? The orange on the blinker is running and red is the flasher/blinker. So far only get the running to work going into the blue wire at the rear connector. No blinker yet.
I don't think so. Resistors are for putting a load in the circuit allowing the OE flasher to function.
 
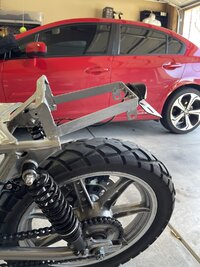
Ok guys I’ve been playing jesse James in my garage chopping the old seat mount and it’s almost time to start welding. My question is, Do I need to remove electrical parts from the bike in order to start welding parts on? Battery will be removed.

Especially around the tank mount area? I’m not too concerned about the seat area.

Also thanks for all the advice so far y’all. Really appreciate it.

I purchased an arch/stick welder from Amazon and hoping it does the trick. I need to get some strap metal to practice before going ham on the bike.

GERORD Welding Machine, Weight 3.3Ib Handheld Welder,110V Portable ARC
 
Until you get a definitive answer one way or the other, I'd play it safe - whatever that is and how far to go.
TCI box for sure. Reg/rec , rotor, stator ....what can you afford to lose?
 
Being that you seem to be new to stick welding, you'll probably "stick" the rod to the work a few times during the process. When that happens, the juice surges through the part you're welding, lol. That could fry stuff.
 
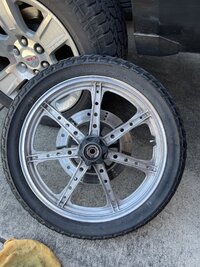
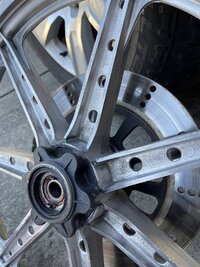
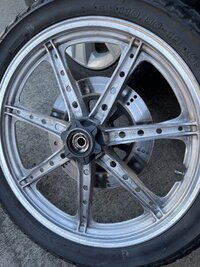
Question, if PO spray painted stock rims. I would like to take the rims back to stock coloration.
The question is. Will paint stripper eat the original black paint colored rims?

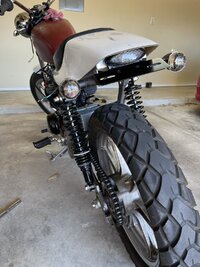
Also been welding the tail section and it’s coming along.
 

Attachments

  • 72886334779__A47D9C2A-EC9B-4691-9A8D-E4124BC4F645.jpeg
    72886334779__A47D9C2A-EC9B-4691-9A8D-E4124BC4F645.jpeg
    319.6 KB · Views: 36
  • 72886429202__2152A2BD-9DE1-486A-8A35-59FEA0710D0A.jpeg
    72886429202__2152A2BD-9DE1-486A-8A35-59FEA0710D0A.jpeg
    328.3 KB · Views: 33
As the old saying goes ..... "my welding skills have greatly improved my grinding skills ...". Get some flap discs, they give a really nice, smooth finish.
 
Question. Should I just paint these to look like stock or is there a way to strip the paint without damaging stock rim finish underneath?
 

Attachments

  • IMG_8329.jpeg
    IMG_8329.jpeg
    540.8 KB · Views: 17
  • IMG_8330.jpeg
    IMG_8330.jpeg
    382.3 KB · Views: 17
  • IMG_8331.jpeg
    IMG_8331.jpeg
    475.2 KB · Views: 17
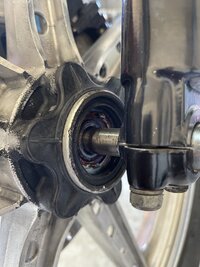
Took the front wheel off last week and went to put it back on today.

My question is, is there suppose to be a dust cover here?
 

Attachments

  • IMG_8333.jpeg
    IMG_8333.jpeg
    293.4 KB · Views: 18
Yes, the speedo drive. It acts as both the dust cover and axle spacer on that side of the wheel .....

Disc Mount Cover.jpg


Speedo Drive.jpg


The unit pictured above is from an earlier model. I like to use them for their "bling" factor. lol. They are natural alloy instead of painted black so they shine up nice. Yours, no doubt, will be one of the newer black painted units .....

XS650 Speedo Drive.jpg
 
Last edited:
Back
Top