vonhofej
XS650 Member
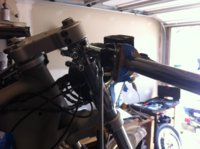
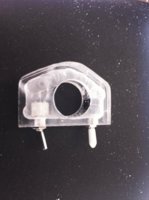
Hey guys, This is for all you purist out there. I decided to make my own low profile switch housing out of Lexan (plexiglass) after I got bored with an hour of internet shopping. It slides on to the handle bar and sits just inside the throttle.
Tools and Materials: micro switches (Radio Shack), plexiglass, router table & flush trim bit, mounting tape, drill & bits, jig saw or band saw, cardboard
Steps:
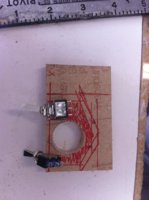
1. Create a cardboard mock up of the switch position (pic 1)
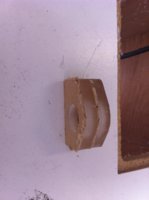
2. Drill a hole to match the diameter of the handle bars in two pieces of plexi (pic 3)
3. Test fit (pic 2)
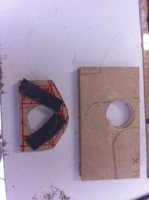
4. Layout the switches leaving space around the border, identify the area for removal (pic 4)
5. Cut out the first piece. (pic 5)
6. Place mounting tape on the cut piece and fasten it to the second blank (pic 5)
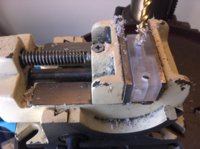
--SAFETY NOTE-- ***When using the router table with these small pieces, use push blocks or fasten them to a larger piece of material. It will try to steal your fingers.***
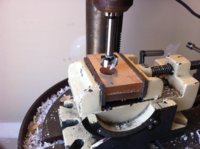
7. Use a flush trim router bit on a router table to cut the second piece as an exact copy. (pic 6)
Tools and Materials: micro switches (Radio Shack), plexiglass, router table & flush trim bit, mounting tape, drill & bits, jig saw or band saw, cardboard
Steps:
1. Create a cardboard mock up of the switch position (pic 1)
2. Drill a hole to match the diameter of the handle bars in two pieces of plexi (pic 3)
3. Test fit (pic 2)
4. Layout the switches leaving space around the border, identify the area for removal (pic 4)
5. Cut out the first piece. (pic 5)
6. Place mounting tape on the cut piece and fasten it to the second blank (pic 5)
--SAFETY NOTE-- ***When using the router table with these small pieces, use push blocks or fasten them to a larger piece of material. It will try to steal your fingers.***
7. Use a flush trim router bit on a router table to cut the second piece as an exact copy. (pic 6)