-
Enjoy XS650.com? Consider making a donation to help support the site.
XS650.com receives a small share of sales from some links on this page, but direct donations have a much greater impact on keeping this site going.
You are using an out of date browser. It may not display this or other websites correctly.
You should upgrade or use an alternative browser.
You should upgrade or use an alternative browser.
Toast
Addict
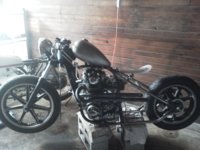
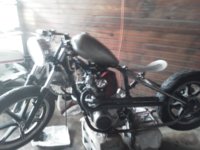
Lookin' good! Digging the left side case cover. Are you going to have the same fun with any other parts? because that could be the bee's knee's if you continue some of that through...
Also...wrapping the exhaust?
Also...wrapping the exhaust?
Thanks Toast 
Are you being serious about the cover toast? It is drilled all weird and doesnt look good in my eyes, but I have an extra one that I am going to play with.
Yes wrap is in order for the pipes, and I am thinking I might fab up some sort of heat shield.
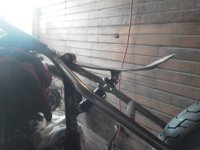
Im not sure what to do about controls though. I have sat on the bike and I think forward controls would be ok, but cant decide if it is to sharp of a riding angle with the clip ons.
Toast
Addict
 ...right..I should have clarified...but yes I am serious
The windowed one that looks like it is currently on the bike: definitely very unique, but something that could look good depending on how that theme is carried through.
The drilled, unwindowed one though I think is a better bet if you're going to use one of them. But again, I still think it's something that could look awesome depending on how that theme is carried through. Don't know if that aligns with your build thoughts though.
Can you mock up some forward to see if they are comfy before committing to them?
Labor day fun!!! Working in the garage listening to physical graphiti 
My poor little RD in the background is getting very upset with me because the 650 is getting all of my attention
Still not sure what I am going to do for the electrical box. I had an old ammo box that I wanted to use, but it just doesnt look right. Ill probably just have to fab one up. Doesnt look like ill be firing it up this weekend after all. I need oil and all the local shops are closed today. At least I dont have to work


My poor little RD in the background is getting very upset with me because the 650 is getting all of my attention
Still not sure what I am going to do for the electrical box. I had an old ammo box that I wanted to use, but it just doesnt look right. Ill probably just have to fab one up. Doesnt look like ill be firing it up this weekend after all. I need oil and all the local shops are closed today.
 At least I dont have to work

chopit25
XS650 Addict
Auto store? Wal-Mart? Looks good! 
I am Carbon
shade tree mechanic
I'm digging Your bike!
The tank looks quite a lot like mine.
The frisco style looks great with the clip-ons.
The scrambler pipes set it off for me with your set up.
I think You will have a head turner when she is finished.

The tank looks quite a lot like mine.
The frisco style looks great with the clip-ons.
The scrambler pipes set it off for me with your set up.
I think You will have a head turner when she is finished.


DEMON DAVE
XS650 Enthusiast
Labor day fun!!! Working in the garage listening to physical graphiti
My poor little RD in the background is getting very upset with me because the 650 is getting all of my attention
Still not sure what I am going to do for the electrical box. I had an old ammo box that I wanted to use, but it just doesnt look right. Ill probably just have to fab one up. Doesnt look like ill be firing it up this weekend after all. I need oil and all the local shops are closed today.At least I dont have to work
View attachment 34282
look very cool , cant wait to see more

ANLAF
XS650 Guru
What not to do is get carb cleaner on the diaphragms or try more than gentle pressure - perhaps rig up a lower end bath for the needle and the plastic seat in some fine lubricant. Do not try and apply direct heat, but you can try warming the lower end in warm water to make the metal expand just enough to release the plastic retainer within - just keep away from the diaphragm and avoid bending the needle.
While these things are dismantled keep the diaphragm assembly bagged, perhaps with some solvent the keep the diaphragm happy.
Why are those needles stuck in there? - perhaps someone has left the dismantled carb exposed to the air, moisture and temperature.
Anlaf
While these things are dismantled keep the diaphragm assembly bagged, perhaps with some solvent the keep the diaphragm happy.
Why are those needles stuck in there? - perhaps someone has left the dismantled carb exposed to the air, moisture and temperature.
Anlaf
ANLAF
XS650 Guru
ksqrly, the above is in reply to your plea for help with jet needles not coming out.
Anlaf
Anlaf
Thanks Anlaf, but I have solved that problem. The carbs are freshly cleaned and rebuilt. I ended up putting a butane torch to the valve, and it came out. Dont worry all of the other parts were out of the carb before I did it, so nothing was harmed. I also had to put a bit of heat get the mixture screw covers out.
chugg
XS650 Enthusiast
Another thing I just noticed is that there is no air mixture screw it is just filled in where the screw should be. Has anyone seen this before
Its been a while since I checked in on you. How is the project going? If you haven't found it yet the carburetor guide in the tech section by Grizld1, and 5twins is a must read. I printed off a copy to put in my binder with the other service manuals. If you have bs34 I think there is a plug with the screw under it.
Philip
ANLAF
XS650 Guru
Glad to hear you sorted out the problem, and on you go!
Anlaf
Anlaf

 Chugg
ChuggYa...I was being one of those guys who asked a question first and then did the research second ooooopss. Ill try not to do that, but sometimes I just get so anxious

I drilled a little hole in the cap and screwed a machine screw into it and popped it out with some pliers. I found this helpful article
http://www.mtsac.edu/~cliff/storage/gs/Mikuni_BS-CV_Carburetor_Rebuild_Tutorial.pdf
I know its not for the xs650 but the carbs are the same. Only we have two, THANK GOD


