OHV chain, maybe?

Any plug you put in was wet with oil in 2 minutes.

The amount of oil laying in the piston valve indents when I opened it up and the fact I have 120psi in that cylinder leads me to believe it was the head gasket. Anyone have thoughts on this. It sure seems like a lot of oil, maybe someone else had the same thing.

Fed Ex has my parts from 650 Direct, always fast service. Should assemble Friday, lots of prep work to do .
 
I'm a little fuzzy on how much sealant I should use on the head. What bead size? Looks like about 1/8".

Parts are due in today!
 
Yes, just a narrow bead. About 1/8" is the smallest you're going to get. I apply it using a tooth pick or awl. For the top cover, I "paint" it on using a cut down acid or flux brush. The top cover doesn't use a gasket, just a complete coating of sealer on all the mating surfaces. Don't do the cam bearing cut-outs.
 
Thanks 5twin. Should start assembly tomorrow, doing prep work today. Not as bad as I fist thought. Hardest part will be getting the engine in the frame.
 
Wipe all the gasket surfaces down just prior to assembly and sealer application with lacquer thinner. This will thoroughly clean them of grease and oil, and dries quickly leaving no residue.

I use no sealer on the points and advance housings. I do soak their gaskets with some motor oil. This allows them to be removed in the future is need be without damaging the gasket. Buff the ends of the cam clean and shiny using a Scotchbrite pad. This will help the housing seals seal better. I rarely replace these seals. The "improved" triple lip version Mike's sells doesn't work that well.
 
Man your timely! Got may parts at 1:45 this afternoon ordered then noon yesterday couldn't believe it.
So I got a start, about to lower jugs on but held up with tools, a friend is coming over with them.
You know, it is a shame when you get it all together and it leaks so your attention to detail for assembly if very very much appreciated!

ps having an awful time trying to change my picture on the site, will not take the one I want to use. It is not too big so it should go but will not upload.
 
...ps having an awful time trying to change my picture on the site, will not take the one I want to use. It is not too big so it should go but will not upload.

I've experienced this if I'm not careful about the filename extension. .jpeg fails, but .jpg works...
 
Update:
Delayed by not having confidence in my cam chain master link. Had to order and wait for new ones. Installed with more confidence using a nut breaker to flare the link. Swung in engine today, should be fire in the hole(s) soon. Also side tracked by planting soybeans, bike is for rain days. Some pictures to come. Many thanks for all who helped with this!
ps That hydraulic bike table from Harbor Freight is the best, it has been up and down like a toilet seat for this job.
 
It's alive! Fired it up tonight and burns clean, no oil leaks at gaskets - so far. Still having trouble with the left cylinder, runs cool. Got to be carbs, will start new thread for this.
 
All is well. Idles fine, both pipes hot, driveable. Sucked air around flange for mounting carb. Pics as promised.
 

Attachments

  • IMG_0013.jpg
    IMG_0013.jpg
    251.2 KB · Views: 63
  • pics 013 (336).JPG
    pics 013 (336).JPG
    182.2 KB · Views: 65
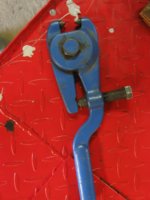
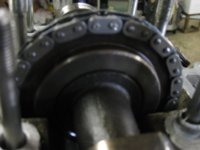
Bike now on the road and running fine. Burns clean and no oil leaks. Here, if the picture comes up, is the nut breaker I used for the link on the cam chain. It allows good control over just where you position the cutting edges to get the link just right.
 

Attachments

  • IMG_0041.jpg
    IMG_0041.jpg
    151.1 KB · Views: 80
  • IMG_0040.jpg
    IMG_0040.jpg
    115.8 KB · Views: 77
  • IMG_0042.jpg
    IMG_0042.jpg
    93.8 KB · Views: 65
Back
Top