Crossed some housekeeping and clean up items off the list today and got the static timing done.

Thought I’d post up some before and after pics of points and advance and of current timing settings.
It was really interesting to see just how much a stretched cam chain affects things.

You can see where I highlighted my old registration marks with an ultra fine point magic marker.

IMG_20180520_120628.jpg


I was running out of timing plate adjustment room, especially on the right side. This shows that pretty clearly.

Similar situation on the advance assembly.

WP_20160727_002.jpg


Here we are now.

IMG_20180520_115954.jpg


You can see on the following pics where my original timing marks end up now after reassembling it and originally setting it to my scribe marks. Wanted to see where those old idle timing marks would be at.

Here’s where we are now.

IMG_20180520_130821.jpg


IMG_20180520_130331.jpg


Held the weights open.

IMG_20180520_124626.jpg


Here we are at full advance.

IMG_20180520_125628.jpg


IMG_20180520_130244.jpg


I know you guys would know to expect this but I found such a dramatic difference pretty interesting.

Getting closer, so close I can almost smell it!
 
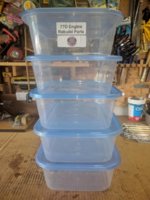
Looking at these parts bins. No parts left, which is both good and bad.

IMG_20180522_143017.jpg

Through this entire teardown and rebuild process I lost two parts. One advance housing starloc washer ('borrowed’ one from my other bike, and buddy found a replacement in his parts boxes), and one of the tiny advance weights shim washers. Although that could have been missing before, don't know.

Here she sits…….

IMG_20180522_131718.jpg


IMG_20180522_132119.jpg


Let’s see what happens……………….

Turn up your volume, grab your BEveRAge of choice, and put your feet up for 5 minutes or so. Got something to show guys.


Edit: Update slideshow

Well…….. there’s her story, and she started. Actually stalled, (edited that part out…..haha). I’m not used to having to turn the choke off so quick….lol. Man it’s smooth. Wow.

Ran 3 heat cycles. Sounds like a little valve noise. I’ll adjust valves and torque head bolts again before break in run. Retorqued twice on the bench, day after, then day after, and then once installed in the frame.

I have read to not crack the throttle during these initial start ups, so am hesitant to put a timing light on and rev to full advance prior to break in run. Thoughts?

Other things upgraded and done over the last few months:
All new seals
NOS one piece long clutch push rod
Type E cam chain adjuster
New chain and sprockets (Installed with a 2M Industries, SPROCKET LOCKIT / SOCKET TWOIT)
Tach cable adjuster freed up (With 2M Industries latest tool release, JAMMIT DAMNIT)
New Shocks
New Mirrors to install
Replacement uncorroded left side cover to install
Little cleanin’, little paintin’, little polishin’
Next job install new seat cover and put the seat trim band back on.

I can’t thank you enough for all of your help guys. Never could have done this without you.

Thanks to buddy Donster, for all the time he spent hanging in through this process here in Papa’s shop helping to get it out, tear it down, rebuild and reinstall. Thanks brother!

Jim, your rebuild thread, man. Walked me step by step through the entire process, (along with a couple ask the teacher oh boy, how bad have I messed up now PM’s).
Thanks buddy!

Hopefully will have some time in the next few days to enjoy a nice break in run and I'll let you know how that goes.

I can’t remember ever being so excited, AND relieved!
Well at least not since the kids were born anyways.

Again, thank you all!
 
Last edited:
Robin this is so great! Gives an old shade tree mechanic like me some hope that I could do this someday!
What a great video tribute you put together also. Very nice!
By the way, where can we buy our own Sprocket Lockit and Jammit Damnits? :lmao:

I have subscribed to your YouTube channel now, I want to see videos of that blue terror zooming the girls at the beach this summer!
 
Back
Top