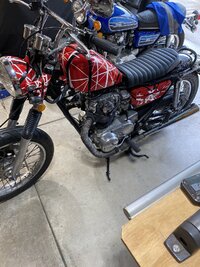
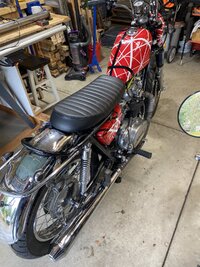
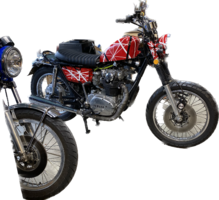
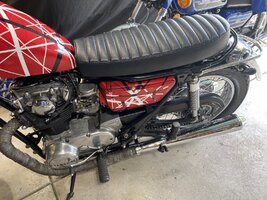
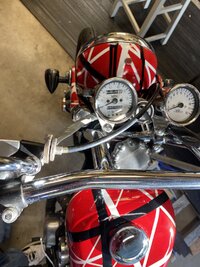
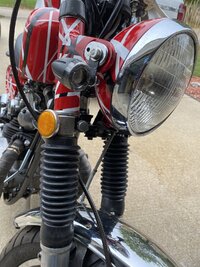
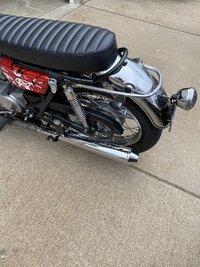
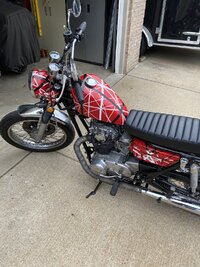
Project Bobber X2.2 the rework.

Success! I actually realized I was chasing two problems. The starter issue and an intermittent lighting issue. I had verified voltage on all the circuits using a test light but it was hooked to the battery. Using the ground side I had no issues finding voltage but when I reversed it to check my grounds it was pretty obvious the issue was in the harness. I added a jumper to ground and like magic, everything lit up!. The starter issue was actually pretty easy to trace. 12.5v at the coils, 12.4 at the Safety relay and nothing coming out to starter relay, plugged it in direct and bam! Got a starter!
 
Last edited:
Just curious how that safety relay could have stuck open? IIRC it was working on the original bike.
 
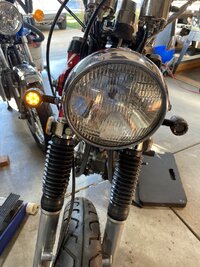
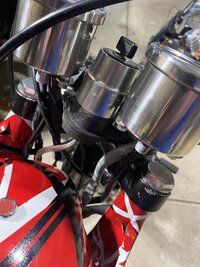
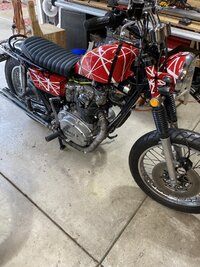
Wiring is totally sorted out, everything up front is wired and operational. I made brackets for the ignition switch and front turn signals and it was really nice that I have an extra steering set so once the switch bracket was ready I just installed it, no on and off fitting issues. Blinker units have three sets of lights. Turn/running light/stop. Only the flashers will be used on the front and I just need to make a jumper harness for the rear set to use all the functions. The next few days are supposed to be nice so I might have to get some riding in these last weeks of the season. IMG_6688.jpegIMG_6685.jpegIMG_6684.jpegIMG_6683.jpeg
 
Got the wiring done for the ignition and charging circuits with everything tucked in real nice and tidy like it’s supposed to be and I’m happy with how the harness worked out(so far).View attachment 251985View attachment 251986 I only found two small potential issues, hopefully there won’t be more. The humidity and bug traffic was down and there was just a hint of a breeze in my paint booth lol so I got everything set up and broke the seal on the Spraymax. View attachment 251983I also had the tank and side covers off my ‘75. I had spent hours shaving dead Clear off because any attempt to sand or remove resulted in getting into the base paint. I’ll post those pics in another thread but all the Bobber tins got finished as well. View attachment 251984a 24 hr cure, a little hand polish and the headlight bucket and ears can go on and when my controls show this week I can complete the control wiring.

I used to use 5-6 cans of spraymax every month because they have such a short shelf life once the seal brakes and it killed me to toss them after only using 3-4 squirts out of the bottle but doing some of the repairs I do for work there is no power and a 2k clear is needed (I’m not lugging a generator around haha). But I stumbled across Car-Rep. 2k clear with no seal, so endless shelf life.

I’ve used their 2k epoxy primer as well and it was great.

Spraymax is great if you know you’re gonna blow through the whole can (which you probably did).

Just an alternative should touch ups need to happen, or some small one off stuff.

IMG_5463.jpeg
 
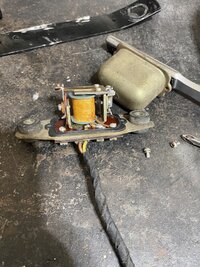
Revisited the safety relay as I noticed you could remove the cover but all it did was confirm the coil winding is open. Continuity from the contact tab out but nothing through the coil.IMG_6689.jpeg
 
I can’t believe the wiring took as long as it did but I tried to be as tidy as possible and of course the very last thing I hooked up (rear LH blinker) didn’t work. Luckily the issue was in the harness between the flasher relay and the rear connector so it was easy enough to run a new wire for that. All I have left is the tail light bracket, front fender and I’d like a longer seat. This one is just a cheap cafe seat, probably for a mini-bike lol and it’s only 20”. I’d like one at least 24” to cover all the wiring at the rear fender.71822642236__C9C74E0B-3BA6-486F-83E3-1A280189CBE2.jpeg71822647019__39E1C76B-9092-4E0E-AB63-B1E89E7A3F98.jpeg71822649566__E901ACC7-582F-4416-ADCC-EE879B820BCF.jpegIMG_6598.png
 
I can’t believe the wiring took as long as it did but I tried to be as tidy as possible and of course the very last thing I hooked up (rear LH blinker) didn’t work. Luckily the issue was in the harness between the flasher relay and the rear connector so it was easy enough to run a new wire for that. All I have left is the tail light bracket, front fender and I’d like a longer seat. This one is just a cheap cafe seat, probably for a mini-bike lol and it’s only 20”. I’d like one at least 24” to cover all the wiring at the rear fender.View attachment 252710View attachment 252711View attachment 252712View attachment 252713
That’s coming together nicely.
 
Glad that TX500 rear wheel worked out so nicely. It may even end up braking better than a 650 one because the shoes are wider .....

BrakeShoesCompared2.jpg
 
Still having crappy weather but I realized I’m not really in a hurry. I found a seat on FBMP which matched the dimensions I was looking for so I took a ride up to Saginaw this morning and picked it up. I love the length and look, drilled a hole in the underside tab and dropped it over the frame tank tab. I needed it to drop a little in the back so I pulled the staples on the cover, rolled it up out of the way and used a low heat setting to warm the plastic pan up. A clamp across the bottom with a little squeezing pressure and the pan moved how I wanted it to and after cooling stayed there. It fit right on the contour of the fender. The rear fender I used came off my ‘76 I believe and I pulled the old rusty front fender out as well. I marked out length and shape I wanted and began cutting. I got what I was hoping for.IMG_6699.jpeg71839769999__74F7441A-916C-4C5A-87E9-1B709E3217B1.jpegIMG_6701.jpeg
I can’t understand why I keep procrastinating on the tail light bracket….
 
Still having crappy weather but I realized I’m not really in a hurry. I found a seat on FBMP which matched the dimensions I was looking for so I took a ride up to Saginaw this morning and picked it up. I love the length and look, drilled a hole in the underside tab and dropped it over the frame tank tab. I needed it to drop a little in the back so I pulled the staples on the cover, rolled it up out of the way and used a low heat setting to warm the plastic pan up. A clamp across the bottom with a little squeezing pressure and the pan moved how I wanted it to and after cooling stayed there. It fit right on the contour of the fender. The rear fender I used came off my ‘76 I believe and I pulled the old rusty front fender out as well. I marked out length and shape I wanted and began cutting. I got what I was hoping for.View attachment 252799View attachment 252800View attachment 252801
I can’t understand why I keep procrastinating on the tail light bracket….
Nice work and the seat looks great.
 
I’ve read a few posts on here about worm gear replacement, clutch basket mods, a different beefier clutch lever but I can’t find anything on the lever angle. Using the clutch perch I have a slight “bow” in the cable. Is there a different perch that might have a different angle for the cable feed?IMG_6703.jpeg
 
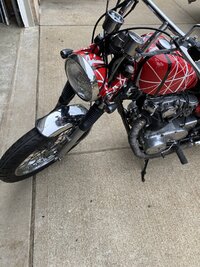
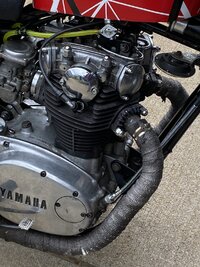
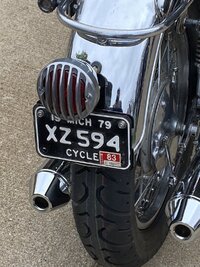
Pretty much done, I still have a few items to tidy up. I need to make and attach brackets for the seat to work with the factory latch, a stop bracket to keep the center stand from smacking the muffler and I’m going to go through the clutch. Something’s just not right there. All in all I’m really happy how this turned out given what I started with.IMG_6713.jpegIMG_6712.jpegIMG_6711.jpegIMG_6710.jpegIMG_6707.jpegIMG_6706.jpegIMG_6705.jpeg I like that I was able to use leftover parts from other builds and different bikes.
PARTS USED:
Frame section: Doner frame from KSHansen
Front fender: “76 XS650
Rear Fender: “75 XS650
Mud fender “82 XJ650
Rear Wheel. “74 TX500
odds and ends pickups. Center stand and bolts, battery cables, rear foot pegs, and probably others if I sat down and figured it out
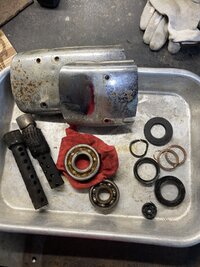
Usually when I do a build I keep a box with all the replaced and take-off parts. I used up a bunch of things I had been gathering for a couple years in anticipation of this project so win/win. Not much trash and lots of shelf room!IMG_6715.jpeg
 
Last edited:
I love the look you achieved with the rear fender and taillight - kudos!
I found that the front cups fit on the XS2 frame tabs and the hole for the tail light brace lined up with the stem on the fender stay. I just put plugs in the stay holes on the fender. The bottom holes were already there so I marked out a hockey puck(yep), cut it on the bandsaw and had a perfect hard rubber base. After the debacle welding my side cover tabs(wire was too big) I ordered a roll of smaller wire and it flowed like butter!
 
Pretty much done, I still have a few items to tidy up. I need to make and attach brackets for the seat to work with the factory latch, a stop bracket to keep the center stand from smacking the muffler and I’m going to go through the clutch. Something’s just not right there. All in all I’m really happy how this turned out given what I started with.View attachment 252974View attachment 252975View attachment 252976View attachment 252977View attachment 252979View attachment 252980View attachment 252981 I like that I was able to use leftover parts from other builds and different bikes.
PARTS USED:
Frame section: Doner frame from KSHansen
Front fender: “76 XS650
Rear Fender: “75 XS650
Mud fender “82 XJ650
Rear Wheel. “74 TX500
odds and ends pickups. Center stand and bolts, battery cables, rear foot pegs, and probably others if I sat down and figured it out
Usually when I do a build I keep a box with all the replaced and take-off parts. I used up a bunch of things I had been gathering for a couple years in anticipation of this project so win/win. Not much trash and lots of shelf room!View attachment 252982
I love a nice butt, thats a nice butt!
 
The last few days I had a minute here and there so I lubed the clutch cable and found a new route. Pulled the cover and greased up the worm, adjusted the screw and the pull was so much nicer however the engagement was still right at the end of travel so I’m going to assume the plates are worn. I’d like to here any opinions about that. The other thing I tried was adjusting the carbs using the dead cylinder method. Right carb was running sweet but I could not get the left to isle on one cylinder. I have a feeling it may be the intake boots but I need to do a few more tests and of course the Drag Specialities petcock decided to start leaking when turned on. A kit is $14 and a new Petcock is $18. Just shows where they come from.
 
however the engagement was still right at the end of travel so I’m going to assume the plates are worn.
Even a wore out clutch can be properly adjusted. The trick is to screw the perch adjustment way in first... like with only about 2 threads of adjustment left, then adjust the screw on the worm. Screw it in until there's no play, pull the clutch in and release several times to eliminate any drag from the cable.... screw in again until the play's gone... then unscrew only about an 1/8th of a turn. Lock it down and then adjust for good feel at the perch.
 
Back
Top