Vacuum Petcock On/Off?

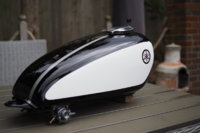
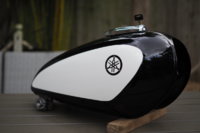
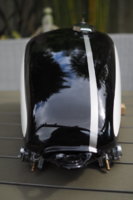
Thanks....I wanted to keep the original tank (this was the one with the hole in (as per previous thread) and also use the original petcocks as they seem pretty good quality. I bought 2 complete petcock kits for them (not cheap!!).

So, yes, when I suck on the tube it forms a vacuum (my tongue stays on). Where am I looking to see the shaft retract? Is this visible with the selector removed?
 
OI000008.jpg
OI000010.jpg
OI000009.jpg
 

Attachments

  • OI000008.jpg
    OI000008.jpg
    88.5 KB · Views: 119
I need to do it and confirm but yes if the tube is long enough you should be able to see the plunger go in out with the selector removed. In spite of the cost of kits I have completely given up on them, and buy the valve from Yamaha, o-rings for the plunger separately and reuse the rest. I have the luxury of extra used parts to make up good units. Note; Yamaha used about 6 different petcocks through the years on XS650s, they came from a couple different vendors and many parts do NOT interchange. Just in the 78 79 models, specials and standards use different petcocks......

A before after of a cheesy "assortment" plunger o-ring that had been in use for a few days
DSCN7698.JPG
 
Sorry to digress - but do I understand that you repaired and painted that tank....yourself?

I'd love to see a thread on THAT task!

Pete
 
Yup, I had the tank welded up then set to work filling and priming. I'm lucky enough to be able to get all the paint at work then had a mate spray it to my design. I can spray myself but I don't have a booth so it's easier to let him do it.

The complete build is on Instagram......
 
Yes sure check out in Instagram;

Paul_james_customs.....it's also in my signature.
 
Are you still needing to see the working part of the petcock when a vacuum is applied? I was headed to the shop and can get a few pics if so.
 
IMG_20170813_112158_274.jpg
You will watching the piston/plunger in the center hole. It should drop about 2mm when you draw a vacuum. An old separate diaphragm and piston placed above for reference.
 
I just checked out the Instagram pages, very nice work in deed! If there is one thing I particularly like it is those triangular plates that sit over the foot rest mounts and brake spline. I think everyone should have a pair of them. The brushed metal effect on the alternator cover is also fab and the etc etc etc!!!

Will be nice to see when everything finalized.
 
View attachment 104514 You will watching the piston/plunger in the center hole. It should drop about 2mm when you draw a vacuum. An old separate diaphragm and piston placed above for reference.

I have tried this and yes it moves in and out nicely, I think by doing this and then fully tightening down the faceplate I think it looks like its problem solved.

On another note does anybody know where I can find some 7mm vintage style (clear pink) fuel line for them? Ebay and Yambits are drawing a blank......
 
Back
Top