I am Carbon
shade tree mechanic
Installed the kickstart mechanism properly and can put the cover back on


 Guess he was a belt and suspenders kind of guy, he coated both sides of the gasket. But why not? It's not like this cover has to come off all the time.
  and it's easy to clean that gasket surface down in the recess.. I have an angled "chisel" ground on the end of a hacksaw blade wrapped in duct tape mainly to do this job.


Hey John, I sure hope so. I'm worried. the head wasn't even torqued down correctly the cam cover bolts ,the bolts under the spark plugs and the one in the rear above the cam chain adjuster were missing. I mean itis so simple to torque the head correctly. I have retorqued the head correctly.Damn Carbon, sorry to hear your having issues with the new engine man.
You'll get her figured brother.
 Don't want to know!
LOL I needed that. he's aI was gonna ask who "built" your engine,but never mind now!
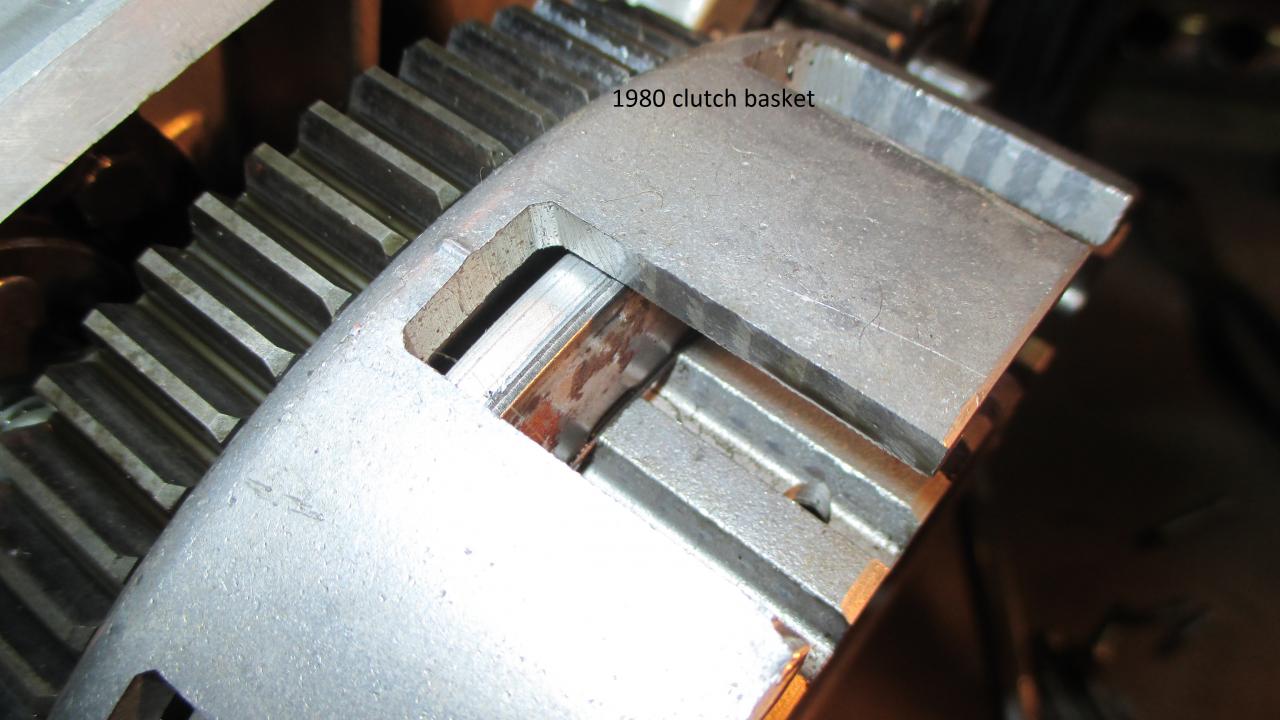
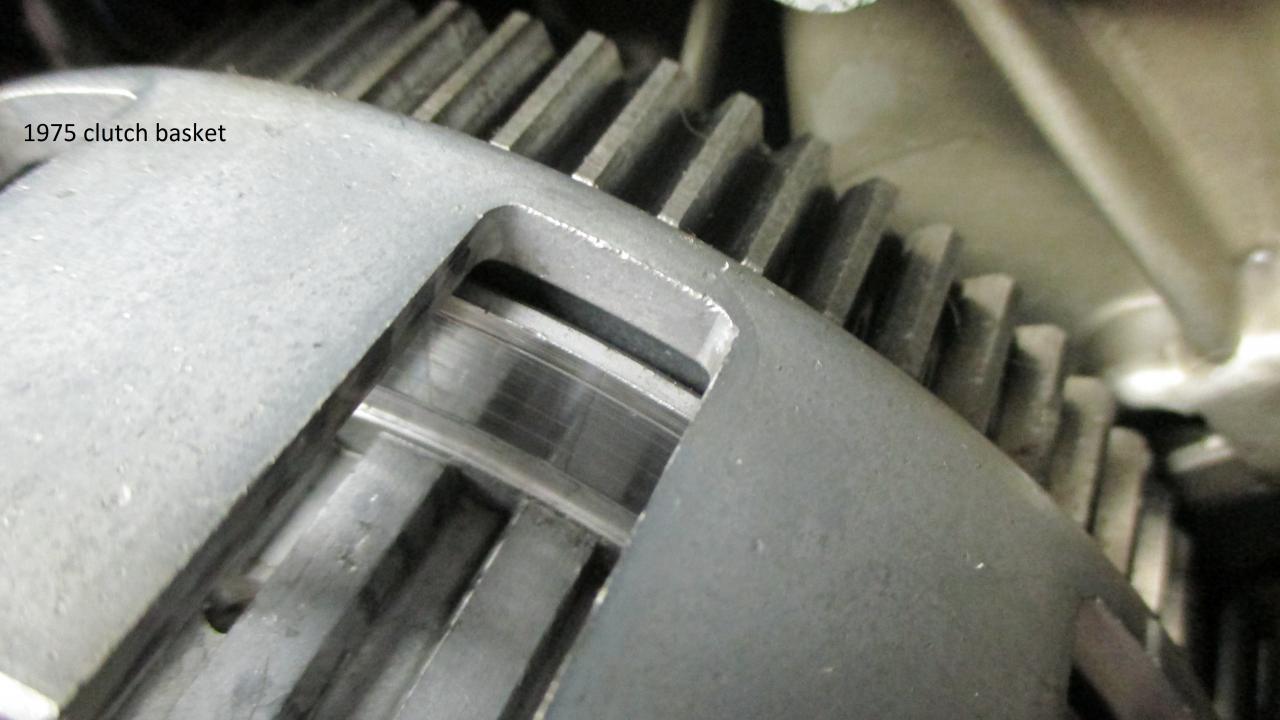
Hey Carbon, your new clutch looks to be a later clutch that is supposed to have only 6 frictions and 5 steels that some one tried to cram 7 frictions and 6 steels in. You should be able to verify that by pulling the pressure plate, frictions and steels to see if has the retaining wire for the spring loaded bottom plate. If it is just put the correct number of frictions and steels in and check your springs. When you go to re-assemble it make sure to line up the alignment marks. Might not be a bad idea to make sure that the thrust bearing and all of the accompanying washers and bushing are assembled correctly. Or you could just throw on the older 7 plate clutch and have an easier time when you are ready for an 8-pack clutch.
Fingers crossed these are the only issues you run into. What kind of gauantee did the builder provide on the rebuild?
hello fellows this is my first post please tell me if it get to you guys im been breaking my head trying to find the way to do it.