There ya go.........Ride......

There ya go.........Ride......
Ok, I’ve had the bike running good and have ridden her around 50 miles since this afternoon. I have the original Green lit Tach, and the orange lit speedo I bought from Jim, and now I can’t decide which color I like better. I unplugged the turn signal canceler, and I have to insist that everyone should do the same. I have read so many posts about the “convenience”. Look, being on two wheels is not about convenience. Having your turn signals stop blinking while sitting at the light, or halfway through the turn, is not convenient either. God I wish I would have ripped that junk off months ago. So, what have I done to my XS today? including yesterday afternoon-
Retorqued head
Replace shit rubber washers with brass washers
Mount coil
Remove flasher canceling unit
Replace exhaust gaskets
Swap gauge cases from chrome back to black
Replace tachometer with original
Polish all chrome, wax all paint
Ride
The setting sun has washed the burgundy out of the paint but here we are with the 76 on the lift preparing for a possible appearance at the fall 650 rally at Iron Horse.
Leaking petcock and float valve dumped gas into crank so I first drained that out then took off enough equipment from left side so that I could install a starter (that a PO had decided he did not need). Took the cleanest spare I had, tested it and went to install same.
First time doing this and what a chore. What with the exhaust crossover the centre stand and the exhaust pipes it was a real test of patience and (lack of) flexibility. Even on the lift. And yes, the PO painted the cases to match the tins.
The starter is on now and just have to get the gear cover on so I can jump the solenoid to see how bad or good the bendix spring is.
The starter plug I removed was a well crafted piece of kit.View attachment 122991 View attachment 122994 View attachment 122995
Not my thing, but that’s a nice clean build WPG!
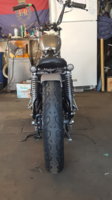
Hey - how did you ground the bars for the horn switch? It looks like they’re powder coated right across the clamps....
Videos missing,,,,Here’s a video of my “new” clattering sound. Is this still acceptable or do I need to take another look at my valves?
Sorry about that- here we goVideos missing,,,,

 I rechecked the exhaust; they’re both still perfectly at .006”- its snug and .007” won’t fit. I set both intakes to where the .004” would be really tight, and then snugged it down to where I couldnt fit the .004” in at all. Sounds great now. No clatter at all.
This is my current philosphy.I know that what I’m about to say will turn a lot of the more fastidious people inside out, but I’ve always been a bit philosophical about a small oil leak.
I regard it as an indication that the engine has oil in it, and that the oil pump is working properly.
I’m not saying we shouldn’t strive for oil tightness and clean engines, but would I tear down an engine purely to cure a weeping head or base gasket.....not likely. It would just be added to the list of things I would be planning to fix once I did get into a full engine job.
....besides, you can buy a lotta oil for the price of an engine job.