WTX's First Bike Build

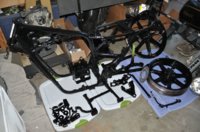
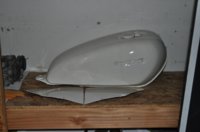
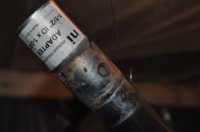
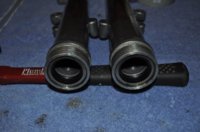
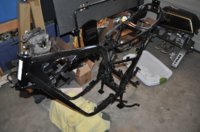
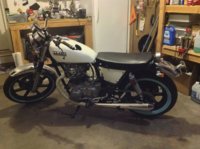
Finally got back to work on the bike after the Holidays. Spent some time in the garage today prepping the tank and side covers for paint. Also worked on the exhaust prepping the head pipes for new mufflers. I cut the stock pipes and installed the adapter as shown by PamcoPete. This mod works great if you can find the adapter at your local auto store. Hopefully I can get the tank and covers painted in the next few days and get started on the assembly.

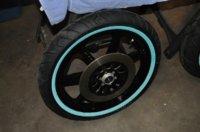
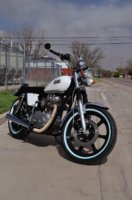
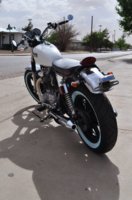
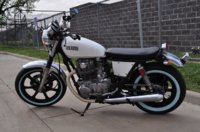
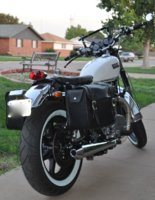
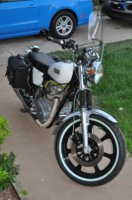
On a different note - what's everyone's thoughts and experience on the Shinko 777 series tire? I really like the look of the white wall version.
 
Finally have some pictures to go along with the updates!:thumbsup:

I have been spending a lot of time working through all of the piece parts getting everything prepped and painted. The pile of painted parts ready to go back together keeps getting bigger! Hopefully I can start assembly in the next few weeks.

I got the tank and side covers painted as well. I went with white to provide good contrast to the black components. I have ordered the silver Yamaha emblems to replace the stock gold ones. I am going for a black, white and chrome theme. Overall I am pleased with how the tank turned out. Needs some polishing but definitely looks like a good start. :D

A big thanks to PamcoPete and the others that have provided technical information on modifying the stock head pipes for use with aftermarket mufflers. I was able to find the 1 3/8" x 1 1/2" adapter at my local hardware store. I cut the stock pipes, cleaned up the burs and installed the adapters. Another great example of the information available here!:thumbsup:

While waiting on dry times and warmer weather I started tearing into the calipers. Looks like they will definitely need a complete rebuild with new pistons!:eek:
 

Attachments

  • XS650 Paint 10.jpg
    XS650 Paint 10.jpg
    186.6 KB · Views: 169
  • XS650 Paint 9.jpg
    XS650 Paint 9.jpg
    95.2 KB · Views: 167
  • XS650 Exhaust 1.jpg
    XS650 Exhaust 1.jpg
    80.5 KB · Views: 153
  • XS650 Brakes 1.jpg
    XS650 Brakes 1.jpg
    106.1 KB · Views: 159
Turned a corner in the project the last few days. Other than the calipers, all of the major components are repainted and I am ready to begin reassembly! :thumbsup:

Spent Saturday disassembling the paint booth and cleaning up.

Installed new TC Bros. bronze bushings in the swing arm. The old plastic bushings came out easily with a long punch. I had kept the bushings in the freezer for several days and did not have any issues getting them installed. Gentle taps with a hammer (bushing shielded by wood) and they slid right in.

Also got to work on the lower forks. Installed new All Balls Racing lower fork seals. They look like quality seals and were relatively easy to install.

Good to see some parts going back together!:D
 

Attachments

  • XS650 Forks 4.jpg
    XS650 Forks 4.jpg
    144.4 KB · Views: 144
  • XS650 Forks 3.jpg
    XS650 Forks 3.jpg
    149.4 KB · Views: 142
  • XS650 Swingarm 2.jpg
    XS650 Swingarm 2.jpg
    139.3 KB · Views: 150
  • XS650 Swingarm 1.jpg
    XS650 Swingarm 1.jpg
    193.7 KB · Views: 137
Thanks Anlaf! I appreciate the kind words.

Hopefully I can make an update tonight or tomorrow with pics. I have made a lot of progress in the last few days. I have gotten the front forks reassembled, roller bearing races installed in the neck, the roller bearing installed on the stem, new bearings and seals installed in the front and rear rims, new tires mounted, the swings reinstalled and the stands reinstalled. A few more hours in the garage and it should be a roller again!:thumbsup:

Pictures coming soon!
 
Finally had a chance to upload some pictures to go along with the work I have been doing.

During the week I was able to get the forks reassembled and gaiters installed. The gaiters are from Dime City and they fit up nice and tight. I was also able to get the races and lower bearing installed for the steering head tapered roller bearing conversion. I bought the kit from All Balls Racing. It was complete and was installed without issue. I put the races and the stem into the freezer before installation (you can actually see the ice crystals in the stem in the phot if you look closely). With this and the use of the old ball bearing races, they were easily installed.

I had some time yesterday to work, so i focused on getting the wheels reassembled. I installed new bearings and seals (again from All Balls). I froze the bearings before assembly and they went in pretty easily with a bearing/seal pusher (the metric set from HF is a great deal). I also got the disc installed and the tire mounted (farmed the tire mounting and balancing out the local shop). I did the same for the rear wheel. After I finished up with the wheels I began work on the frame. I installed the swing arm, the center stand and the side stand. Making progress!:thumbsup:

As a side discussion - I hate putting old crusty fasteners on a newly painted ride but I really don't want to had to replace every last nut and bolt. I ran across Evapo-Rust at my local auto store. I was a little skeptical since it is labeled to be so safe and benign. This stuff actually works really well on removing surface rust. Couple it with a Ultrasonic cleaner and little time and the rust is gone. Definitely lives up to its name!
 

Attachments

  • XS650 Rust Removal 3.jpg
    XS650 Rust Removal 3.jpg
    216.8 KB · Views: 162
  • XS650 Rust Removal 1.jpg
    XS650 Rust Removal 1.jpg
    136.7 KB · Views: 154
  • XS650 Assembly 2.jpg
    XS650 Assembly 2.jpg
    168.5 KB · Views: 147
  • XS650 Assembly 1.jpg
    XS650 Assembly 1.jpg
    130.3 KB · Views: 150
  • XS650 Forks 6.jpg
    XS650 Forks 6.jpg
    154.1 KB · Views: 142
  • XS650 Forks 5.jpg
    XS650 Forks 5.jpg
    138 KB · Views: 145
Anlaf - I do too! They are worth a thousand words!

Made a little more progress on the bike over the last couple of days. I got the front suspension reassembled and installed on the frame. It is amazing the improvement that the tapered roller bearings make in the steering feel. Definitely worth the effort for the upgrade. It is good to see a wheel back on the bike! :thumbsup:

Also spent some time reassembling the components in the center and rear of the frame. Installed the regulator/rectifier, the battery box and TCI module, the rear brake pivot and associated hardware, the inner fender and the chain guard. My box full of little bags of parts is gradually growing smaller. Still a ways to go though! :laugh:

Here is the rats nest (i.e. stock wiring harness) that I pulled off the bike. Definitely going to build my own simplified version. New wires that are not aged and brittle would make it work while!
 

Attachments

  • XS650 Wiring 1.jpg
    XS650 Wiring 1.jpg
    138.6 KB · Views: 138
  • XS650 Assembly 6.jpg
    XS650 Assembly 6.jpg
    133.3 KB · Views: 136
  • XS650 Assembly 5.jpg
    XS650 Assembly 5.jpg
    86.8 KB · Views: 145
  • XS650 Assembly 7.jpg
    XS650 Assembly 7.jpg
    104 KB · Views: 147
  • XS650 Assembly 3.jpg
    XS650 Assembly 3.jpg
    121.4 KB · Views: 152
The project is officially a roller!

I was able to spend some time in the garage tonight after work (great stress reliever). I got the rear wheel and associated hardware installed on the swing arm. After seeing it all together I have decided to ditch the chain guard for now. I am going to keep it in my parts bin but it just didn't seem to fit. I also installed the front and rear fenders and the handlebars. The bars are Daytona flat trackers from Dime City. I am still working on the final mounting position but I really like the rise and pull back. I think it will be a good looking, comfortable set up. :thumbsup:

I have the stock shocks mounted currently. I will replace them in the near future; still trying to decide on which ones to purchase.:shrug:

A little closer everyday!:bike:
 

Attachments

  • XS650 Assembly 8.jpg
    XS650 Assembly 8.jpg
    214.2 KB · Views: 146
  • XS650 Assembly 9.jpg
    XS650 Assembly 9.jpg
    225 KB · Views: 157
ANLAF - it is going back together much faster than I expected. I kept all of the hardware bagged and labeled so I haven't had to hunt for things. It also helps that I have been compiling parts for quite some time so I had them waiting in the shelf. I expect things to slow down some in the next few weeks as I work on building the new wiring harness. Only time will tell!

I am planning on keeping the starter. It is a nice feature to have for routine riding. My wife will ride the bike some (May become hers if she likes it) so it will help her as well.
 
Good luck with the harness. I put together a simplified system and adapted it when I moved from points to Boyer ignition; rotor/stator to PMA. I want to wire-in my Sparx capacitor with a relay so I can switch between battery to Sparx as a back-up.

ANLAF
 
Been a while since I have posted any updates on the project.

I made quite a bit of progress and am nearing the first start-up. I have a few loose ends on the electrical to wrap up, need to install the carbs (currently rebuilding the EX500 carbs), and install the brakes. Hopefully she will be rode worthy for the beginning of riding season!

Sorry for the poor photo quality - the battery on my good camera was dead.
 

Attachments

  • XS650 Assembly 10.jpg
    XS650 Assembly 10.jpg
    163.8 KB · Views: 169
She's on the road!!!!!

I have been able to wrap up a few of the loose ends over the last few weeks. She is road worthy and ready for riding season! Attached are a few pictures of the final product.

I couldn't be happier with the EX500 carb swap. After syncing the carbs, she starts up on the first kick and runs like a champ from idle to top end. I also added a Battery Tender plug to aid in keeping the battery charge without having to remove the seat.

I am ready to hit the road!
 

Attachments

  • XS650 Final 3.jpg
    XS650 Final 3.jpg
    175.6 KB · Views: 137
  • XS650 Final 2.jpg
    XS650 Final 2.jpg
    171.4 KB · Views: 149
  • XS650 Final 1.jpg
    XS650 Final 1.jpg
    224.5 KB · Views: 166
Made a few more changes to the Bike and wanted to post some pictures. I out a few hundred miles on the bike in form shown in the previous post and soon realized that I needed some storage for tools, gear etc. Wearing a backpack got hold in a hurry so I bought a set of reinforced soft bags. I fabbed up some brackets to keep the bags from getting into the shocks/rear wheel. I think they fit up well and match the bike. They are large enough to hold my armored riding jacket in one side and my tools/gloves/etc in the other.

I also got tired of the wind blast and high revs at highway speeds. To remedy these issues, i undertook several modifications. I purchased a 19" x 17" windshield that connects to the handlebars. I also purchased an 18T front and 30T rear sprocket. While I had the bike down installing the new sprockets, I replaced the countershaft seal, completed the one piece clutch rod swap, and installed a new coil, wires, and plugs. In stock form, the bike would run 4000 rpm at 60 mph. After the sprocket swap, the bike runs around 3250 rpm at 60 mph. The windshield is just large enough to direct the wind over my head and around my chest. For me, these are welcome changes that make riding the old XS650 that much more enjoyable. :bike:
 

Attachments

  • XS650 Bags 1.jpg
    XS650 Bags 1.jpg
    162 KB · Views: 180
  • XS650 Bags 2.jpg
    XS650 Bags 2.jpg
    259 KB · Views: 142
  • XS650 Bags 3.jpg
    XS650 Bags 3.jpg
    198.4 KB · Views: 135
  • XS650 Bags 4.jpg
    XS650 Bags 4.jpg
    188.7 KB · Views: 149
Certainly not my style of bike, but what a great job you did on this rebuild! What's great is that you have an essentially new motorcycle that can give you years and years of enjoyment and riding.

Good work!
 
Thanks Yamaha_Chop! It was a lot of fun doing it and I have a bike runs great!

I have looked at some your work! Very impressive especially megasquirt EFI - turbo project. All I can say is wow!
 
Back
Top