XS1 Build

Kgreenhaw

XS650 Enthusiast
Messages
92
Reaction score
0
Points
6
Location
Hayward, ca
Hey guys,

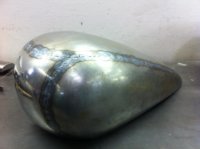
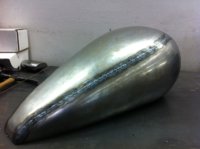
I'm new to the forum and working on my first bike build. I've had a lot of help from all the information other users have posted here, so I thought maybe I could contribute in some way. I also thought it would just be cool to show you what I'm doing. Feel free to offer any words of wisdom along the way as well!

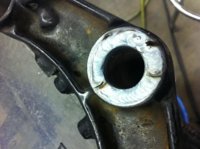
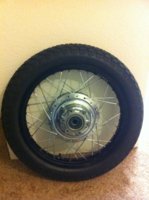
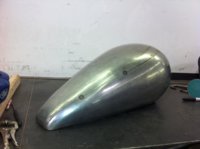
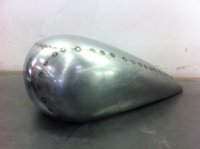
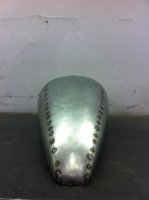
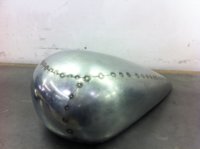
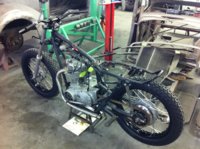
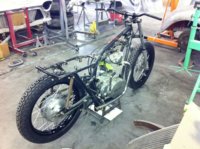
I found a '70 XS that was a good starting point...:)
 

Attachments

  • IMG_0686.jpg
    IMG_0686.jpg
    219.3 KB · Views: 284
Last edited:
The first thing I did was modify the steering stem on a set of '80 trees to fit my head tube and upgraded to tapered roller bearings. I shortened the stem, ran a few beads around the base of the shaft and turned it on a lathe to fit the bottom bearing. After that I mocked up the front end, tacked in the stem and welded it up.
 

Attachments

  • IMG_0713.jpg
    IMG_0713.jpg
    220.6 KB · Views: 187
I wanted to go with a mini drum on the front, so I got one off a trail 90 and used the rear backing plate from the same bike. My plan was to use the caliper mounts and make some kind of stop. I kept the original hub in the rear. I got some 19" rims from mikes xs and had them laced up. I wanted a vintage looking tire and decided to go with the dunlop k70.
 

Attachments

  • IMG_0735.jpg
    IMG_0735.jpg
    223.2 KB · Views: 233
  • IMG_0738.jpg
    IMG_0738.jpg
    230.7 KB · Views: 225
I looked at buying a tank and chopping it up, but I couldn't quite find what I was looking for. I figured if I'm going to hack one to pieces, why not just make one from scratch! Something I always wanted to do anyway... Here are some templates I made out of chip board.
 

Attachments

  • IMG_0770.jpg
    IMG_0770.jpg
    178.3 KB · Views: 195
Hey Kgreenhaw,

Welcome to the group, and very cool start...looking forward to seeing your build.
 
This is what the top piece of the tank looked like after a pass with the bossing hammer.
IMG_0778.jpg

The top and one side after some shaping on the power hammer and english wheel.
IMG_0784.jpg
 
After some more shaping and fitting, I got the top and right side tacked together.
 

Attachments

  • IMG_0798.jpg
    IMG_0798.jpg
    148.1 KB · Views: 211
  • IMG_0797.jpg
    IMG_0797.jpg
    163.7 KB · Views: 612
Welcome. The build is off to a good start. Like how the tank is going together. Not an easy task and you are one kick ass metal man to make it. Super fine job. Will be watching with interest. :thumbsup::thumbsup:
 
Thanks for the kind words gentlemen!

Making the front piece was probably the most difficult part up until this point. I almost couldn't get enough shape into it and getting it to butt up nice with the adjacent panels was challenging. I eventually got everything fitting nice and tacked it up!
 

Attachments

  • IMG_0802.jpg
    IMG_0802.jpg
    139.2 KB · Views: 211
  • IMG_0801.jpg
    IMG_0801.jpg
    139.7 KB · Views: 232
  • IMG_0800.jpg
    IMG_0800.jpg
    151.3 KB · Views: 241
Got the front end together, and slapped on some renthal fatbars. I made a little stand too! :D
 

Attachments

  • IMG_0752.jpg
    IMG_0752.jpg
    251.4 KB · Views: 237
  • IMG_0753.jpg
    IMG_0753.jpg
    296.3 KB · Views: 239
  • IMG_0754.jpg
    IMG_0754.jpg
    301.6 KB · Views: 242
Top, front and sides are all welded up! I'm just starting to learn how to metal finish a weld. The trick is to make small welds, about an inch in length, and as soon as you complete the weld, you want to plannish it before it cools all the way. When a weld cools it contracts and pulls in the surrounding metal, creating a "valley" so to speak. so by plannishing the weld you're essentially stretching the metal back out and smoothing it at the same time. I even do this with each tack to ensure that the two panels I'm welding are butted up nicely. I just use a hammer and dolly at the welding bench, if you have access to a pneumatic plannishing hammer you can run it through that afterwards too.
 

Attachments

  • IMG_0810.jpg
    IMG_0810.jpg
    169.4 KB · Views: 222
  • IMG_0809.jpg
    IMG_0809.jpg
    172.5 KB · Views: 192
  • IMG_0808.jpg
    IMG_0808.jpg
    132.9 KB · Views: 201
Here's the tank with one half of the bottom welded up.
IMG_0834.jpg

Other bottom half partially welded. I started notching it to fit over the upper motor mounts. I wanted it to sit low on the frame.
IMG_0840.jpg

Got both bottom pieces welded, finished notching it to clear motor mounts and rough formed the tunnel.
IMG_0848.jpg
IMG_0849.jpg
 
Did some trimming on the tunnel, here it is on the bike for the first time! I also got the new shocks mounted. I ended up cutting most of the dust cover off, I thought it looked better with more spring exposed.
IMG_0850.jpg

IMG_0847.jpg
 
all looking good, very good. gonna be a nice finished bike... and tailored to fit the top mount. far better than the job I did on my sporty tank which now sits low like that. I had to do similar cutouts. I am relieved to see you didn't leave the buck in there though:laugh:
 
Back
Top