Two pistons. One on each side.
I can't remember the answer to your lever question and I don't have one here.
I can't remember the answer to your lever question and I don't have one here.
Two pistons. One on each side.
I can't remember the answer to your lever question and I don't have one here.
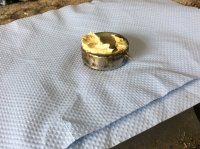
Reinstall the removed piston... once it's cleaned up enough to easily remove by hand. Hold it in place with a C clamp, vise... 2 pieces of wood and 2 clamps... whatever it takes, then go at it with the grease gun again 'till the other one gives up.I used a grease gun attached to the bleeder in order to get the one piston out... I'll be damned if I can figure out a way to remove the other. Any ideas?
Reinstall the removed piston... once it's cleaned up enough to easily remove by hand. Hold it in place with a C clamp, vise... 2 pieces of wood and 2 clamps... whatever it takes, then go at it with the grease gun again 'till the other one gives up.
Option B:I assume that you want me to bolt the two halves together first. Sounds like a plan.... and I just got done cleaning up all of the grease mess...Geeezzz!
Option B:
OTC 4799 Brake Piston Removal Locking Pliers
Of course you'll have to find something else to do while waiting.
Motion Pro has a different one, and I noted Home depot has a Bosch similar to OTC.Who knew? They make a tool for everything!
There are ways and means to remove seized pistons. If the grease gun fails your in trouble.
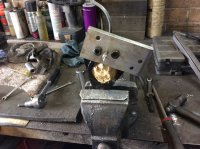
Exactly that. One side can be pushed out with an adaptor into the brake pipe union hole using a grease gun with the calliper in one piece.Rasputin,
If I follow you... Bolt a blank piece of metal to block the 'transfer port/hole' and apply grease gun. Got it!
Thanks
Exactly that. One side can be pushed out with an adaptor into the brake pipe union hole using a grease gun with the calliper in one piece.
Depends which one gives, if the blind side is stuck and you split the calliper, a piece of flat bar with holes drilled for the bolts and centre one for a grease nipple, usually will come out. There can be a lot of pressure built up with a grease gun. Messy but effective.
That one looked like mine.This thread will be documenting the build of a 1972 XS650.
I purchased the bike from the second owner who had it laying up against the back of his garage under a tarp. He bought it from the original owner who had it laying on its side, in the weeds, for over a decade. Needless to say the bike is a real mess.... and a real challenge!
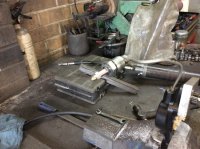
Over the next couple of weeks I hope to illustrate my method of bringing this bike back from the dead. First... here is my shop:View attachment 180639
Sorry but I do not have pictures of when I collected the bike... I had already started to clean it up prior to the decision to create this build thread.
View attachment 180640 View attachment 180642
The bike was missing the seat, both side covers and the right side muffler. The left side had to be trashed anyway. I did get the chrome seat hoop and the bottom chrome piece that holds on the seat cover.View attachment 180643
I stripped the gas tank of its paint and addressed the several rust areas. The inside of the tank had a lot of rust and gas varnish which was mitigated using a gel type toilet bowl cleaner... worked great!
View attachment 180644
After cleaning the inside of the tank I sealed it with Caswell Tank Sealer. I have used this product before and it is the best that I have found. It comes in several colors that comes in handy if you are covering up some of the remaining rust in the tank.
I am currently waiting for parts... new solenoid, rubber foot pegs, battery basket, oil filter, etc.
That one looked like mine.
Good luck.
Bill
I bought one of these. The jaws were not deep enough. I sent them back.Who knew? They make a tool for everything!
530. Mine was 105 links.Just a minor update and a question:
As I mentioned before; I got a 22 Liter Ultrasonic Cleaner for Christmas and have already put it to good use. Here are a couple of uninteresting photos:View attachment 182007View attachment 182008View attachment 182009
I used Simple Green and water (increased solution height after pic was taken) with some success. The carb body came out a little dull but a quick wipe of some Marvel's brought the shine back. I apologize for not having any before pics... but trust me these babies were filthy!
Once I put them all back together the bike started on the first kick and ran great. I had a smile on my face the entire day!
Now for the question:
I can not seem to find the spec on what drive chain to purchase? Is it a 530 or 520 chain? How many links?
'Thanks'
530. Mine was 105 links.
https://www.ebay.com/itm/324017978732
DID 530 "Standard" non O-ring chain.
Descent price and a good reputation.
-R