I'm baaack! Did you miss me?
Starter Gear Replacement and serious Mission Creep!
My starter has been sketchy since day one. Lately however it has really been jumping out of gear while the starter is engaged. I have been planning this for a long time. Fortunately for me I procrastinated long enough that several of my friends went first and did a great job of documenting their work, therefore making life much easier for me! Yay! I'm not going to document every single washer I removed because that info is available in exploded diagrams and others work. I do however like taking photos and this IS my little thread so......here we go.
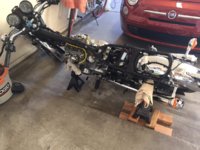
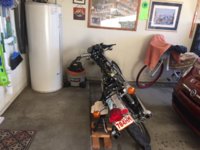
The first thing I did was to remove my gas tank, carbs, seat, mirrors, battery, right side foot peg, kick starter, and tip the bike over onto its left side, propped up on the rear lift handle and the left side exhaust pipe, right next to the head. This makes it so the oil doesn't have to be drained and everything is in an excellent position to work on.


Cover off and my first impression is that everything looks remarkably clean and there is no apparent damage to the clutch pressure plate screws.
I then removed the clutch pressure plate screws and the springs, which let me pull of the pressure plate and remove all the clutch plates.
Once all that was removed, I could then remove the clutch basket. I bought a universal clutch holding tool made by Tusk. It works well, if a little bit fiddly. It comes with one caution, DO NOT clamp this tight, use only enough pressure to hold the basket. Too much pressure can damage your clutch basket. I used a plug in electric 1/2" impact wrench to take the hub nut off. It came off RIGHT NOW!
There are a lot of washers of various thicknesses in this clutch assembly. If this is your first time in there, as it was for me. I recommend you take a lot of photos and or notes, and keep your work area neat. You'll be glad you did later.
This was my needle bearing.

Even though it wasn't broken I decided to upgrade to a MikesXS needle bearing, that has a whole bunch more roller bearings, it was an inexpensive upgrade.
With the clutch basket removed I can now work on getting to that starter gear. There is a gear in front of it that has to come off before you can get to it. First thing is removing a snap ring that holds a whole assortment of washers.
Once again the washers are numerous. Pay attention to the order as you are removing them. Now you can remove that gear.
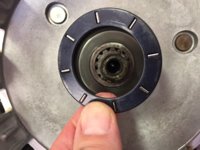
Now you can access the starter gear and the coil spring. Ah here's the one I came all this way to access.
The gear and spring really don't look all that bad. The rubber is mostly intact, the teeth look a little hammered, but the real culprit here is the wishbone tension spring, it only had only four pounds of slip tension.
I replaced this gear and spring with a new one from MikesXS. The new one, as others have reported, does not have enough tension to operate properly. I did as others have and bought a little spring loaded fish weighing scale and I squeezed the new spring until I got roughly 12 pounds of resistance to turn on the gear.
I cannot stress enough the need to stay organized. You don't want to mix up the order of any of your washers and spacers. I like to use ice cube trays to hold small parts. And I photograph EVERYTHING.
Up next, here comes the mission creep


 A vice grips works well, right xjwmx?