Just another first build.

lovin the look of the bike RD but most of all I'm so impressed at your meticulous attention to everything. :thumbsup:

I can't understand why some of us seem to have all sorts of problems getting the tuning right and others seem to dial it in first time around. ? especially considering your critical eye and attention to detail ?

I'm beginning to wonder how the dealerships ever sold these things in such numbers ?
The carbs seem to be turning out to be akin to that other Prince of Darkness 'Lucas' (quickly makes sign of cross) :wink2:

I think starting another thread to deal with the tuning aspect is an excellent idea ,it could become a useful source of reference for others if the rest of your build is anything to go by.

Haven't heard from ol' peanut for a while! Thank you. I picked that up at an early age from my boss and father.

Maybe they are tuning their bikes when the moon is at its brightest and fullest? :laugh:

Not discredting anyone that got thier bikes tuned easily (I'm sure many who did have had a lot of expierence with these bikes) but maybe they got it tuned easily the first time around because they are less "picky" or "finicky" with thier bikes. As long as it starts, builds oil psi, and doesn't stall on them it's all good to go! Just a theory anyways :bike:
 
I didn't get as much done today as I hoped for. I tested for spark again on the right cylinder just to be sure. (trying to figure out the plug is looking the way it is) It's getting a good healthy spark.

Started the PMA swap. Set the engine to TDC. Removed the old rotor, etc.

Damn near broke my hand breaking the rotor loose!

30bz3fc.jpg


There was a small, light trail of oil coming from the main seal. Decided I should go ahead and replace it while I was in there.

Thanks to Carbon for the video on swapping these out. I had the video playing on my phone while I did it. I tried racing him, but he beat me by a good 30 seconds :laugh:

351wh05.jpg


Yamabond on the outside of the seal.

2luukvs.jpg


I got the rest of the PMA installed, forgot to take a picture. But unfortunately I have to take it back off haha. I installed the new flywheel, tightened it down, and for some reason decided to wiggle it back and forth to make sure there was no binding. Guess that makes sense, but what I didn't realize is that I had not made a new TDC mark yet on the flywheel :doh:

Luckily I painted a mark on the crankshaft with a painted mark on the stator mount. so all I have to do is pop the flywheel back off, check that those two marks are dialed in, re-install the flywheel, and NOT MOVE it until I paint my new timing mark!

I hate leaving a project half way finished like that over night. I'm going to be walking by the bike all day tomorrow itching for the clock to strike 5:00 so I can fix it :laugh:


On the agenda for this week is to:

1. finish the PMA/ wiring. Make sure it charges the battery while running
2. adjust the rear drum brake
3. order two more larger pilots
4. install a piece of tape for a digital laser tachometer on the flywheel, so I can see what RPMs I'm dealing with
5. attempt setting the mixture screws by using the dead cylinder test, hopefully by pulling the vacum barbs off of the carbs.
6. ride the bike to Costa Mesa Hose right down the block from my shop, so they can make up a stainless steel front brake line :laugh:
7. test run!
 
Removed the new flywheel. Checked my marks. Still were good! Reinstalled the flywheel

note: the flywheel puller supplied by hugh's is reverse thread (ask me how long it took to figure that out :laugh:)

We have charging!

2aklhu9.png


REALLY bothered that I didn't have enough wire to install it cleaner :mad:

2a61q28.jpg


Grr. Hate the way it looks.

2q9lvno.jpg


2vcxbgo.jpg


b702sk.jpg


Just gotta adjust the rear drum brake, and I can ride it over to mesa hose for the stainless steel brake line!
 
Got the rear brake adjusted correctly. Got to rest run today!!:D

Bike stalled the first time I put it in gear. I wasn't too concerned about that; figured the clutch plates, etc needed to be "broken in." Started the bike back up, put it in gear again and it took off perfectly.


All smiles. The bike sounds great. The plugs are definitely reading on the lean side. Going to go up one more on the pilot and go from there. It runs great so far in the middle/top throttle range. Haven't gotten to test wide open yet, see below why. Just feels lean right at the first crack of the throttle

Riding the bike to mesa hose tomorrow morning to have them make a front brake line, I rode it around today with a rear drum only :eek:

After riding it the few miles I did I noticed slight oil leaks at the valve covers. Are you supposed to run o-rings and gaskets on the covers? I only have the o rings on them right now.

I've also decided I want to run a fork brace. Emailed Gordon Scott about getting one.

Supposed to get rain at the end of the week so I'll have to wait another week to fully enjoy it!
 
Front brake line. Just need to add fluid and bleed it down, then I'll be able to stop when I try a wide open throttle test :laugh:

You'll notice my speedometer cable is broken. I tried routing it cleaner, and it pulled out of the twist nut that it sits into. Darn.

eagw29.jpg


2upya8m.jpg


What's up with these oil leaks?! Ordered new filter gaskets.

x54iu.jpg


Also ordered some bigger jets from 650 central. Micheal over there is very informative. He was giving me some "tips" in getting this bike dialed in. Says a #30 pilot (what's in the bike right now) is already kind of big. :shrug:

He mentioned drilling the breather hole in the throttle slide bigger? I forgot what size bit he told me to use, but I wrote it down. Anyone heard of this? For the BS38's.

I also need to check the spark plug gaps.

Hoping to perfrom the dead cylinder test this weekend. Super busy at work this week.

Here's how the plugs sit after the couple test runs. Input?

r2vzfb.jpg


10i59vb.jpg
 
Do you have the copper washers on the 6mm screws for the oil filter cover?

Y@aaaahhhh, that 2nd plug looks bad! Time to diagnose.

I prefer to do the zonal approach to plug readings. Riding at a specific throttle openings and speeds, then do shutdown, plug pull, and read. This isolates the effects of specific fuel delivery zones and minimizes contamination from other jetting zones.
 
Added dot3/4 brake fluid to the master cylinder. Bled it down. Feels real nice.

Blitwell recoil grips and license plate brakcet (California won't let me run the vertical plate)

2r239qq.jpg


Mirror from CRG is on its way.

I dropped of the rear drum brake anchor rod for a clear powder coat.

While turning the engine over I heard a funky noise by the left cover. Removed it to inspect.

28svbky.jpg


The one bolt that's closest to the PMA flywheel is broken. The head of it is also really worn down. Leads me to believe the flywheel rubbed on it, and broke it, or it broke, then wedged itself momentarily until it was grounded down. Little bummed, but I have faith Hugh will make it right. Emailed him earlier today.
 
lucky you heard it before it caused too much damage !:wink2:
What part of the flywheel rubbed on the bolt head ? it looks like there is plenty of clearance in the image
 

Attachments

  • 28svbky.jpg
    28svbky.jpg
    162.3 KB · Views: 188
lucky you heard it before it caused too much damage !:wink2:
What part of the flywheel rubbed on the bolt head ? it looks like there is plenty of clearance in the image

The image doesn't really do it justice. The bolt head has been grounded down, so now there is plenty of clearance :laugh:

I emailed Hugh about it and this was his reply.

"There have been a handful of folks with this problem recently. Its almost always due to some "walking" of the crank, where the XS650 cranks tend to seperate at the flywheels after a bit, causing issues like yours above. If the engine is running fine, you are probably in good shape. Shoot me your address, and I'll send you an updated Hardware Kit and a new mounting plate. No Charge."

:thumbsup: should be here on wednesday.
 
Brake stay after clear coat. I like it.

29ngmqx.jpg


The controls after the new grips and mirror installed.

17y9sw.jpg


So I mounted the license plate using the horizontal rear axle mount. I can't stand it. It sticks SO far out, I don't see how you could lay the bike over at all without it catching the ground. Not to mention walking around the bike and it taking out your shin. I found the plate fits perfectly here. I think I'm going to add two little strips of LED lights underneath to light it up as well.

k9b7r4.jpg


Kick start rubber.

whyydk.jpg


We have some awesome weather right now. Hoping to get Hugh's upgraded hardware kit installed this week so I can ride the bike home this weekend!
 
Hey I was wondering what kind of turn signals those are and how much did she charge you to wrap your seat?
 
Hey I was wondering what kind of turn signals those are and how much did she charge you to wrap your seat?

Sorry for the late reply. The turn signals are from wrenchmonkees. I would not buy them again. I love them and I've yet to see anyone else use them. But when I was ordering I did not realize they were out of the US. Prices were in Euros, and the freight was insane. Way too much money on turn signals. They look and perfrom great though.

She charged me $300 with shipping.
 
For those who haven't seen the other thread, the PMA is not charging the battery.

In the process of getting a new PMA kit from Hugh. All the good things I read about him are true. Reccomend his product over others anyday :thumbsup:


Been messing around with the jetting. I went up one more on the pilot to a 32.5. Mains are still 2 up. Needle is still lowered (raised clip by one slot)

Starts and idles really well. I'm able to get idle adjusted to 1100 rpm. No more backfiring when I hold the throttle slightly cracked. But there is a hesitation/bog when you crack the throttle really quick. Which I believe means is too rich. The plugs are showing too rich as well, black and sooty. I'll do a couple other tests and different RPM's with this setting and go from there.

I'm almost wondering if the backfiring in the previous setting is from the leaning the needle clip out. If my current setup isn't dialed, i'll be returning the pilot screw to the size 30, and put the needle clip in the stock posistion, and try that.

I got the valve covers to stop leaking by running the o-rings along with the gaskets.

Made a homemade manometer this past weekend.

28je1w4.jpg


Next project! Not my bike though. My buddy got all stoked on my bike and decided to buy this 1978 CB550 four and have me build it for him.

2w7lli9.jpg
 
Wow 300 is insane, I would never pay that. If it wasnt for the fouled plugs, I would say you might be leaning out.
 
Been a while since I've posted. I've been meaning to upload a finished video of the bike. I finally got it jetted right. 32.5 pilot. Did the job.

Got the charging system all worked out. Hugh sent me a brand new PMA kit at no charge. The one I sent to him that came off my bike tested bad.

I've put 800 miles on it so far. Did a couple re-torques for the first few heating cycles. Changed the oil and filter. A couple small shavings in the oil filter, nothing concerning. The sumo filter still looked great so I didn't change it. Checked the igntion timing, valves, carb sync, etc.

Me and my girl have been having a blast riding it. It gets a lot of attention at the local biker bars (if that's even what they're called) It's flattering, but concerning. I'm super paranoid about it getting stolen.

Someone approached me a few weeks ago asking if they could use the bike for a photoshoot. I agreed. Got paid $150 for sitting there for an hour.

2873koo.jpg


Cheese.
2yn5mww.jpg


otjio4.jpg


Ran into my first problem so far with the bike yesterday however.

While getting off an offramp I heard a clicking noise coming from the rear wheel. I could also feel this noise in the rear brake pedal, as it was simultaneously making the the pedal "twitch."


I disconencted the back break to see if it was coming from the back break or wheel. Even with the brake disconnected the noise persist. Obviously I can no longer feel it with the back break disconnected, but the sound is the same.


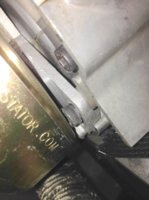
I pulled the rear wheel off to diagnosis. Everything in the brake hub looked good. Springs and shoes intact. But when I looked down the center of the hub I noticed that the long, inner spacer was floating around in the hub, not seated tight against the bearings.

I'm assuming the clicking noise is from that spacer wiggling back and forth freely around the axle.

I removed the bearings, and tried to re-seat them with the spacer. However I cannot. I tap the first bearing in (it has the top hat inside the bearing) . I know it's fully seated becauase the change in pitch while tapping it. I flip the wheel over, drop the spacer in, start the other bearing, slide the axel in to keep eeverything aligned. I tap the second bearing all the way down until I hear the change in pitch letting me know its seated, but when I stand the wheel up the spacer in the center of the hub is still floating loosely?

I thought maybe when I'm tapping the second bearing in, I was pushing the first bearing on the other side out. So I tried setting the wheel on top of a socket I had laying around, so that the bearing on the other side could not be pushed out while tapping in the second bearing. Still no luck.

Anyone encountered this problem?

My only solution as of right now is to make a new spacer that is 2-3mm longer. It's seriously that close. The spacer inside touches both of the bearings, but it's not a tight fit how it should be.
 
You replaced the rear bearings ? If so is the axle loose inside the left bearing ? And if so you probably thru away the spacer that went inside that bearing and took up the last bit of apace
 
Yo mang, I was wondering what happened to you. I guess you've been having too much fun to post. The bike look's great, I only hope I can do such work. I figured $1,000.00 would get me up and running and I was saving cash when I was approached with an offer I couldn't refuse. A 1942 Colt 1911 in 95% finish. I had to do it, for military firearms are what I live and breath. Top that purchase with a very slow winter here in the Northeast and I am back to square one, saving cash to put into the bike. Oh well, a man's gotta do what a man's gotta do. FYI, the gun sure is purty. If I knew how to post pic's, I'd get one up of it. Did I mention it sure is purty? Good luck and stay safe. It was fun watching your build. Let's see that Honda transformation.
 
Anyone encountered this problem?

My only solution as of right now is to make a new spacer that is 2-3mm longer. It's seriously that close. The spacer inside touches both of the bearings, but it's not a tight fit how it should be.

I had a sort of similar problem on my 78/9 Special and it turned out to be one of the bearing dust covers that came with the bearing set.

It looks like late type hubs have a slightly thicker dust cover by about 2mm !? which prevents you fully tightening the axle assembly

The only reason I noticed it was that the dust cover had a depression in the middle where I had tightened up the hub nut and a couple of rub marks.

 
Back
Top