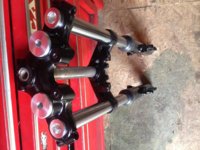
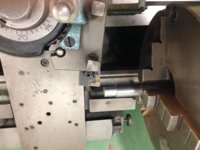
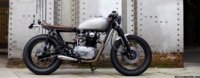
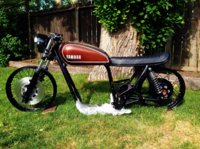
Last noodling for the night... Looking at exhaust options, my factory units are toast. I am having a tough time identifying which head pipes are the ones to order. With all things, personal taste comes into play and the pipes I am looking for have a specific bend profile that seems just right in my mind. The head pipes I am looking for are the ones in this picture, the final kick up bend occurs right below the brake pedal pad, others seem to have the final kick up a bit further back towards the rear of the engine but I am not feeling those ones. I am assuming this is one of the 1.5" od commando style headers mike sells (unless I'm mistaken) but his pictures are not quite at the right angle for me to be sure. This specific shaped head pipe seem to look very much like the 1.75" stainless ones he sells (in the picture on the website anyway) but I'm not sure about going that big, even with the big bore kit I am going to use. It seems he sells 2 different commando head pipes in 1.5" , one for the standard and one for the special, can anyone please confirm which is which for me? Again I'm looking for a pair with the same bends that is shown in this picture.
I would also welcome any thoughts on using the 1.75" stainless ones with the 750 kit, seems there is some varying opinions on this from what I've read. Leaning towards the 1.5's but I'm open to all options
Many thanks!


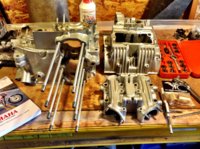
") After a couple nights of reading and weighing cost options the Heiden tuning big bore kit is on its way. The Hoos kit sounds real nice but with the added cost, machining effort and that damn Canadian/US border thing tipped the scale towards the Heiden kit for me.
After a couple nights of reading and weighing cost options the Heiden tuning big bore kit is on its way. The Hoos kit sounds real nice but with the added cost, machining effort and that damn Canadian/US border thing tipped the scale towards the Heiden kit for me.