'75 Cafe Build

hookemdevils22

XS650 Member
Messages
27
Reaction score
0
Points
1
Location
Phoenix, AZ
Hey all, I just picked up a '75 XS650B from a friend, on which I'm planning to do a cafe build. It came in boxes, but 90% of it is there.

My plans for the electrical includes a PMA and ditching the battery. I'm going to run LED turn signals and tail/brake light, with 2.5" multi-function speedo and tach and a yet-undecided-sized headlight. The bike came with the full OEM harness, but I'm ditching that to build my own similar to this.

I also have a set of 35mm later-style forks and triples that I plan to install and perhaps lower a tad. The seat will be replaced (this is dead sexy), though I'd prefer to keep the tank. Likely going with tracker handlebars with a smaller rise, and I'm kicking around eliminating - or at the very least, cutting - the fenders.

I do have a couple questions:
1) My ignition appears to be a Pamco hall effect with mechanical advance (Edit: It is indeed a Pamco unit, and does appear to have the 60° rotor.), meaning I will need a dual output coil. Is this correct? And if so, is it advisable that I ditch the mechanical advance for the E-advance?
A: It is a Pamco hall effect ignition with 60° rotor, and requires a dual coil. I'll keep it as-is for now.
0D0709E5-5DF4-4981-96FC-A9492BD87F65_zpslltlve1k.jpg

AF99DA0A-4010-4D12-B2A9-65705A30A8D9_zpszww73xmz.jpg

B951024E-DA3A-43C7-90BB-8AE476DE8AB1_zpsjsa2wxpv.jpg

2) Right under the frame, at the back of the engine above the carbs, are two 12mm ID hoses that are capped. Anybody know what they're for?
A: Crankcase breathers.
9B8E86DE-0FAA-4015-ADB7-C22D3807315F_zpsfe0vb8bo.jpg


3) My fuel petcocks don't have a provision for vacuum. Can I plug the two nipples at the base of the carbs (one can be seen in the pic above, just below the valve cover), or are they for something else?
A: Yes, plug them.

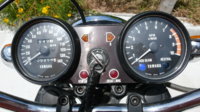
4) This one is going to sound incredibly stupid: where do the speedo and tacho cables connect to the powerplant? It looks like one connects at the front of the right side engine cover, but I can't for the life of me find another.
A: Tach to the front right side engine cover, speedo to the front wheel.

I apologize for the rudimentary questions; I haven't received the workshop manual in the mail yet.

21521A79-112A-4B04-90A3-0481EE2D8527_zpsgshmgrdn.jpg


97102ED7-0FD8-4C37-B2F7-E0DDDA2D9584_zps0bugzv16.jpg


4BC9B23E-FC4C-4A8F-8ED2-B199FAD57DED_zpslrsloedp.jpg
 
Last edited:
Yes, that is a Pamco ignition. Yes, you will need a dual output coil. You already have the 60° rotor. The older 90° rotor would have those 4 little "dots" on the rotor face spaced equally, 90° apart from one another. There's nothing wrong with the mechanical advance if it is in good shape and working order. I wouldn't change it immediately, maybe sometime in the future.

Those vacuum nipples on the carb manifolds are for vacuum powered petcocks. Yes, you can just cap them if not using them, but you must close them off. You can't run the bike with them open or you'll have two giant air leaks, lol. Those larger plugged hoses above the carbs are engine breathers. You want them open. Maybe they were plugged just to keep dirt out while the bike was sitting. They let excess pressure out of the crankcase and also sometimes emit some oil vapor. Eventually, you'll want to install longer hoses so if any oil does come out, it isn't dumping all over the tops of your carbs. Speaking of which .....

That may be a newer carb set. I can't tell for sure because the pics aren't close or detailed enough. The newer carb sets were linked and I can see the top linking bracket between the carb tops. There was also a piece of angle iron between the bottom fronts of the carbs. They also used only one throttle cable and it operated both carbs through a linkage. Those intake manifolds with the vacuum barbs would be consistent with a newer '78-'79 carb set.

It's possible the whole motor is newer. Compare the serial number on the lower front to the one on the frame.
 
Oh, speedo and tach cables - yes, tach cable to front of right engine cover. Speedo cable goes to it's drive unit on the left side of the front wheel. If the bike is just loosely bolted together, maybe the speedo drive is still in the parts box .....

XS650SpeedoDrive.jpg
 
Thanks for the replies. I wouldn't have ever guessed the speedo is run off the front tire. I'm used to trans outputs driving the speedo. Both drive cables are in boxes.

Good eye on the carbs! They are indeed linked, so they must be later ones. The engine matches up with the frame, so carbs must have been swapped.
 
Last edited:
Welcome to the forum.

Looks like you have a good starting point on a desirable year.

Some members will advise checking out the existing electrical generating system to see if it will work before putting out the big bucks for a replacement system. There will be lots of other items that you absolutely have to buy down the road.
 
Yup, I've been bookmarking items that I will be needing to buy. The harness has been removed from the bike, along with the starter and associated gears. The thing basically came in boxes. At this point, it's much easier for me to build a harness than mess with OEM, but I can wire it up as-is, using a battery off my twins' electric 4wheeler to test the system and get the engine running. I'll continue updating as I go. The manual arrived yesterday, which will hopefully keep my newbie questions to a minimum.
 
I don't know which manual you got but it helps to have several so you can cross-reference between them. The factory manual is on-line for free here .....

http://www.biker.net/

It is the '78 (and later) version but most of it will still apply to your model. Most all of the factory manuals are available on-line for free if you search hard enough.
 
I have a Haynes manual. Biker.net has schematics for the 650B, but they're the same as those in the Haynes, and there are a few things not covered. Such as...

What is this? It's an electrical switch, located under the brake lever. Nothing in the Haynes, and I can't find any other brake switch in the back.
A: It's for the brake lining warning light, located between the gauges.
B0FC694C-83B4-4458-9690-584A02ADE260_zpsitq8ydqh.jpg


And is the front brake light switch pressure-actuated, and located on the lower triple? It's on the ground, at the lower left of this photo. I assumed it was for a brake warning light.
A: Yes
5D1AF911-5ACA-4433-881F-774214B9BDEB_zpsgcgg0dlx.jpg


I also found a mechanical switch in my box of goodies, but I'm not sure if it's for the front brake, as I can't find a provision for one on the master cylinder.
A: It's the rear brake light switch.
16BFB33E-34E6-4023-9549-B8F96546CB75_zps92qxlh1u.jpg
 
Last edited:
First pic: That electrical plug in the rear hub is for a "Brake lining warning light" Warning light is between the gauges.

Second pic: Yes.

Third pic: is the rear brake light switch actuated by the rear brake lever.

Scroll down to the XSB service manual. It is in 3 languages. Laid out in Jpeg form.
http://www.xs650.com/forum/showthread.php?t=30569
 

Attachments

  • 1h 75B.JPG
    1h 75B.JPG
    278.5 KB · Views: 307
Actually, your last pic is a front brake light switch, but for the later rectangular MC, not the round style you have. The rear switch is a larger unit located on a frame tab back on the passenger peg/muffler hanger frame loop. It is double nutted for adjustment and connects to the back side of the foot pedal pivot shaft with a little spring .....

DrumBrakeLightSwitch.jpg


SpecialDrumSwitch.jpg
 
Great, thanks. I have a later-style MC in the box, but it's in rough shape so it's heading for the scrap bin. I'll likely switch to a hydraulic front brake switch (Mike's PN 29-7002), pending the condition of the master cylinder.
 
Well, got some of the wiring done, and went to put oil in before realizing that the entire tach drive has been removed and the bolt hole plugged. So I'm now looking for the tach drive, if anyone has extra parts. Can I install the tach drive parts, excluding #9, with the side cover installed?
tach%20drive_zpsfl7et6si.jpg


I installed the PMA and have wired the ignition and main circuits; she's ready to fire aside from oil. I lucked out - the kickstart wasn't returning, and I feared that the spring was broken. But it wasn't installed correctly.

I'm debating between two options for the rec/reg: either behind the engine, or directly underneath the carbs. I like the latter because it places it within the engine area.

Behind the engine:
B006023F-4288-4EB9-A6CF-82490AFCF817_zpswekdxusj.jpg


Under the carbs:
6E980D38-F0E9-41B6-B6F3-2EAF4DB11B61_zpsefcyo2n7.jpg


Finally, can anyone help me identify these petcocks? I don't believe they're vacuum type, but would like to be sure. I'm going to rebuild them.
F60727E2-2255-4C0F-BEB0-BD7BC72BF7B0_zpsbwkdmnwh.jpg

10CE5F49-0DFE-4D9B-80DC-7B20E6503F01_zpsejd6wd4o.jpg
 
Damned parts fiches anyways.

This Yamaha 447-24510-02-00 FUEL COCK ASY 2 is used on these models and components:

1970 XS1 FUEL TANK
1971 XS1B FUEL TANK
1972 XS2 FUEL TANK
1973 TX500 FUEL TANK 1
1973 TX650 FUEL TANK
1973 TX750 FUEL TANK
1974 TX500A FUEL TANK 1
1974 TX650A FUEL TANK TX650A - XS650B
1974 TX750A FUEL TANK
1975 XS500B FUEL TANK 1
1975 XS500B FUEL TANK 2 XS500B
1975 XS650B FUEL TANK TX650A - XS650B
1976 XS500C FUEL TANK
1976 XS650C FUEL TANK XS650C
1977 XS500D FUEL TANK
1977 XS650D FUEL TANK XS650D
 
The reg/rec unit needs to be kept somewhat cool. I wouldn't set it on top of the motor. Hanging off the bottom of your new electrics box would be better, cooling fins running front to back.

It's probably best you remove the right side cover to properly install the tach drive assembly. That #8 shim washer at the bottom of the #7 drive shaft may fall off while trying to install the rod from the outside. In fact, the original may have fallen off the original rod when it was removed if they just pulled it up out of the case. That washer may be floating around inside that right cover somewhere.
 
Thanks guys. I was actually just looking at that. The later carbs on the bike had me confused - I thought the early style were vacuum.

Edit: 5Twins, I thought about bolting it to my electrics box. My preferred spot would be attached to the OEM coil bracket, but the exhaust would probably fry it in minutes.

The side cover had been removed when I got the bike, and I've had it off. I didn't notice that washer, but seeing how small it is, I'll double-check.
 
Last edited:
Adjusting your cam chain may be a chore anyway as it appears you still have the original larger type C adjuster assembly. When Yamaha introduced the linked carb sets in '76, they also changed to a more compact cam chain adjuster assembly, the type D .....

TensionerID.jpg


Besides a smaller cover nut and lower location for the adjusting screw, they also angled it down a little bit. All this combined gave lots more clearance for that lower front angle bracket on the new linked carb set. Their only screw-up was eliminating the lock nut on the type D adjuster. That didn't work out too well. They came out with the type E adjuster a few years later, which is basically just a modded type D, and put the lock nut back on.
 
Back
Top