Another Boring Engine re-Build Thread: Advice Welcome

SpongeBobbed

650 Simpleton
Messages
122
Reaction score
25
Points
28
Location
Calgary, Alberta
Hi Everyone,

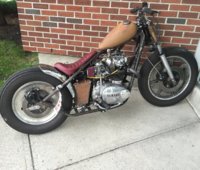
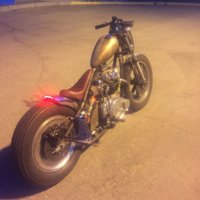
I've "built" a few 650s over the last 10 years or so, but am no way an experienced builder when it comes to engines. Over the last few years I put together the bobber pictured below, and have had a lot of fun on it. I know the wheels/handlebars/stance are not set up for a go fast bike, but it's a blast to ride.
IMG_0358.JPG

IMG_8334.JPG

Last year I took a few hundred km trip with some buddies and one the way home I was getting smoke out of the jugs. I ended up having to trailer the bike home and let it sit for a while as I was building a 1984 Harley FXRT and put all my time and money into that. That project is now finished and I decided to rip into my 650 to get it running for the spring. When I tore down the engine I noticed right away that one piston was scored really badly, one of the jugs was also scored and the small end rods on my crank were pretty messed up. I thought about sending the crank to Hugh to do a full rephase with new rods but money is tight so I bought a cheap used engine and took the crank, jugs and pistons from that. They looked in good shape so I took the economical route for now.

I've completely torn the engine apart and am now ready for the rebuild phase. I've read through both the Clymer and Haynes manuals and I think I'm ready to go. I wanted to document my rebuild experience so that I can ask all you experts the little questions that are hard to get answers for. I know that there are plenty of threads on this already, but I thought it couldn't hurt to add one more. If you have any advice or answers please feel free to chime in as I'm always looking for some help. Thanks a bunch!!
 
So here's my engine taken out of the bike.

IMG_1012.JPG

It had a Pamco system, Hugh's PMA, aftermarket oil filter, new valves and guides, and the crank had been rebuilt with new rods and bearings by previous owner.
 
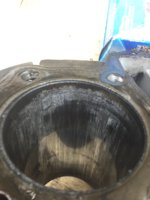
Here's the jug completely scored.
IMG_1119.JPG

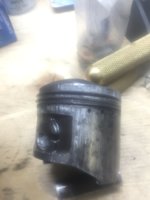
And the piston that came out of there

IMG_1132.JPG

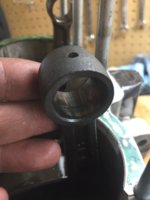
So I was orginally thinking I would just bore out the cylinders and put some oversize pistons in there, easy fix! That was until I started getting into my crank and took a good look at the small end of the crank rod. As you can see they were pretty scored and had to come out.

IMG_1128.JPG

I also noticed that there was more play on the small ends then was recommended in the manual. So this meant that I had to spread apart the crank and put new rods in there. I didn't have access to a 20 ton press so this wasn't an option. I was planning to send it to Hugh's, and since I had the engine apart I decided I would give it a good clean.

This is where I made my first major mistake.
 
cruzinimage_co has oversize pistons for $80. Daddygcycles on here had an unreal price on a crank assembly a while back. Conceivably git 'er done for a couple bills.
 
So the engine was all apart, trans and crank out, etc., and I thought it was time for a good clean. I talked to some friends and looked on here and it looked like it would be safe to glass bead the engine. So I took it to my local blaster and put it in the cabinet and started blasting away. When it came out I was thrilled. The engine was super clean and it looked brand new.

IMG_1320.JPG IMG_1315.JPG IMG_1322 copy.JPG

Well my happiness turned to sadness when I started looking closer and talking to one of my buddies who rebuilt his engine. Turns out if you want to soda blast your engine, you need to do it when the engine is together and the all the holes are plugged. The engine looked beautiful, but now all the bearing surfaces in cases where scratched really bad. Glass beading is great for the outside, but the super tiny particles actually get embedded into the cases and can cause some damage once you bolt everything together and get the engine nice and hot again. I was told I might be able to salvage it by scrubbing every surface super clean but there was no guarantee that would work. At this point I was pretty bummed. Now I have a shit crank, shit jugs and pistons, and i screwed my cases!
 
Last edited:
I've kept the cases just in case they can be salvagable. I started scouring the internet for new cases and I was coming up empty handed. There was a bunch of stuff on ebay but it was overpriced. I went to the local old motorcycle shop here and they had a super beat up engine that had literally been spray painted three times (it has a very nice mix of black/blue/pink all over it) and they wanted $500 for it. I almost bought it by my better judgement told me to walk away. A couple days later a new add came up on craigslist and a guy had a storage locker full of 650 parts and I was able to pick up one of his engines off him for $150. It didn't have the rocker cover but I was able to use mine.
 
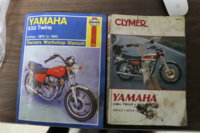
So I started tearing this engine down and I was happy with what I found. Pistons and jugs that were in great shape, and crank that was in spec and bearings that looked good. I used both my Haynes and Clymer books to break it down step by step. I was finding that there were some parts of the Clymer book that were helpful and sometimes the Haynes was better. Here's the books I used.

IMG_4226.JPG

I personally found the Haynes to be better for me. Seemed like there were more detailed instructions and I could follow it step by step a little more, but to each their own.
 
So I don't think I'll give a step by step instruction on how I disassembled the motor. I doubt many people want to see that and the manual does a good job of showing you how to do it. If anyone wants any details just shoot me a message and I'd by happy to show you what I did.
The three things that were paramount for me when pulling everything apart where:
1. Clean work bench
2. Properly storing and labelling each and every part
3. Taking more pictures than I thought where necessary

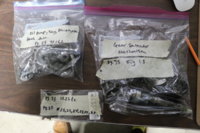
This is generally how I stored and labelled my parts. I used a lot of big and small zip loc bags and put a piece of masking tape on each one.

IMG_4227.JPG

I wrote what the part was, the page that I could find the diagram on, and what specific part number each was on the diagram. I would also write the page number down where their were instructions on how it came apart. For example, for some small parts of the gear selector mechanism I wrote that the visual instructions were on pg.33 in the Haynes book and that photos 13.2b and 13.2c showed how it was disassembled. I then wrote that the diagram was on pg.35 and the specific parts that were in the bag were 22-27. This way if I ever had any issues I could refer back to that.
 
I also took a ton of photos of every step. I took photos from different angles, took photos before it was taken apart, during, and after to show as references. Again, this way I could see what it should look like going back together and what order the parts came off in.

For example, here are 8 photos I took of the gear selector mechanism. It's definitely overkill but I wanted to make sure I could completely understand how it was set up just from the photos.

Gear Mech 1.jpg Gear Mech 2.jpg Gear Mech 3.jpg Gear Mech 4.jpg Gear Mech 5.jpg Gear Mech 7.jpg Gear Mech 6.jpg Gear Mech 8.jpg
 
So after breaking everything down, putting all the parts into bags, labelling them and making sure everything was still there I ended up with a bench full of all the big parts. I took some time to split the cases. This actually took the longest out of everything. I carefully removed all the bolts and it just wouldn't come out. I ended up taking my heat gun to the cases hoping that I could pry it loose with some heat, but after about an hour and half of working it just wouldn't budge. I went on the forum and did some more research and found out there was one last little bolt hidden under the clutch side. Once I found out where that was I was able to split the cases with no problem.

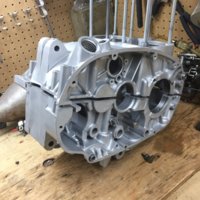
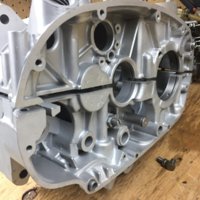
So I had all the smaller parts in bags, and the following big parts sitting on my bench: crank, bottom engine case, top engine case, cam, side covers, the two different transmission assemblies, jugs, head and rocker cover. I decided that since I had it all apart, it was time to clean the crap out of this thing. In my opinion there is no point tearing and engine apart and not building it back up looking beautiful. So instead of making the same mistake last time, I decided to take it to a local shop that had a vapor blaster and could give this thing a really good bath.

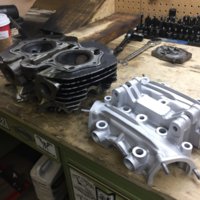
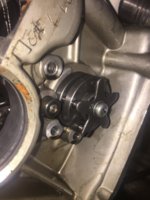
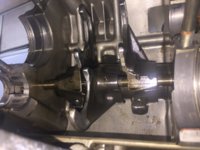
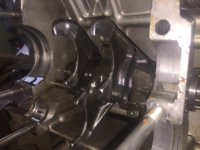
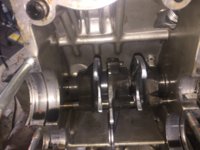
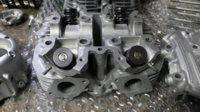
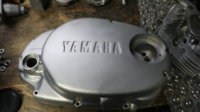
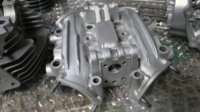
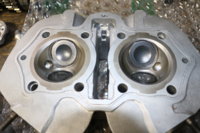
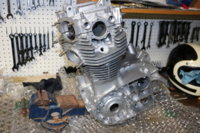
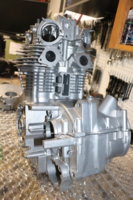
Here are all the big parts after they had 8 hours in the vapor cabinet.
Clean 2.JPG Clean 1.JPG Clean 3.JPG Clean 5.JPG Clean 9.JPG Clean 18.JPG
 
Back in Late '77 I bought a mid 60's CB77 (305 Superhawk) for $35. Cylinders bored to take CB350 pistons. Engine was apart and I too glass beaded the pistons and head to clean them. Put it back together and got it running. Had to transfer and had a friend sell it for me. He changed the oil and told me about about the glass beads in the drained oil.
Your doing good the with the bagging and tagging and taking pics. Keep at it.
Your vapor blasted engine looks good!
 
While I had the head apart and getting cleaned I had the valve seats cleaned up and had intake and exhaust ported. When I put my fingers in there you could feel a really sharp edge it was definitely blocking the flow of air. We cleaned that up and now we should have some good air flow going in and out of there.
 
So now I am ready to start putting everything back together. I purchased an athena gasket kit and a full seal kit. I'm also going to purchase complete top and bottom end fastener kits as well as you might as well have some shiny bolts on a nice clean engine. I just got the parts back from the blasters today so I'm going to give them a nice bath in warm water and soap.

Now is where I'm looking for some advice. Here are a couple questions I have for the forum:

1. I'm going to buy the copper washers for the head bolts. Should I buy the top end copper sealing washer kit and the brass cylinder head washers? If I need the head washers, how many should I get? I'm having a tough time telling by the diagram. I'm thinking 8 but could be wrong.

2. Does everyone recommend the 5th gear overdrive? I'm thinking since I have the transmission out it would be good to install.

Thanks!
 
I did the 5th gear OD and run a 32T rear and 17T front (stock) sprockets. I'm no lightweight too. It works OK for me. I had to get the brass sleeve in the OD gear honed to fit at a machine shop.
 
Glass beading is great for the outside, but the super tiny particles actually get embedded into the cases and can cause some damage once you bolt everything together and get the engine nice and hot again. I was told I might be able to salvage it by scrubbing every surface super clean but there was no guarantee that would work.
They can be salvaged. Steam clean the hell outta them. The heat expands the metal and any bead matter imbedded will be blasted loose. Fill all the holes and passageways with your solvent of choice (stoddard, MEK, acetone....) and blow em out with a blow gun multiple times. And then steam clean em again. All is not lost...
 
Should I buy the top end copper sealing washer kit and the brass cylinder head washers? If I need the head washers, how many should I get? I'm having a tough time telling by the diagram. I'm thinking 8 but could be wrong.
If I'm understanding your question, all you need is the 8 washers... doesn't matter if you buy em in kit form or individually... cept' maybe the price.
 
They can be salvaged. Steam clean the hell outta them. The heat expands the metal and any bead matter imbedded will be blasted loose. Fill all the holes and passageways with your solvent of choice (stoddard, MEK, acetone....) and blow em out with a blow gun multiple times. And then steam clean em again. All is not lost...

Sounds great. I'll take a stab at it and see if I can make them all good again. We have a little steam cleaner with a jet nozzle that we got suckered into buying at a home show so I'll try to put it to good use :)
 
Back
Top