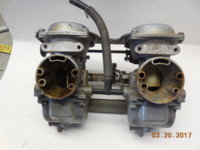
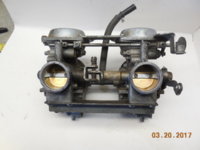
... or more than you wanted to know about corroded BS34's and bilge salvage in general .
I've spent years acquiring mechanical survival skills from various areas . Although an experienced motorcycle mechanic my skills have come from such widely diverse areas as organic chemistry , cabinet making and restoration , wooden boats , aircraft and antique vehicles of many descriptions and eras .
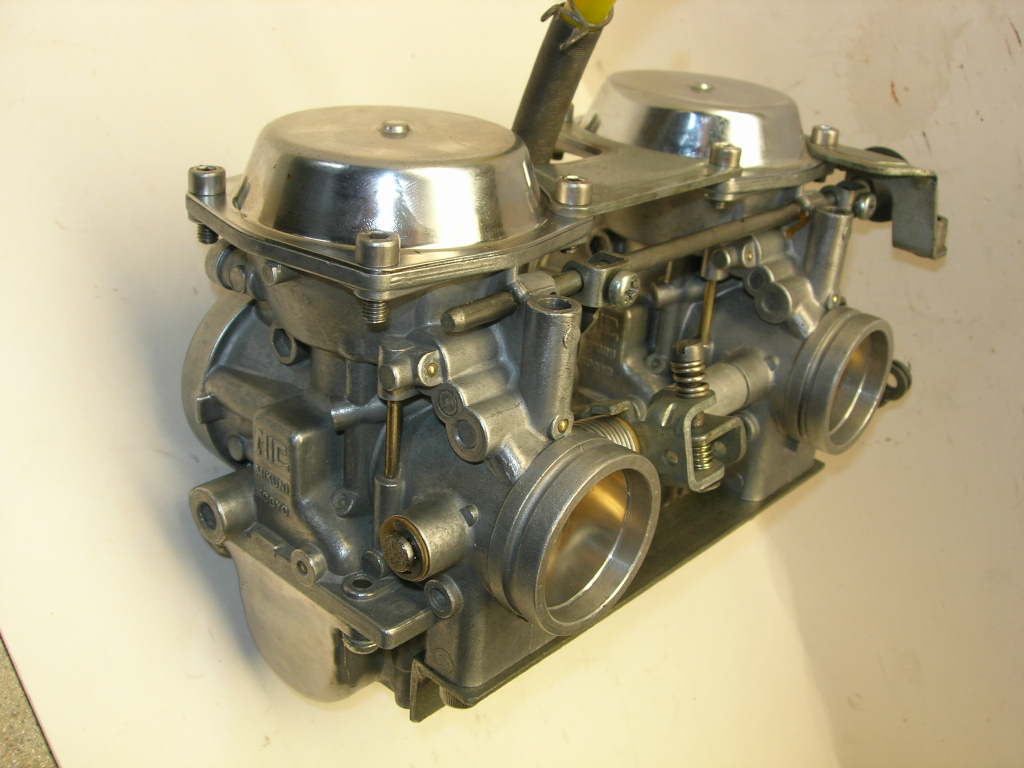
Every spring a seemingly endless parade of carburetor cleaning would come through the door . Most were just plugged pilot jets and general cleaning . That is not what I want to talk about here . Every once in a while a bank of or a single carburetor would come through the door that would be a challenge even for my talents .
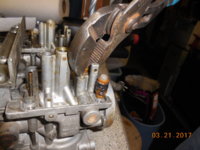
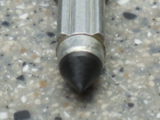
Just getting the carburetor(s) off can be a unique task . Snap-On made a now obscure radiator hose removal tool about 16"long that has a curious double bend at the pointed tip that is like nothing I've found since . It' is with out a doubt the best thing I've found for removal and installation .
Once on the bench I solidly support the carburetors as best I can and find a 3/16 to 5/16"punch or drift and not so lightly tap on each screw I'll be removing . Occasionally I'll find one or all of the screw slots ruined by previous attempts to disassemble . I'll tap all the burrs and damage back into the center of the screw head . The final few blows on the screw head are straight down on the screw . This has the effect of waking up the threads . If your father or grandfather wasn't a cabinet maker this may not make sense but it's the best description I can give you .
If you don't know what value a hand impact tool is to a motorcycle mechanic stop right here and do the prerequisite reading . I don't think even the weekend cycle mechanic can survive without one . Apex makes P1 , P2 and P3 Phillips head , 3/8"drive bits . The P1 is most often found in 1/4"drive .
Take the correct bit and a short , disposable 3/8"drive extension (disposable because you are going to be pounding on female end ) and center it on the screw head lined up with the now mangled screw slots . Drive the bit solidly into the slots reforming them as you drive it in . Likely you will be able to remove the extension and have the bit stick in the screw head . This isn't always the case but is the best case . Insert the hand impact into the bit and turn counter clockwise to load the impact driver . It's not unusual for the screw to turn and be easily removed at this point but most will not . Again solidly supported ,and in some cases supported directly under the screw to prevent casting breakage, take a firm grip on the hand impact holding pressure counter clock wise and hit the impact driver with a hammer . A number of things can happen at this point . Ideally the screw turns . If not the slots are completely destroyed and the bit removes them completely . If not the screw head snaps off . If not you didn't hit it hard enough . If not you hit it too hard and broke the casting .
If the screw turned , success .
If you didn't hit it hard enough , try again . This is an acquired talent and takes a bit of feel to get right .
If you hit it too hard and broke the casting you are a hammer mechanic Like I once was and need professional help .
If the screw head snapped off either you were not able to wake up the threads or didn't take the time to . Again seek professional help because repairing or replacing threads this small , with this little margin to work with is best solved by saving the original threads . That little bit of mechanical wonder is for another time .
As good as these reformed screws look do not be tempted to reuse them . Replace all of them .Preferably with socket head cap screws .
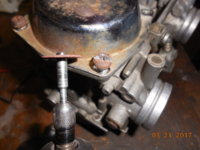
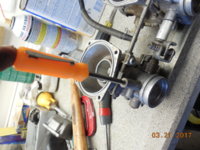
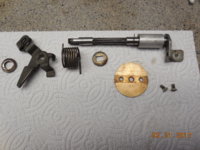
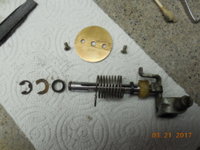
In most cases the carburetors will not have to be removed from the rails and I don't recommend it for a variety of reasons but alignment is the primary reason . In the severe case where a deceleration valve (typical Honda) needs to be removed or the carburetor bodies are so fouled that removal is looking like an option , stop . Find the smallest roll pin you can at the local nut and bolt and get it as long as you can . Find the correct drill bit (should be close to 1/16") and drill from the cylinder head side of the rail into the carburetor body using a drill stop or piece of tubing to prevent the drill from going in too deep . Most carburetor castings are not full flush with the rail so drilling as near the outside of the area in contact with the rail will ensure that you bite into metal and not void . A change in resistance to the drill and a change in chip color and consistency will let you know that you have gotten through . Now drive the pin into the hole and trim it leaving about 1/4". As above use the hand impact and appropriate bit to remove the screws while solidly supporting the carburetors.
Finally we're inside the carburetors and can't believe that anything like this could possibly happen just because of old fuel . After having removed all the rubber parts that could be damaged by solvents I give these special cases a very special bath . I'm fortunate enough to have a supply of moderately used transmission fluid that doesn't smell like a house fire but if you don't when was the last time you did a fluid and filter change on the daily driver ? The bath consists of transmission fluid and acetone . Mix it any way you like . For the initial bath I don't use much acetone . Some time later remove the carburetors , drain and rinse . I have a safety clean solution but there are others available . This first dip is just that a dip to soften up the deposits . Remove from the chem dip and rinse .
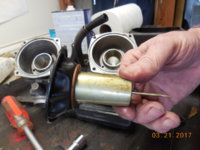
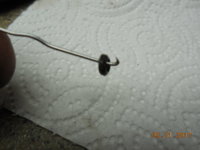
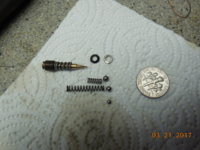
On the bench we have a still ugly set of carburetors with floats , needle valves and seats , with jets still installed . First things first . The hinge pin for the float has to come out . Don't hesitate , grab the micro torch the first time . I have turned several small C-clamps into tools to remove these occasionally obstinate items from their fragile supports but in most cases a small amount of heat from a micro torch or a hot soldering iron will get them to move . Again , solidly supported use a pin pinch to attempt to get the pin to move . Some , not all , are easier to remove from one side so experiment tapping the pin back an forth gently until enough is exposed that you can grab it and pull it out . I can't emphasize enough just how fragile these posts that the pin is pressed into are .
All I can say about jet removal is fill the slot . I mean fill the flat blade screwdriver slot completely.
Some main jets are hex head but most are slotted . I have made screwdrivers from drill blanks for most common slots . These are not the common screwdriver shape but a blade shaped on the end of the drill stock with no taper . I want the flat of the diameter to rest on the upper surface of the jet and the blade to nearly touch the bottom of the slot . The handles are 1"aluminum or brass round stock and the shaft of the driver pressed into the handle . I want solid tools I can hit repeatedly with a small hammer while turning . Again start with heat first not as a last resort . Here is where I use a 50/50 mix of clean transmission fluid and acetone alternating with heat . Finally insert the bit into the jet . It should be sized so that it is between a slip and light press fit . While tapping the driver with a small ball peen hammer apply steady counter clockwise pressure . If the jet doesn't move with moderate pressure apply heat and 50/50 mix over a period of time . Patience is the key here . If the slot in the brass gives up it probably isn't your fault , some previous maniacal manic mechanic has probably destroyed the jet prior to your efforts . At this point all you can do is resort to a careful drilling and extractor . If you don't understand this part find someone who does ...
I've spent years acquiring mechanical survival skills from various areas . Although an experienced motorcycle mechanic my skills have come from such widely diverse areas as organic chemistry , cabinet making and restoration , wooden boats , aircraft and antique vehicles of many descriptions and eras .
Every spring a seemingly endless parade of carburetor cleaning would come through the door . Most were just plugged pilot jets and general cleaning . That is not what I want to talk about here . Every once in a while a bank of or a single carburetor would come through the door that would be a challenge even for my talents .
Just getting the carburetor(s) off can be a unique task . Snap-On made a now obscure radiator hose removal tool about 16"long that has a curious double bend at the pointed tip that is like nothing I've found since . It' is with out a doubt the best thing I've found for removal and installation .
Once on the bench I solidly support the carburetors as best I can and find a 3/16 to 5/16"punch or drift and not so lightly tap on each screw I'll be removing . Occasionally I'll find one or all of the screw slots ruined by previous attempts to disassemble . I'll tap all the burrs and damage back into the center of the screw head . The final few blows on the screw head are straight down on the screw . This has the effect of waking up the threads . If your father or grandfather wasn't a cabinet maker this may not make sense but it's the best description I can give you .
If you don't know what value a hand impact tool is to a motorcycle mechanic stop right here and do the prerequisite reading . I don't think even the weekend cycle mechanic can survive without one . Apex makes P1 , P2 and P3 Phillips head , 3/8"drive bits . The P1 is most often found in 1/4"drive .
Take the correct bit and a short , disposable 3/8"drive extension (disposable because you are going to be pounding on female end ) and center it on the screw head lined up with the now mangled screw slots . Drive the bit solidly into the slots reforming them as you drive it in . Likely you will be able to remove the extension and have the bit stick in the screw head . This isn't always the case but is the best case . Insert the hand impact into the bit and turn counter clockwise to load the impact driver . It's not unusual for the screw to turn and be easily removed at this point but most will not . Again solidly supported ,and in some cases supported directly under the screw to prevent casting breakage, take a firm grip on the hand impact holding pressure counter clock wise and hit the impact driver with a hammer . A number of things can happen at this point . Ideally the screw turns . If not the slots are completely destroyed and the bit removes them completely . If not the screw head snaps off . If not you didn't hit it hard enough . If not you hit it too hard and broke the casting .
If the screw turned , success .
If you didn't hit it hard enough , try again . This is an acquired talent and takes a bit of feel to get right .
If you hit it too hard and broke the casting you are a hammer mechanic Like I once was and need professional help .
If the screw head snapped off either you were not able to wake up the threads or didn't take the time to . Again seek professional help because repairing or replacing threads this small , with this little margin to work with is best solved by saving the original threads . That little bit of mechanical wonder is for another time .
As good as these reformed screws look do not be tempted to reuse them . Replace all of them .Preferably with socket head cap screws .
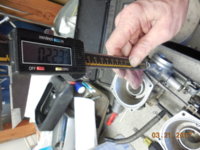
In most cases the carburetors will not have to be removed from the rails and I don't recommend it for a variety of reasons but alignment is the primary reason . In the severe case where a deceleration valve (typical Honda) needs to be removed or the carburetor bodies are so fouled that removal is looking like an option , stop . Find the smallest roll pin you can at the local nut and bolt and get it as long as you can . Find the correct drill bit (should be close to 1/16") and drill from the cylinder head side of the rail into the carburetor body using a drill stop or piece of tubing to prevent the drill from going in too deep . Most carburetor castings are not full flush with the rail so drilling as near the outside of the area in contact with the rail will ensure that you bite into metal and not void . A change in resistance to the drill and a change in chip color and consistency will let you know that you have gotten through . Now drive the pin into the hole and trim it leaving about 1/4". As above use the hand impact and appropriate bit to remove the screws while solidly supporting the carburetors.
Finally we're inside the carburetors and can't believe that anything like this could possibly happen just because of old fuel . After having removed all the rubber parts that could be damaged by solvents I give these special cases a very special bath . I'm fortunate enough to have a supply of moderately used transmission fluid that doesn't smell like a house fire but if you don't when was the last time you did a fluid and filter change on the daily driver ? The bath consists of transmission fluid and acetone . Mix it any way you like . For the initial bath I don't use much acetone . Some time later remove the carburetors , drain and rinse . I have a safety clean solution but there are others available . This first dip is just that a dip to soften up the deposits . Remove from the chem dip and rinse .
On the bench we have a still ugly set of carburetors with floats , needle valves and seats , with jets still installed . First things first . The hinge pin for the float has to come out . Don't hesitate , grab the micro torch the first time . I have turned several small C-clamps into tools to remove these occasionally obstinate items from their fragile supports but in most cases a small amount of heat from a micro torch or a hot soldering iron will get them to move . Again , solidly supported use a pin pinch to attempt to get the pin to move . Some , not all , are easier to remove from one side so experiment tapping the pin back an forth gently until enough is exposed that you can grab it and pull it out . I can't emphasize enough just how fragile these posts that the pin is pressed into are .
All I can say about jet removal is fill the slot . I mean fill the flat blade screwdriver slot completely.
Some main jets are hex head but most are slotted . I have made screwdrivers from drill blanks for most common slots . These are not the common screwdriver shape but a blade shaped on the end of the drill stock with no taper . I want the flat of the diameter to rest on the upper surface of the jet and the blade to nearly touch the bottom of the slot . The handles are 1"aluminum or brass round stock and the shaft of the driver pressed into the handle . I want solid tools I can hit repeatedly with a small hammer while turning . Again start with heat first not as a last resort . Here is where I use a 50/50 mix of clean transmission fluid and acetone alternating with heat . Finally insert the bit into the jet . It should be sized so that it is between a slip and light press fit . While tapping the driver with a small ball peen hammer apply steady counter clockwise pressure . If the jet doesn't move with moderate pressure apply heat and 50/50 mix over a period of time . Patience is the key here . If the slot in the brass gives up it probably isn't your fault , some previous maniacal manic mechanic has probably destroyed the jet prior to your efforts . At this point all you can do is resort to a careful drilling and extractor . If you don't understand this part find someone who does ...