Chaising the infamous hanging idle - Carb tops possibly?

Yes on the "sprayer with straw" trick.

You could also try to eliminate the possibility of a crack at the bottom of the inlet tract, by carefully and slowly painting small daubs of grease on the underside of the head, in this area, adjacent to where the inlet tract runs, while it's doing its hi-idle thing.

Head-RightInlet02.jpg
 
Last edited:
Aw heck, 2M, I'm betting you've nailed it--as usual! Material gets awfully thin in that area. If that's it, Sci, don't despair; believe it or not, J B Weld holds up nicely in intake ports. If there's a crack use a rotary tool to widen it just a bit to give the JB a little more area for adhesion, fill, and sand. Use the regular formula, not JB Quick.
 
For a poor mans leak down: get the crank held at TDC in gear rear brake applied works) feed air in the plug hole, two part compression testers let you connect an air hose. Turn compressor dial down to zero PSI, slowly add air, listen around to see where it escapes. turn crank to TDC other cylinder, repeat.


I'm thinking one butterfly hanging up is still very likely.
 
Last edited:
Thanks guys for the tips. I will check all the above and report back when I get a chance in a few days.
 
@gggGary I performed your quick leakdown test as you described (checked the valve clearances first). Well, I can't even check the head gasket because all but 1 of the valves is leaking air past it. Hmm, must have done a pretty crappy job of lapping those. Well, I guess this is why we do it...to learn huh? I also noticed the left side crank seal behind the rotor is leaking. Ugh. So, looks like I'm going back in regardless. :(
 
^You can do the seal behind the rotor without splitting the case. Need a seal puller from NAPA that looks little pickax, and a piece of PVC pipe (sink drain replacement part) to drive the seal in with. Hammer the pickax into the seal and lever it out.
 
At least that's some good news. But, I'm thinking if I have to open the engine up again, I might as well go all out with a new big bore cylinder, have the valve seats recut, get the crank rebuilt, etc. Just got to figure out how to pay for it now haha
 
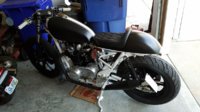
At least she looks good sitting still lol...
 

Attachments

  • 20170509_172937.jpg
    20170509_172937.jpg
    160.9 KB · Views: 165
At least that's some good news. But, I'm thinking if I have to open the engine up again, I might as well go all out with a new big bore cylinder, have the valve seats recut, get the crank rebuilt, etc. Just got to figure out how to pay for it now haha
Looks like you won't be using any JV Weld then.
 
I also had a persistant hanging idle which I eventually cured but I must have taken the damn carbs off a dozen times to get there.

Try this test when the engine is idling high. Press down hard on the throttle shaft attachment against the idle adjust stop and see if that reduces the idle speed at all.
I found that my butterfly discs were not centred properly allowing the discs to drag against the sides of the venturis preventing the throttles to return fully.
I centred the butterflies and added a stronger spring to the throttles which pretty much solved the problem for me.

I also found slight air leaks around both of the choke bodies where they bolt to the carbs . I renewed the gaskets with a smear of liquid gasket either side . It only needs to be a tiny minute air leak to make the idle mixture too lean and the revs to rise and hang.


you might find something helpful in these vids
 
Last edited:
Hay Peanut !
Very nice precise and to the point video's ! THANK YOU !!!!! Well done !
....
Bob.........
 
Hay Peanut !
Very nice precise and to the point video's ! THANK YOU !!!!! Well done !
....
Bob.........
why thank you kindly young Bob :)

They were thrown together when I first got my bike and looking back some are a bit cringeworthy now but they definitely have helped a lot of folk over the years particularly the vids on Boyer Branson ignitions and clutch and kickstart installations so I reckon it was worth all the time and effort it cost me to produce them , errors and all.;)
 
well, you did a damm good job there Peanut ! and I see the cat was supervising your work too ! HAHHA !
Kool !
C ya !
Bob.........
 
Good stuff guys thanks! I performed gggGary's poor mans leak down and found 3 of the valves leaking air so I'm pulling the head regardless. I also found a leak in the left side main seal and a tiny pin hole on one of the diaphragms that I missed originally dang it. So, I've got some things to rework now.

@peanut - when you do the slide test, should it be slow all the way from the top? I can't tell from the video. I ask because my slide initially drops normally for the first 1/4-1/2" then continues dropping slowly like you demonstrate.
 
@peanut - when you do the slide test, should it be slow all the way from the top? I can't tell from the video. I ask because my slide initially drops normally for the first 1/4-1/2" then continues dropping slowly like you demonstrate.

yes the slide should not drop sharply at any point of its travel. If it does it would suggest that you have a tiny air leak somewhere around the diaphram.
I smeared a little vasoline around the edge of my diaphrams because I couldn't cure a tiny leak like I show in my vid...it works a treat but don't touch any part of the slides if you have vasoline on your fingers
 
Peanut , Your thinking correctly on it's slide but he asked when it initially starts and it will Drop say 1/4" to get the vacuum built up
at first when you take your finger off the slide to start the test... yes it will fall a short amount then, after the short fall, it should progress evenly all the way down ....sounds like their good to me ! LOL
( good thinking on don't touch the slide with the gooie fingers Peanut ! they have to be clean ! and just a touch of vaseline will make them stop ! ...... Right ? )....
I douse mine with WD-40 and havn't had any trouble .... have you done that Peanut ?
Bob........
yes I clean the slides last thing before fitting them always.

The slides should definitely not suddenly drop at at any point .

If your slides drop sharply at any point then I'd say you also have either a tiny air leak somewhere or the diaphrams are saggy or shot.;)

If there was no air leak then you should get a vacuum above the slide when closing off the atmospheric vent at the front.
It might not effect some folk too much to have a slight hesitation on snapping the throttle open but most of us strive to get a fast snappy throttle response
 
not even when you take your finger off the slide and the vacuum is equal on both sides of the diaphragm ? sense the vacuum is equal in testing the slide has to move a bit in order to create the vacuum to hold the slide up...... just that initial small amount mind you .
not a big amount by any means enough to create vacuum on the top side of the diaphragm to hold the slide
what your saying is true for in Operation,.... but the test has no vacuum in it and the slide trying to come back down has to create it's own vacuum before it slows down to a crawl..... that's how I see it.
do you still maintain from the let go of the slide on no drop ? not even to get the vacuum in the top pf the diaphragm ?
interesting !
thanks Peanut !
Bob..........
 
When you do the slide/diaphragm test, the slide (#1) is lifted, then cover the crescent-shaped port (#4).

Carb-BS38.jpg


When that #4 port is covered/sealed, it traps air under the diaphragm. If there's minimal leakage, the slide will be held up by the trapped air pressure in chamber #4. No vacuum involved here.

Not only does this test the quality of the diaphragm, it also tests the effectiveness of the choke/enrichner plunger.

70-73-Enrichener.jpg


Therefore, the test must be done with the choke/enrichner "off", otherwise the trapped air will simply leak (#11) past the plunger into the carb throat (#12)...
 
OOOOH ! ok Now I understand ! I thought #3 had vacuum in it not pressure in #4... in that case Peanut is absolutely Correct then !
as I thought he probably was in the first place ! HEHEHE thanks for clearing that up for me 2M
........you guys are GREAT !
Bob..........
 
Back
Top