Flattrack racer build

Champion750

XS650 Addict
Messages
100
Reaction score
0
Points
16
Location
Los Banos, CA
Since I put up my first post on choosing ignition systems for a flattrack racer build a few weeks ago I figure I might as well start a thread on this build.

My name is Robert and I live in Central Valley CA and have been racing bikes for about 20 years, mostly flattrack. I have only ridden an XS650 based flattrack racer once (stock engine in a Boss frame) in a practice session that was owned by a friend. This will be my first XS based build and I'm starting from scratch. Well actually I already have an engine so not totally from scratch :). It's from a 1980 Special II and totally stock. Also, I won't be breaking the bank here but at the same time this will not be a 'budget build' either.

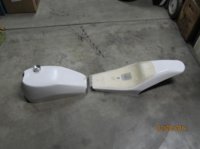
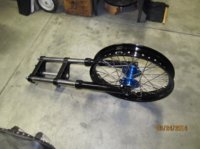
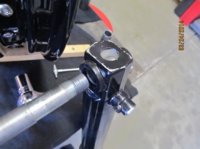
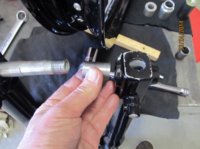
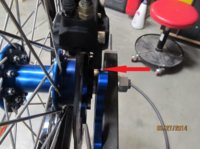
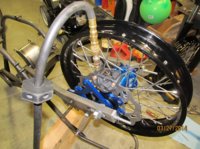
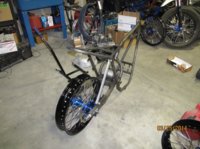
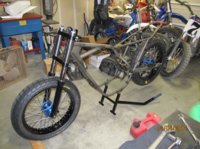
Here is the frame. I just took delivery of this beauty last week. It's a VMC Champion 'copy'. Special thanks to Doug Horner and all his help.
IMG_0564.jpg

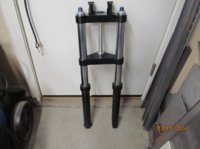
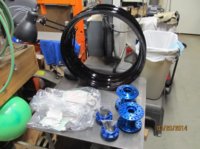
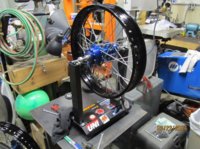
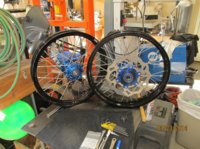
More pics to come as I'm acquiring parts as this is posted.

Cheers,
Robert
 
Welcome to the forum Champion750 or Robert great to see an old CA flattracker on here I don't feel alone. Really looking forward to your build, the Champion frame is a awesome start for the real deal as you know. If you ever get over to the central coast let me know I am sure we know many of the people.
 
The person I contacted for the frame was Doug Horner. I got his contact info from the AHRMA web site. Here is the link: http://dev.ahrma.org/?page_id=246
Doug charges $2500 + shipping for what you see in the picture. There are no mounts for the head stay, forward engine and no bolt for the lower engine. The buyer has to manufacture these. The reason for this is that it gives the welder a little more le-way in locating these mounting points instead of them having to be dead nuts every time. Also helps to keep costs down.
I can tell you that its a beautiful piece of work! Doug can also offer lots of helpful tips when setting up the rolling chassis and getting the engine mounted up as he has plenty of personal experience racing these frames.
 
I know I haven't posted to this thread in a really long time but I've just been collecting parts and doing a lot of waiting for parts to come in. Lately I've finally been able to assemble some things so that it looks like something's happening instead of just a big pile of parts.
Here's a list of what's pictured:
2002 Yamaha R6 forks, new seals, oil and springs from Durelle Racing
West Coast Racing triple clamps
A&A Racing hubs
Excel front rim, Sun rear rim and stainless spokes/nipples from Buchanan's
Seat and tank from Jack Warren at First Klass Glass

I'll try to post more pics of the work I'm doing because I'm doing a lot of work in the shop making things to suit my taste. One example is I moved the axle bearings in the rear hub (Barnes style) out into the knock offs like the Kennedy hubs. This meant making a new bearing spacer as well. Next is axle spacers and getting the tires on the wheels so I can get the frame up off the ground and start taking measurements for shocks.

More pics as work progresses...
 

Attachments

  • IMG_0640.jpg
    IMG_0640.jpg
    128.4 KB · Views: 750
  • IMG_0652.jpg
    IMG_0652.jpg
    150.7 KB · Views: 779
  • IMG_0653.jpg
    IMG_0653.jpg
    194.1 KB · Views: 722
  • IMG_0654.jpg
    IMG_0654.jpg
    250.4 KB · Views: 753
  • IMG_0657.jpg
    IMG_0657.jpg
    270.7 KB · Views: 782
Got the front wheel mounted up to the forks. Had to make a little sleave for the A&A Racing front axle. I don't know why A&A made that axle the way they did. Might be that it is meant for more than one front end. Axle spacers are done too so now all that's needed is to mount the tire. Next is the back wheel which is more complicated because of the brake.

More pics to come...

P.S. How do you post pics so that they are large and have a caption below each picture? I see this a lot in other posts. Thanks for any help.
 

Attachments

  • IMG_0665.jpg
    IMG_0665.jpg
    176.5 KB · Views: 2,015
  • IMG_0664.jpg
    IMG_0664.jpg
    178.6 KB · Views: 585
  • IMG_0663.jpg
    IMG_0663.jpg
    157.1 KB · Views: 621
  • IMG_0662.jpg
    IMG_0662.jpg
    132.6 KB · Views: 669
  • IMG_0661.jpg
    IMG_0661.jpg
    154.2 KB · Views: 569
  • IMG_0660.jpg
    IMG_0660.jpg
    224.3 KB · Views: 684
Setting up the rear wheel in the swing arm. It's more complicated than the front because of the brake. It's hard to see but, in the pic with the arrow, you can see that the caliper didn't want to line up with the hanger. So I had to remove material to make things line up.

Next is tires and steering head bearings so I can get the frame up off the ground to determine shock length (among other things).

Thanx everyone for the positive responses. Building a bike from the ground up is a big project. So many details....
 

Attachments

  • IMG_0674.jpg
    IMG_0674.jpg
    218.7 KB · Views: 757
  • IMG_0671.jpg
    IMG_0671.jpg
    171.9 KB · Views: 749
  • IMG_0673.jpg
    IMG_0673.jpg
    237.8 KB · Views: 841
  • IMG_0666.jpg
    IMG_0666.jpg
    220.9 KB · Views: 993
  • IMG_0668.jpg
    IMG_0668.jpg
    192.5 KB · Views: 728
Got these back from R&D Service in Iowa. PVL ignition, right side shift and remote starter setup for the 650. Racing season has started so work will slow down on this but progress is being made. Also finally got the frame up on wheels.
 

Attachments

  • IMG_0694.jpg
    IMG_0694.jpg
    250.5 KB · Views: 2,730
  • IMG_0696.jpg
    IMG_0696.jpg
    187.8 KB · Views: 809
Back
Top