Gasket sealing surface

hard_y_rd

XS650 Guru
Messages
1,876
Reaction score
23
Points
38
Location
P.E.I, Canada
So the P.O sandblasted the gasket sealing surface on the clutch cover. I put a gasket on it anyway hoping it would seal. It seemed to work until i moved the bike around on my homemade wooden stand and seemed to have sprung a small leak.
My question is: Do I look for another clutch cover or can i get the surface on the leaky one planed down or something?
 
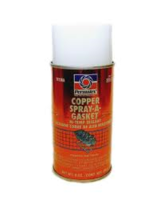
On an engine rebuild. Its done on the base gasket. Copper spray type. Wont hurt to try. You can pick that up at any auto parts store
 
Yamabond JUST the cover's sealing surface, oil the other side of the gasket, assemble. Resist the urge to over tighten the bolts. Hope that works for you. If it were me, and I do this fairly often, I take a long flat file and VERY carefully place it across two areas of the sealing surface and lightly stoke, constantly moving it around the whole cover so I take just high spots until I see file marks everywhere. OR and this may be better, put some say 320 grit on a FLAT surface put the cover on it, work it it circles, inspect to see where the low spots (gaps in sanding marks) are, see if you can make them go away. Then assemble as above. For either method remove the oil pump first clean cover completely before assembly.

Yes the covers interchange, well there is a year or 3 with more clutch plates that has more clearance for the clutch pac? but that wouldn't bother a 73. Some of the late model covers have an oil sight gauge but it doesn't hurt anything. Interchange shows 1970 to 1980 fit I think the 81-83 do also. the 83 cover shows it fits back to 1974, I am pretty sure it works on the earlier bikes too.
 
How about glassing it in? Some valve lapping paste on a sheet of glass rub cover gasket surface in paste to get a level and smooth finish?
 
I read that on here before about the sandpaper or lapping paste trick but that was on smaller covers and such. I guess it would work if you were careful enough. I might go that route or buy one on fleabay. I polished the cover so i kinda want to use it. You guys know how long that takes.
By the way Gary, what is the proper torque for those cover screws?
 
generally 7 ft pounds on a 6mm bolt in aluminum. A PO may have raised the threads in the block surface by overtorquing.....
 
The real lesson here is that you never sand blast aluminum ... waaaay too aggressive. Razor blade and a 3M abrasive pad will always remove gasket crud - just takes some care and patience. Yamabond or Gasgacinch both seem to work well for filling and sealing nicks and such on a clean and reasonably flat sealing surfaces when just a dry gasket won't retain oil.
 
I use paint stripper. It softens the gasket so it is easily removed without damaging the sealing surface. Sometimes it takes several applications but it hasn't failed me yet. Just prior to assembly, all surfaces are wiped down with lacquer thinner.
 
Iuse copper coat on both sides of gaskets,let it get tacky then install gasket.
As far as the bolts go Id put a little blue lock tite on the threads then snug them up with a 3/8 drive ratchet:wink2:
 

Attachments

  • copper coat.png
    copper coat.png
    36.6 KB · Views: 127
Dude musta been real brutal with the sand blaster.... is it a small nick or has is made recessed areas?

For me paint stripper and a flat stanley blade with a lot of care. Then i use a wet dry paper, usually 800 grit to smooth it and get off the last little residue. I get it clean enough to eat off. If i see an obvious nick from PO or whatever and i have time, i will make up a little jb weld and fill it to smooth.

The hex head bolts i torque to about 6.5 foot pounds so gggary is right as usual.
 
Back
Top