What have you done to your XS today?

Those special bars are like limp pretzels never seen a set that was perfectly straight, You can bend them looking at a passing babe....
I figure I'll see if I can tweak the bent ones to match the spare set while both are off. Never can tell when I might need a spare set.

Good little project for the morning!

Oh! I did find out that the kick start lever from the 1972 will not quite work on my 1982 Heritage. Seems it is just a little bit closer to the side of the engine that the one off the 1982 and if you kick it down all the way it binds on the rear brake lever. No problem I found the one off the 1982 so will swap that tomorrow too!
 
Most of you know I have been fighting my '83 XS650 trying to get it to start properly and it's been fighting me all the way.....
today I took off the carbs again and started looking for things I may have missed in the previous 4 attempts..... and there they were the float bowls
the choke passageways on each float bowl were plugged solid..... I got'em cleaned out and put the thing back together and the choke seams to work now.... we'll see how it starts in the morning when it's cold !
Bob......
 
it was driving me crazy,.... I went out and felt the engine cases twice ! last time it was cold to the touch so I tried it.... it fired on the first revolution ! and reved to about 3000rpm which I thought was kind'a high !!!! but it started like it should have !!!!! so SUCCESS !!!! WOOOOT !
lol
Bob........
 
Way to go, Bob!
You've successfully peeled another layer off the onion.


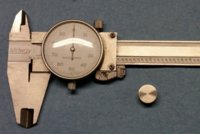
I'd been working on parts for the magic clutch, using my favorite calipers, when I felt something crumble in my hand, and things falling to the floor.

The el-cheapo plastic hook that holds the thumbwheel shattered, almost lost the thumbwheel. Dangit, my favorite caliper, and I really depend on that thumbwheel.
CaliperThumbWheelHook01.jpg

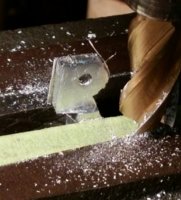
Well, that hook thing isn't available. Some clever fellows have made their own using 3D printers, but not for sale, they're just exchanging CAD files. So, have to carve one outta aluminum.
CaliperThumbWheelHook02.jpg

New hook from aluminum. Should outlast the plastic versions.
CaliperThumbWheelHook03.jpg

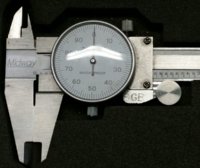
Installed, returned to service...
CaliperThumbWheelHook04.jpg
 
Last edited:
Hay way to go 2M ! thats down right clever of you ! i bet that one won't brake off in your hand ! LOL
well done !
but you got my couriousity up now....why didn't you use the old humb wheel and Just make the clip ? not wide enough for the beefier clip ?
....
Bob......
 
OH ! ok well that makes sense !
how did you clamp such a small piece to the mill ? looks like you need tweezers just to hold it ! LOL
small things on the mill give me cold chills.... I can invision them coming off and going through me ! LOL
( maybe that's why I mill stuff at slow speeds ? )
anyway looks like clean living and perserveriance prevailed once again Congrats ! .....Wish I had a set of calapers like that ...mine went through the house fire ...needless to say they ain't what they used to be.... HAHHAH!
c ya !
Bob.........
 
Thanks Halfmile, I have the tires for mine but I will need to take one of the rims to the paint store to get a paint match. Once that is done I will mount up the tires and I'm sire your right, that will make a big difference in the next mock up.
 
today I pulled the carbs off twice to try and set the float level..... only to find that the measuring stick I was using was in inches not MM
I also noticed that there was no way to adjust them as far as they wanted...... so I figure I'll let it set and get back to it later when I have a Milimeter measuring thingie ! .... I thought my ruler was in MM but turns out (when I put my glasses on it was in 1/32" graduations..... go figure !
so today was sort'a a let down.... but I did open up the air boxes a bit so it could breathe better ! and lubed the choke lever ! but that's about it !
.....weird that 3 out of 3 manuals all have diferent settings for the floats on '80~'84 I am taking 22mm as 2M says to be the gospal on the settings
but in my search I got 24mm,22mm,and 27.3mm LOL
Bob.........
 
Bob, when it comes to setting the float levels quite a few build a wooden frame to mount the carbs on the bench and attach a small homemade fuel tank. This saves having to keep pulling and fitting the carbs. Mine is very simple:
  • The L brackets screw to the bench
  • The carbs fit in the middle and are set level with a spirit level - Important
  • The carbs are held securely by tightening the threaded stud and then the level checked again
  • The fuel tank is an old acid top up container that came with the battery
I got this idea from this Forum - it is brilliant!!
IMG_0662.JPG


Edit: Forgot to say that I also could not adjust the floats to specification but everything worked well - mystery?. Months later I realised I used the wrong reference point. On rechecking I found I had coincidentally got it right after all. The mm setting depends on the carb model and float type (metal verse plastic) so check carefully.
 
Last edited:
Well not too much.
Did decide to install the fuel tank and took a look inside as I have had this bike sitting in the barn for going on 17 years. I believe I did manage to get it running back when I first got it but not since as it was jumping out of some gear as I recall.

I was almost shocked when I looked down in the tank, nice bare steel with no sign of rust. Well I "knew" the fuel valve was going to be bad with that old fuel in it! Again almost shocked to take it apart and find no gummy stuff and nice looking rubber parts. Hooked up vacuum hand pump and no leak on the diaphragms!

Installed tank and set valve to "Prime" and dumped in about 1 gallon fuel. Took a few kick but then it did fire up and sounded nice. Turned to "Run" on fuel valve and it kept running for several minutes till I shut it down.

Then I proceeded to install the air boxes for the filters and hook up the breather lines to them from the engine. Sure would help to have smaller hands and no achy joints for that job! Next need to wash out the old foam filters and install them.

After that installing lights will be the next project, tail light does work as does the brake light, just need to mount the signals and head lamp and confirm they all work. Then if weather co-operates I might be able to do some test runs on the water line access road across the street to see how it shifts. If everything works out I may have to break down and buy a good battery and a set of new tires to put this old bike back on the road! The state inspection sticker on the front forks ran out in 1994 so I'm sure that was the last year it was licensed and on the road.
 
today I pulled the carbs off twice to try and set the float level..... only to find that the measuring stick I was using was in inches not MM
I also noticed that there was no way to adjust them as far as they wanted...... so I figure I'll let it set and get back to it later when I have a Milimeter measuring thingie ! .... I thought my ruler was in MM but turns out (when I put my glasses on it was in 1/32" graduations..... go figure !
so today was sort'a a let down.... but I did open up the air boxes a bit so it could breathe better ! and lubed the choke lever ! but that's about it !
.....weird that 3 out of 3 manuals all have diferent settings for the floats on '80~'84 I am taking 22mm as 2M says to be the gospal on the settings
but in my search I got 24mm,22mm,and 27.3mm LOL
Bob.........
25.4 mm = 1 inch, 22 mm = nearly 7/8 inch
 
Today I had a fantastic day in the newly renovated (i.e. tidied up) Disaster Central Workshop! I did some work on both of my 650s and on my Honda ST1300.

Using the lovely and talented Lucille (red 1976 C model), I had a delightful iPad FaceTime session (audio & video) with a friend and fellow forum member. We covered the basics of multimeter use and then dived into how to make a MikesXS 1977 left side handlebar switch work with a 1976 wiring harness. The problem is that the '77 switch has provisions for a self-cancelling turn signal function but the '76 harness has none of the required sensors etc. etc. It takes a little detective work - but I think we're there. Interestingly, we found that his handlebars were not grounded - and THAT must be fixed before anything else is going to work properly - especially the horn and the starter.

After the call, I removed Lucille's fuel tank and tracked down (I think) the cause of the occasional ignition miss I've had a couple of times: it was a loose high tension lead securing nut on the RH coil (I think). I still plan to go full PAMCO, but the funding approval hasn't quite come through from the Senior Management Budget Committee just yet..:(. Then I installed a cute little $4.30 (really!!) Chinoise combo digital volt meter and 2x USB charging module on the handlebar and wired it to the battery with a fuse. Finally, I began Lucille's beautification program by giving her exhaust stud nuts, as well as the bolts holding on her banged-up front fender & stays, a little shot of penetrating fluid. Tomorrow, I'll swap her sadly dented header pipes and the fender for the nice clean shiny parts I got from our own GeorgeOC. Thanks George - what a prince!

IMG_0276.JPG


Then I sorted out the crankcase breather hoses which were too long and were kinked. After that, I cleaned up the wiring around the battery and popped it on the tender because I cannot ride until my seat comes back from Mike's Cycle Seats (no relation, I assure you) in London, ON - unless of course I go "enduro" style as suggested by more than one of you delinquents out there in XS650.com-land.... :lmao:

IMG_0277.JPG


After the header and fender swaps I am going to dive into the PMA install (I got those parts last summer).

On the '81 Special-to-Cafe bike, I removed the carbs. After much effort, I have still not gotten that puppy started and so I am going to methodically go through the bike and make sure that everything is ticky-boo before I expend more money and effort on it. I know that the starter hairpin needs to be fixed (got an NOS one a while back) because it's doing the ol' "spoon down the garburator" impression when I hit the button and I will also go over the carbs and hopefully, that will do it.

On the ST, I began prepping for my first big trip of the season: a jaunt down to Peterborough and then northern New York, New Hampshire and perhaps further, with my riding buddies from eastern Ontario. The group is led by a friend named Walter who is one of those incredibly well organized people (he is a retired banker) and so I call it Walter's Kawartha Riders MC after the large Kawartha lakes system around Peterborough. The group includes Walter, my cousin Grant who is a retired contractor, a retired plumber, retired cop and a couple of engineers including me. The pace is easy, the humour is great and each evening we have a "healing circle" which, needless to say, involves a cleansing beverage or several... I even bought Walter a set of highball glasses with "WKRMC" engraved on them - and had the glasses sent unannounced to his home (he was surprised and got a huge kick out of that - ROTFLMAO).
Because four of the bikes are Harley's and two are Hondas, there are also the usual jokes about parts falling off and soy sauce as well.

Anyhow, a great day all around: I got a couple of useful tasks done, helped a friend and enjoyed some nice weather and listened to some rock & roll in the DCW.

Cheers,

Pete
 
Last edited:
I checked the fuel level in the float bowls their right where they should be .... i think ..... perhaps a tad high but it'll do !
i put fresh gas in the tank almost 2 gal. and it came up about 3/4 the way to the tank cap. more room in that tank than I thought !
... I fired the bike up and finally got the choke set just right the right cylinder was missing a bit with the choke on.... when it finally warmed up enough
to take the choke off it ran fine ..... a bit light on the right side so I turned the pilot airscrew about 1/2 turn out and it evened out better.
I got the letter and check ready to send to BBQRider for the seat... will mail it monday. Tomorrow I plan to change oil and clean filters and put in fresh 20w-50w oil I got today....
all in all I think the o'l girl is ready for the road ! WOOT !!!!!
I'm having a beer to celebrate ! LOL
C'ya !
Bob..........
 
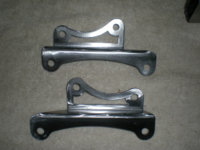
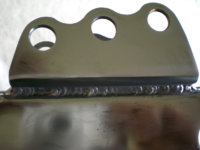
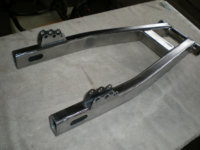
Got a little done today. Goober welded the shock mounts to the Radian swing arm and did a little initial sanding for polishing tomorrow, deburred the HHB motor mounts, and test fitted the NOS DT175 tank I thought I`d use on the scrambler project but It is too narrow, too tall, and too short. Oh Well.
xs today 002.JPG xs today 003.JPG xs today 005.JPG xs today 006.JPG
 
Pulled the battery box and the attached electronics. Battery box needs a good delousing- at least a thorough cleansing of the surface rust and a rattle can Rustoleum make-over. Electronic contacts cleaned. Various chrome got the Windex and aluminum foil treatment, followed up with Blue Magic polish. Liquid refreshments consumed.
 
Ahhh, there's nothing like BEvERages consumed in the workshop while pursuing a technical challenge (even it simply involves sitting on your @ss watching the paint dry....).

I do have a question DoubleE....Windex and aluminium foil. I get the Windex but how does the foil figure in that?
 
Last edited:
The Windex has ammonia in it (so does the Blue Magic for that matter). Slightly basic. The dirt, rust and slight pitting on the chrome has been oxidized- often by acidic conditions. Generally speaking, rust is simply oxidized iron. I believe that as the ammonia is reducing the various oxides, the aluminum in the foil is creating aluminum oxide and "sweeping" the oxides away. I found this method here in the forum. It actually works quite well. Afterwards I use the Blue Magic for a final cleaning. It has some extra waxes or polishes in it- not sure what.
 
Back
Top