Engine Rebuild & Beautification (Shot Blasting)

Just got back from dropping my crankshaft off with a "local" shop. Around here, local means less than 40 miles of driving.

They've done these cranks before and expect it to be done by tomorrow.
 
Parts (seals, cam chain tool and top end fastener kit) arrived today. Didn't get any time to work on it though. Tomorrow...wrestling. After that I think I'll take my boys out for a snowmobile ride now that we finally have snow. Or at least pull them on the sled.
 
I did consider removing the starter for a few brief moments. However, I'm lazy from time to time and like the convenience of the e-starter. Saves on the leg from time to time.

After kicking my chop over for three years, I'm ready for the electric start of my newest project. It was novel for awhile, but enoughs enough :)
 
After kicking my chop over for three years, I'm ready for the electric start of my newest project. It was novel for awhile, but enoughs enough :)

My starter is pretty weak. After about 5 revolutions it just can't turn the engine over as it seems to really draw the battery down. I end of kicking it more often when stone cold than any other time. She fires up quickly with the e-start when warm...duh, big surprise, right? Maybe I should lose the starter and all the associated gears for weight reduction. I don't know. Guess I'll have to put some more thought into it now that I'm thinking "outloud".
 
More likely your battery is shot. The starters sometimes have gear issues, and can sound awful, but I don't think there are a lot of motor problems.

John
 
Nope, brand new battery and I keep it topped off with a battery tender. The starter just pulls a lot of current. Possibly due to the windings shorting out. I don't have high expectations for a bike of nearly 30 years. As long as I can start it some way, some how I'm happy.
 
I took some time yesterday and last night to run a bead of JB Weld along the edge of the oil sump filter to mitigate the all too common tearing issue that we've all experienced on our beloved 650s. After mixing the compound I carefully ran a bead then let it cure before flipping it over and doing it on the other side. Hopefully this will prevent the screen from tearing from the housing long term.
 

Attachments

  • Sump Filter - Reinforced 1.jpg
    Sump Filter - Reinforced 1.jpg
    166.9 KB · Views: 191
  • Sump Filter - Reinforced 2.jpg
    Sump Filter - Reinforced 2.jpg
    178.9 KB · Views: 179
Got my crankshaft back today. Everything looks good. I managed to get it into position and seal up the case halves with Yamabond (a very thin coat). The starter is installed as well as the starter gearset and cover. The cam chain is routed in the tunnel and currently held together with some wire until I decide to rivet it together later. I'm currently putting the eight real long threaded rods into their places to hold the cylinder block. Right now I have to peel off and go pick the boys up from school. Pics will follow tonight or more likely tomorrow.
 
This is an interesting thread. I hope I never have to go inside, but journals of this sort are helpful for general (and some specific) knowledge, especially when accompanied by photos.

Thanks for taking the time and trouble to journal this!

TC
 
Thanks TeeCat.

I spent some time with the beast this morning. I managed to forget to install the cam chain under the crank shaft when I put the case halves together. No big deal though as I fished it through with some semi-rigid tie wire. This stuff is so great. It has saved my ass a couple times so far in this rebuild. More on that later.
Cam Chain In Place.jpg
I installed the 8 long threaded rods into the case halves. After fighting with them to thread down to what I felt was far enough, I picked up an M10x1.25 tap and chased the internal threads. This worked WONDERFULLY as the long rods threaded much much much easier with my stud removal/install tool.
Stud Tool.jpg
I pre-installed the pistons into the cylinders as they were easy to get to. Tip: Install the piston clips on the inside first so you can work from the outside while inserting the wrist pins and subsequently the outside piston clips. Be sure to note left and right piston as well as the orientation of the pistons in the cylinders. For those of you (like me) who have removed the carbon buildup from the pistons and in the process ended up removing the directional arrow, don't fret. Just remember that the exhaust valve is the smaller of the two valves and is in the forward position. Pushing air with the piston is easier than sucking air on the intake...thus the large intake valve and smaller exhaust valve. On a side note, this is why 3-valve per cylinder engines have two small intake valves and one large exhaust valve. Just a tid-bit of information.

I managed to get the wrist pins in place then clipped them with the piston clips (as I mentioned above) from the outside. The cam chain and tensioner weren't a problem to route up through the cylinder block.

I dropped the head into position and ran the cam chain to roughly where it needed to be. At this point I had to install the alternator rotor and stator since I was going to need the TDC position. I could get close just by eyeballing it but this needs to be EXACT.

At this point I have NOT riveted the cam chain together. I got the pistons to TDC and installed the cam shaft. I positioned it left/right by loosely putting the cam shaft seals against the cam shaft bearings and centering the cam shaft.

Now is the tricky part where you need about 3 extra arms but can manage with the two that you have. Align the cam shaft so the indicator dot is level with the top machined surface of the head. This is shown in your repair manual so I won't bore you with another picture. I was using wire once again to keep the cam chain from falling down into the tunnel. I hooked it on the cam chain and gave a good pull on the front of the cam chain to get some tension and looped it over the cam shaft sprocket as the pistons were at TDC and the cam shaft was showing TDC. While holding with one hand I used my trusty wire again and put tension on the rear of the cam chain and got the links to fall onto the cam shaft sprocket teeth. I have not yet installed the tensioner assembly...just the tensioner arm. There really isn't any tension on the cam chain except for the unstretched length it has. I quickly, but carefully, grabbed my master link and slipped it into it's new home. The cam chain riveting tool I got from mikesxs worked perfectly.

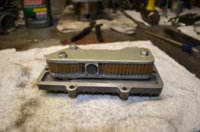
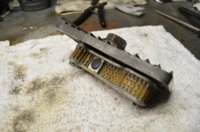
The last two pics show where I'm at so far. Just small stuff to install then out to the pole barn where the frame is languishing.
Top End Assembled 1.jpg
Top End Assembled 2.jpg

Stay tuned...more to come.
 
Ran across something interesting/befuddling this afternoon. I installed the cam chain damper. I set the plunger so it is flush with the surface of the 10mm nut. I put the acorn nut on and it is bottoming out before it snugs up to the 22mm stop nut.

Is this because I have a new chain and it hasn't stretched yet? I'm guessing a few revolutions of the engine (once it is in the frame) will stretch the chain and I'll need to readjust.

Comments/suggestion are welcome. The floor is now open.
 
^Is it possible you have some slack on the front of the chain somehow rather than all on the back side? Have you turned it a few revs by hand?
 
^Is it possible you have some slack on the front of the chain somehow rather than all on the back side?

I sure hope not. I'd wager that the fact that I was able to get the cam chain together on the cam chain sprocket would tell me I've taken up all the slack...right guys? However, I have ran a few revolutions by hand (while setting the valve clearances). I'll have to check it again after a few more revolutions. Who knows, maybe it has stretched a bit by now.
 
Set the valve clearances today. 0.0025" on the intake valves and 0.006" on the exhaust valves. That was all I could muster as I'm pretty tired. Yesterday was a wrestling meet for both my boys. Today was a 5 hour (round trip) drive to the West side of the state to pick up a '79 XS400. I'm beat.
 
Only one of them is a new one. I managed to bend one pretty good when I took them out. They were stuck in there pretty good and...well, it bent. Chasing the threads with a tap really helped with installation.
 
I'm done for the time being. I chased the side cover threads (in the cases) with an M6x1.0 tap to clean them up. Right side cover is on. Left side cover will have to wait until I put the motor back into the frame.

The pole barn is darn cold so I'm going to have to wait until we get some warm weather to do it. No fun working in the cold.
 
Ran across something interesting/befuddling this afternoon. I installed the cam chain damper. I set the plunger so it is flush with the surface of the 10mm nut. I put the acorn nut on and it is bottoming out before it snugs up to the 22mm stop nut.

Is this because I have a new chain and it hasn't stretched yet? I'm guessing a few revolutions of the engine (once it is in the frame) will stretch the chain and I'll need to readjust.

Comments/suggestion are welcome. The floor is now open.

The cam chain did indeed stretch for me after a few revolutions by hand. The acorn nut at the adjuster is now sealing to the lock nut at the case.
 
Back
Top