Hi All: All this talk of tires is, I think germane to Mailman's thread (if I may...) and so I went and dug up a note on tires that I compiled some time ago for some students. I don't claim authorship or that it is perfect in every way - but it is informative.

MARTY - you and your pillion are right on over there on that 1100!

Pete

Whatever_Lets_Ride-BABY.png
 

Attachments

  • All_AboutTires.pdf
    254 KB · Views: 292
Hey don't think twice about adding any good information to my little build thread, all is welcome, and Pete that's a handy reference you sent. Thanks!
 
Hey don't think twice about adding any good information to my little build thread, all is welcome, and Pete that's a handy reference you sent. Thanks!

You're most welcome - and how did you like the recent photo of .....me?

P
 
The beat goes on!
Today I installed my new chain. It's hard to believe that as long as I have been around motorcycles I have never had to change sprockets and chains. Having a couple shaft drive bikes helped there but I was surprisingly unsure about the chain. I bought a good quality DID 530 chain which had to be cut to length. So I tried the chain on my bike to see where I wanted to cut it and then was worried about cutting it too short. So I cut it one link longer than I thought I needed. Only to have to cut it again where I originally thought! Haha
I also got to use my brand new chain breaker. Yay! Like Max Pete says, Tools are fun!

IMG_3944.JPG


And here it is installed and all adjusted and freshly lubed ready to go.
IMG_3946.JPG


Then I tackled an easy job, my handlebars were super wobbly, so I had ordered new handlebar bushings. Man I wish all the jobs on this bike were so easy. 10 minutes, start to finish. And the end result was really nice , solid feeling bars again.

IMG_3947.JPG

IMG_3958.JPG


Next up, this is either a great idea or I will be kicking myself in the morning. My rear wheel especially, had yellowed and flaking clear coat that I want off of it. So first I tested a small area with citrus strip stripping gel for about a half hour. It wrinkled the clear coat but didn't remove it all. So.. I went all in. I applied it on the entire rim with a small brush, being careful to not get it in the tire or the spokes. I intend to leave it on overnight and take it off in the morning. The instructions say it can sit for up to 24 hours. It is already wrinkling the clear coat. We will see what we have in the morning.
IMG_3961.JPG

IMG_3962.JPG
 
It looks just like you! But you shaved the beard huh? Haha

Yup, I wanted to spruce-up and look my best for the occasion! ;)

Mailman - that chain job looks good. C ould you possibly post a photo of the bottle of stripper you are using - I'm not familiar with that brand....

Peter
 
Mailman - C ould you possibly post a photo of the bottle of stripper you are using - I'm not familiar with that brand....

Peter

Sure, here you go. I bought this at Lowes Home Improvement store. I don't know if you have any in Canada.
I like it because it is low odor, almost no fumes. Safer for my asthma.

IMG_3963.JPG
 
Thanks! Sounds like a good product - anxious to see how it all looks tomorrow.

Pete
 
This morning I went back at it. There were some places that had begun to dry and I thought I might have to wet it with stripper again, but I decided to see what happens first. Here is what it looked like after 18 hours of soak time.
IMG_3964.JPG


I rolled it out to the driveway and went after it with a bucket of hot soapy water and a large soft bristle brush that was made for washing wheels on cars. Followed by a clear water rinse from the hose.

IMG_3966.JPG


After drying it all off and rolling it back into the garage I could see that all the clear coat had been removed but the wheel looked splotchy, you could see where the clear coat had been.
Now this is where it gets good. I went at it with Blue Magic polish, and man! What a transformation! I couldn't be happier, it looks like chrome. Sure the wheel has some scratches and nicks but hey, it's 40 years old.
Check out the cloths I used, this came off a wheel that looked clean.

IMG_3971.JPG


And now the final results!

IMG_3968.JPG

IMG_3969.JPG

IMG_3972.JPG


This whole process was not hard at all, took a little time but not hard.
Thanks to ggGary for putting me on to Blue Magic, that stuff is amazing.
Couple of notes: I don't think it needed to sit overnight. The finish looked completely lifted after a few hours. That stripper is wonderfully odor free. Also the final thing I did was run a small buffing wheel over it. Not really necessary but brought the shine up really nice.
Must be time for a celebratory beer!
 
You got lucky in that there was no corrosion built up under the clear coat. That would have required much more work. Yes, that Blue Magic is wonderful stuff. I used it years ago but had pretty much forgotten all about it. I'm glad Gary brought it to our attention. I've switched back and love it.
 
You got lucky in that there was no corrosion built up under the clear coat.

Agreed, I've seen just how nasty these wheels can be. As I've mentioned elsewhere in this thread, the bike is pretty much corrosion free, it's just that the original finish on everything has simply degraded.

Great job on the wheels....................they look super! That Blue Magic is doing a fine job for you. I have never used it but I suspect its a similar product to the Autosol , that I do use.

Yes I am loving the Blue Magic, I've never used Autosol but I know it has a big following. My go to metal polish was always Mothers Mag Wheel polish. But I think I am now a Blue Magic convert. Haha
 
All looking very good.. Curious how did the head torque work for solving the oil leaks?

Thanks! Regarding the head gasket leak, I haven't started the bike yet, I've been working my way through the bike. I still want to finish cleaning up the electrical wiring, , set the cam chain tension, adjust the valves, install new plugs, and then I think I'll be about ready to fire it up.
 
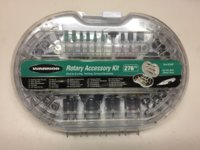
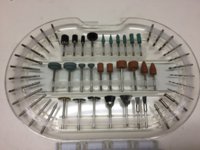
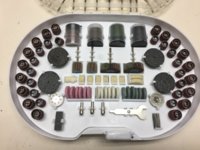
Today began with a trip to The Magic Kingdom ( Harbor Freight). I had a 20% coupon burning a hole in my pocket and Dremel bits on my mind. I picked up an absolutely huge assortment for less than $15 , woop woop!
IMG_3994.JPG
IMG_3995.JPG
IMG_3996.JPG

Then I got serious about cleaning up my wiring connections, today I pulled apart and cleaned every single electrical connection rear of the headlight, including battery cables, starter cables and all the lights. I will get into the headlight bucket also but not today. I used a combination of brass wire wheels, small tapered diamond bits and electrical contact cleaner, and finished up with a little dielectric grease.

IMG_4017.JPG

IMG_4019.JPG

IMG_4021.JPG

IMG_3998.JPG


I also removed my stock main fuse holder and replaced it with a new modern automotive blade fuse holder.

IMG_4023.JPG


I would like to thank everyone who shared their tips for cleaning wiring connections when I asked for suggestions a few weeks ago in the garage section. You guys are awesome and so very helpful.
 
Back
Top