Both my XS650s needed work in this area. The Blue Tracker was decent so a paint stripper routine (several applications, rinse, repeat) worked, following up with a buffing wheel on a drill motor. The Red Bike had a lot of aluminium corrosion and needed the roloc to clean up. Then a medium grit (30 or 50) Maguires polishing compound (this for paint job buffing) took out most of the scratches, followed by Mother's aluminium polish. The Maguires bottles look similar but the little scale on the left side indicates how coarse the compound is. This one below is pretty fine at a 30 rating. This is for paint or gelcoat so you want to stay away the coarser grades.On this case I used paint stripper to remove 75% of the clear coat, then a blue Roloc disc to complete the rest. Then I used 220 sandpaper to clean up the corners and scuffed the whole case to give it a more uniform appearance. That was good to remove marks left by the Roloc. Then I wet sanded with 400, then 800. The scratches are most likely from the 220 sandpaper. If I was looking for a “show” finish, I would have spent more time on it wet sanding, maybe adding 600 and 1000 to the mix. For me, I just wanted the corrosion yo be cleaned so this is good enough.
I didn’t use steel wool on the aluminum but used it to clean up the chrome.
-
Enjoy XS650.com? Consider making a donation to help support the site.
XS650.com receives a small share of sales from some links on this page, but direct donations have a much greater impact on keeping this site going.
You are using an out of date browser. It may not display this or other websites correctly.
You should upgrade or use an alternative browser.
You should upgrade or use an alternative browser.
New to me - ‘95 Honda Shadow VLX600
- Thread starter bosco659
- Start date
In a place (clutch actuator) where most manufacturers would just use a plain bushing, Honda presses in a needle bearing. That's why they'll last forever. 
Last edited:
Yes there’s two of them in there.I a place (clutch actuator) where most manufacturers would just use a plain bushing, Honda presses in a needle bearing. That's why they'll last forever.
 I was careful with them because the cover was given a bath in hot soapy water. Once dried off I gave each bearing a generous dose of water displacing lubricant.
I like this finish which looks very close to factory and doesn't take forever.
First a blue dico wheel on a VSR drill, run so it leaves scratches in a pleasing uniform direction.
hint; work the tight corners, pockets first, then do the overall large surfaces. Follow up with blue magic on a cotton buff. Creates a pleasing pattern with a shine, much like what the factory put on the XS engine covers and fork legs under the clear coat. A bit of blue magic now and then keeps it looking sharp.
Looks great.
I like this finish which looks very close to factory and doesn't take forever.
View attachment 257644
First a blue dico wheel on a VSR drill, run so it leaves scratches in a pleasing uniform direction.
hint; work the tight corners, pockets first, then do the overall large surfaces. Follow up with blue magic on a cotton buff. Creates a pleasing pattern with a shine, much like what the factory put on the XS engine covers and fork legs under the clear coat. A bit of blue magic now and then keeps it looking sharp.
 . When sanding, I try to develop a “grain” to my sanding marks rather than random or circular swirls. That way if I see them after polishing they kinda look like they were supposed to be there. On all the stuff I’ve polished so far I’ve applied a coat of Blue Magic. I particularly like uding that stuff on chrome.
Let's face it. 50 years ago Yamaha put a clear coat on new aluminium. Now we have relics to deal with. Some folks have recreated the clear coat finish, and kudos to them. A few here on this forum have achieved a chrome like mirror finish. Kudos to each who have. I like a pretty good bare metal finish and each of us has a different definition of pretty good. The beauty is that bare metal gets a Mother's or Blue Magic or whatever quick polish a couple times a year and it look darn good. This is a Hoo Hoooh Hohhh Honda thread (ouch ) and it looks like @bosco659 is doing a great job on this bike. I really like his progress reports.
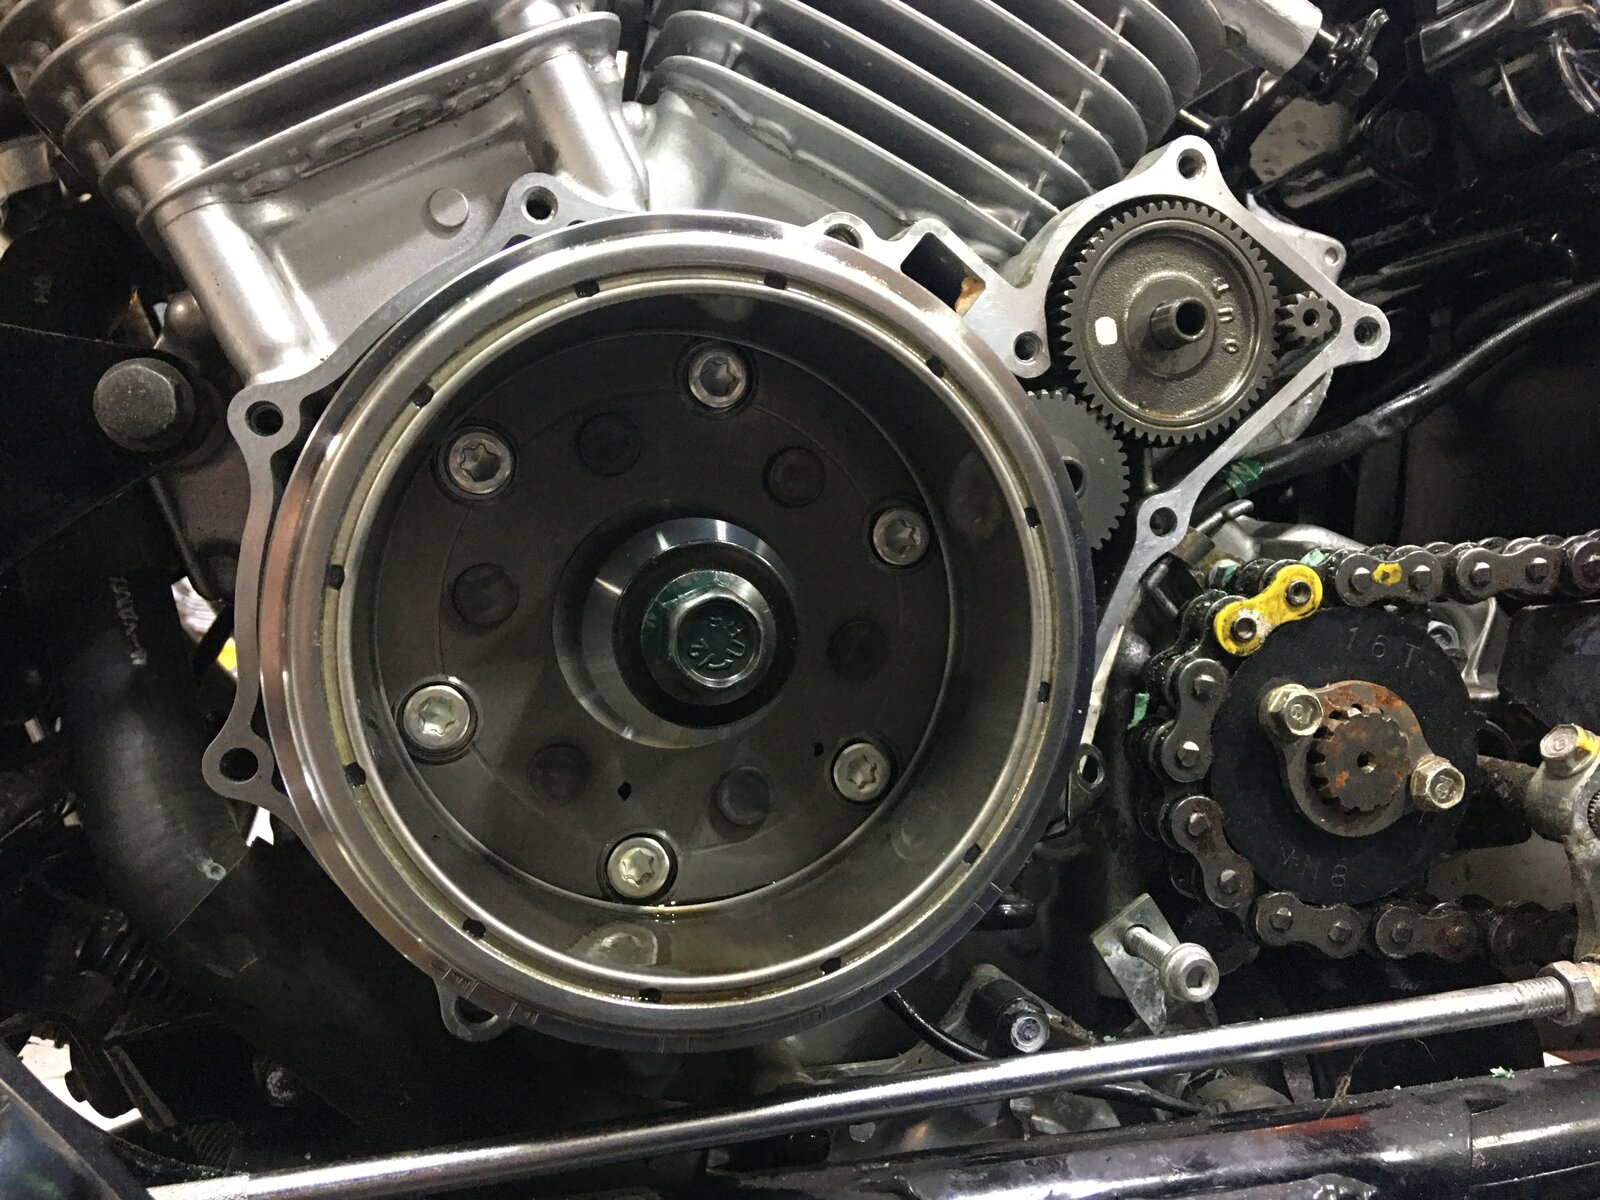
) and it looks like @bosco659 is doing a great job on this bike. I really like his progress reports.Looks like my bike has a riveted master link. I want to remove the chain to do some more work to it (the bike). I was thinking about replacing the master link, with one with a clip. Bad idea? Main reason is I haven’t bought a chain riveting tool yet.
Saw that and conveniently painted yellow. You need brand and model of chain for the master link to fit, ask how I know.Looks like my bike has a riveted master link. I want to remove the chain to do some more work to it (the bike). I was thinking about replacing the master link, with one with a clip. Bad idea? Main reason is I haven’t bought a chain riveting tool yet.
I'll weigh in that I waited WAY too long before buying a Motion Pro chain tool...............
Methinks it’s an OEM chain. Does that mean I need to buy a $25.00 master link from Honda? I think I’ll order the Motion Pro tool tomorrow. Thx.Saw that and conveniently painted yellow. You need brand and model of chain for the master link to fit, ask how I know.
I'll weigh in that I waited WAY too long before buying a Motion Pro chain tool...............
I was guessing OEM also, but Honda don't make chains. The trick is figgering out what it is. A guess would be D.I.D., any marks on the links? How many miles on it?
Chain fit the sprockets well, the adjustment scale still in the green?
Chain fit the sprockets well, the adjustment scale still in the green?
You made me look 2K miles? I'd leave the ML right where it is, there's not much you can't do to a bike with the chain still complete. If you just have to, removing the swing arm frees the chain....In a place (clutch actuator) where most manufacturers would just use a plain bushing, Honda presses in a needle bearing. That's why they'll last forever.
If the odometer is true the mileage is so short that normally nothing is wrong
Depending on price of course but I expect it to find interest . Phone ringing quite a lot
Spread the word and it can be sold soon
From partzilla either Daido AKA DID or RK Excel I'm guessing the RK is a modern sub not the OE chain. shrug
Thanks… the reason I wanted to remove the chain was to see why the rear wheel didn’t spin freely 360 degrees. I’ll have to look again more carefully but there’s a spot where something feels like it’s dragging. Probable causes - bad bearing; brake shoes dragging on a rusty spot on the drum, chain partially seized from sitting. I’ll put on my Sherlock Holmes hat and have a more serious look tomorrow.
Part #7 on a Canuck parts listing. $26.58 Cdn after tax. Gotta love our prices 
A pipe might help, add some opium for curious mysteries...Thanks… the reason I wanted to remove the chain was to see why the rear wheel didn’t spin freely 360 degrees. I’ll have to look again more carefully but there’s a spot where something feels like it’s dragging. Probable causes - bad bearing; brake shoes dragging on a rusty spot on the drum, chain partially seized from sitting. I’ll put on my Sherlock Holmes hat and have a more serious look tomorrow.
Wish my 800 Tiger had that kind of sprocket lock. What do you think Vic thanks for all you help. Sorry for the highjackSaw that and conveniently painted yellow. You need brand and model of chain for the master link to fit, ask how I know.
I'll weigh in that I waited WAY too long before buying a Motion Pro chain tool...............
No problem, glad I could help Al. Looking forward to next years Paris meet. Wonder what bike(s) I’ll own when that weekend rolls around.Wish my 800 Tiger had that kind of sprocket lock. What do you think Vic thanks for all you help. Sorry for the highjack
I think my Ducati has a similar lock for the shaft / sprocket.
Getting ready to reinstall the engine cases I noticed the 6mm cap screws were quite corroded and wouldn’t look nice on the shiny cases. I tried to order SS shcs from my local industrial supplier and they wanted to sell me 100 pcs min and a 2 week delivery. This wasn’t acceptable so I tried to clean up the old ones. It was a lot of work but they turned out ok. The only concern is I may have worn the plating off and they may rust. Time will tell.
While on the subject, I am critical of the plating Honda used on this bike. Steel shiny bits have all corroded and a white powdery residue remains. Looks like they missed the mark in this department as well as their poor clear coat. If fairness to them the po may have left it for years in an unforgiving environment.


While on the subject, I am critical of the plating Honda used on this bike. Steel shiny bits have all corroded and a white powdery residue remains. Looks like they missed the mark in this department as well as their poor clear coat. If fairness to them the po may have left it for years in an unforgiving environment.