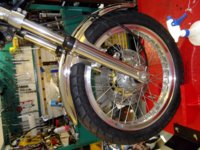
Polishing question with pictures

Scgoobertn

XS650 Enthusiast
Messages
68
Reaction score
0
Points
6
So i have never polished anything before. I have read some instructions on ways of doing it. Well i used some aluminum cleaner to try and clean some of the muck off the hub backing plate. Removed some stuff but not really as much as i thought cleaner would. Tried a few different cleaners nothing really removed anything more. So after trying some cleaners on the backing plate i ended up looking like this
20130330_191749.jpg


So after playing around a little and testing some stuff out i ended up with
20130402_181309.jpg

(Just used a little bit of polishing cream to test something)
Which really showed me how it could clean up pretty nicely with some elbow grease.

Well as i started moving to finer and finer sandpaper i had this

20130402_211739.jpg
(still just sanding no polishing)

But i started to notice this
20130402_211818.jpg

(The solid black spec with white around it in the middle left of the picture is something on my lens, not the backing plate)
And this is were my question is. I am noticing little specs in it (see above picture) , will this buff out once i get to the polishing part or am i needing to use courser sandpaper till its gone then start back going finer and finer?
 
Thats what i was thinking was needing to go more sanding at a courser grit, but like i said first time doing this so not really sure. lol Thanks!
 
once you get to the actual polishing part, get the harbor freight two wheel buffer. its cheap, and get the stand to go with it. its a good set up to start with/learn. then get a few sticks of the coarse(brown) polishing compound, and also a couple sticks of the next finer compound. get the wheels that are spiral sewn, two of those, and only use one compound on each wheel. wear heavy gloves, and use the brown to get at smooth as that compound will allow, then get finer on the other wheel. Hang on tight! The parts will get hot. Lots to learn about this, but will get you going.
GGGary I think has a lot of polishing knowledge that will be easier to understand than web pages showing grits, rpms, and such. In a word, "dumb it down" for you.
I only use the brown on the wheel, then mequiars cream to give a bit more shine. Helps seal it too. I have a cross between a rat, and a ride able bike, er, respectable, but not over shiny bike. Dig?
 
The compound I use the most is the coarse black emory. It will remove the fine scratches left by 400 paper. In fact, it's just about all I use. I have the finer brown tripoli and white but the shine doesn't seem to get much better after the black.I have the bench buffers but what works really well for finishing and getting into the nooks and crannies are the little 3" wheels in a die grinder. HF has a kit w/ 2 wheels and some compounds.
 
I picked up a couple of the buffing pads. how do you guys get into the nooks and crannies(sp?) of the hubs, like the inside of the hub (yes, its not laced up or anything) but seems like a hard spot to hit with sandpaper. Also are there any cleaners that will knock more of the crude off. The stuff i got just doesnt seem to do much of anything.

Thank you all for the replys
 
I don't do the inside portion of the hubs. I just clean them well, no polishing. Why? Because once you spoke the hub, you'll never get back in there to keep it polished. Here's the last one I did, outside polished, inside just cleaned .....

HubAssembled.jpg
 
It looks like you are dry sanding it. I have always had more luck wet sanding. 600-2000 the something that has a buffing or rubbing compound then polish then seal.
Make sure it's WET and clean and wet the paper all the time. Use a spray bottle with a mix of water and a bit of dish washing soap in it. Soak your sandpaper in water at LEAST 1 hour.
It should end up like glass. That's the same method I use for clearcoat by the way ;-)

Also hand sanding you leave pits and scratches as the paper folds under your fingers. A machine buff (get a round or SPHERE) foam pad on a drill to help or the cone shaped one when you are up to the compounding stage.

My process would be to use 1000 to get most of those scratches out. I mean an hour or two of wet sanding. If you can't get them out with 1000 they are deep. Go down to 800 and try again. When you only have even fine sanding marks go to 2000 and do the same. Wet sand until you only see the sandpaper scratches in light. Then compound buff with machine (mothers makes something called a powerball) not the best but gets into the curves. Use good compound. Then polish and seal.

Good luck. That's why I paint/powder my stuff now. Polished looks awesome but I'm impatient and you need to polish and seal often to keep it looking nice.

Cheers,
Peter

Posted via Mobile


Thank you! I have been wet sanding, but didnt leave it in water for an hour will try that. Stupid me thought the pack of sandpaper i bought had 600-1500 but i must of grabbed the wrong one. I also understand going powder/paint. I was debating that before i started this little polishing attempt. But since i have no means to powder coat or spray at my parents house, i was gonna give this a shot first. May still end up calling around and see about having some stuff powder coated. Every little bit eats into the budget lol.
 
Mate if you like polished go for it. That's the beauty of building a bobber!!
Just remember unless you have all the tools the polishing WILL still work but take a lot of time. Just sit back and keep going till it spotless.

The soaking trick really helps though and some soap in the water for lubrication. If it slides easy its ok. When it "grabs" lube it more. Rinse the paper often too

Posted via Mobile
 
Everyone has a different way, and depending on what you do the level of shine will vary, so its really to taste. For me its:

- 400 wet dry (if the part is really rough, like 30 years crud rough). I use crc or wd40 as lube for it - works better than water i feel, no issues with it getting places. Spend plenty of time here, because the better you do this stage, the easier the polishing and the better the finish later on. If pits and scratches are really deep i use a die grinder with a sanding drum. Use a sanding block to. This prevents the paper moving in your hand. Sounds obvious but it makes it much more efficient.
-Then move up to 800, then 1000, then a light run with 1200.
-Now i break out the bench grinder with sisal mop and some bright cut. There are a lot of videos on youtube about this. I found one really good one but never bookmarked it :(
-Finally wipe it down with meths to remove compound and then a little hand polish with MAAS.
 
Last edited:
#1 I am lazy
#2 I like shiny aluminum

:banghead: :D

I start by stripping the clear coat with aircraft stripper. (nasty stuff a pin head blob burns on your skin)
I then use a 4" nylox wheel if the aluminum isn't too bad I start with blue if it's pitted I start with the coarse orange then swtihc to blue vary direction so you see the scratches from the last pass disappear.
I keep a plastic spray bottle of paint thinner, wipe the part after the blue wheel
then it's black compound on a sisal wheel 3/4 harbor fright buffer paper towel and paint thinner.
Final is white bar on cotton wheel. it will be brilliant.

There will be some pits in aluminum castings that's life. I haven't trtied it but you could rub the pits with aluminum foil before the final buff? shine em up and call it a day.
For maintenance buff polish I like blue magic in a tub.

These were the typical corroded front tubes and rim.

79options 003.jpg

I am getting close to welding up my dream buffer, a 5 HP motor belt drive to the rear axle from a quad....
 
I wet sand with 220, 400, 600, then 800. Polish with emory, tripoli (brown), then white. I found that when the oxidation gets this bad some of the pits require too much effort to get out so I just live with it. You can't see them from 2 feet away.

think I will try those nylon wheels next time.

75engine_zps79decee1.jpg


bike080jpga.jpg


rim003jpga_zps142dddd5.jpg


75xs650025jpga_zpsf0348ede.jpg


75xs650015_zps8b28ca61.jpg
 
This doesn't pertain too much to the polishing but is a good wheel tip none the less. I now clean the outer part of the rim, where the tire seats. I got this tip from my dealer. You can use a wire wheel but I prefer this 3M Scotchbrite coarse wheel. I get them at Walmart .....

InnerRimClean.jpg
 
They weren't chrome from the factory, just polished aluminum and then clear coated. I strip the clear coat with paint stripper first. Saves a little sanding time.
 
Carb cleaner, lacquer thinner, or acetone softens clear coat so it comes off with a nylox wheel pretty fast. If you don't need the stripper elsewhere those will do the job, seems like the early clear coat isn't as tough as the later model stuff.....
 
Not to say someone didn't chrome yours. I have seen several engines with (pitted, peeling) chrome sidecovers.
 
The cam covers are chrome on my 81. And maybe I shouldn't have but I put my covers Ina glass bead blaster. Did the entire engine as well. I do plan on polishing the covers though.
 
Back
Top