Yes, that is the correct order, but I think you have both the seals pictured upside down. When flipped over, the rubber part of the All Balls one will actually snap onto the bottom of the bearing's inner cage.
-
Enjoy XS650.com? Consider making a donation to help support the site.
XS650.com receives a small share of sales from some links on this page, but direct donations have a much greater impact on keeping this site going.
You are using an out of date browser. It may not display this or other websites correctly.
You should upgrade or use an alternative browser.
You should upgrade or use an alternative browser.
Refurbing a '78 Standard
- Thread starter pckopp
- Start date
-
- Tags
- 78 standard painting refurbish
pckopp
XS650 Addict
Yes, that is the correct order, but I think you have both the seals pictured upside down.
Yes they are. I promise to install them correctly. Thanks.
Hey pckopp, Are you "notching" the neck for future removal of the bearings?
pckopp
XS650 Addict
Hey pckopp, Are you "notching" the neck for future removal of the bearings?
I didn't. This bike goes to my son when I pass on. Changing the PITA steering head bearings will be part of the "pay back."
 BWHAHAHAHAHA
Honestly, if you keep them greased, I don't think the tapered bearings will ever wear out. The only thing I could ever see removing on mine is the lower bearing on the tree. I used the MikesXS bearing kit so it came with no additional grease seals. Now that I see how well the All Balls seal works on the bottom, I wish I had one there. Grease constantly oozes out of my bottom bearing and makes a mess. On the other hand, I guess that makes it sort of self lubing, lol. I switched to a heavier grease now and hopefully that will help, but there's still some of the old stuff in there that's going to eventually come out on it's own.
pckopp
XS650 Addict
Now that I see how well the All Balls seal works on the bottom, I wish I had one there.
I have an extra. Happy to send it your way.
pckopp
XS650 Addict
If they don't know off the top of their head, I'll bet 2M or 5twins will have a reference. Until they answer we both will wonder.Is there a torque spec for the spokes?
You might find this article helpful.
http://www.webbikeworld.com/motorcycle-wheels/spoke-wheels/
There may be a torque spec that the factory uses when assembling wheels but I've never seen it listed anywhere. It's probably one of those things the factory figures your typical owner doesn't need to know or will never make use of. It also takes a special torque wrench to apply it and they're pretty expensive. I just make them tight, like tightening a small bolt. You kinda develop a feel for spokes and learn what tight is for them. I also tap them and listen to the "ring". But be aware, you usually can't make them all the same tightness, the rim won't be true if you do. Some will need to be a little tighter than others to make the rim true.
pckopp
XS650 Addict
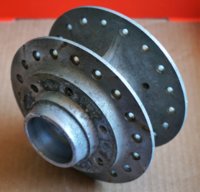
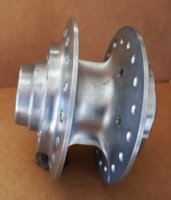
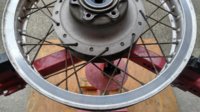
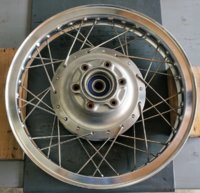
Both wheels are done. The front came along without complaint, but the rear was not so cooperative.
Ready for new shoes.
Ready for new shoes.
pckopp
XS650 Addict
pckopp
XS650 Addict
pckopp
XS650 Addict
Have you noticed any issues prior? Doesn't look good, but would probably be possible to get it welded if it's not cracked beyond that point.
pckopp
XS650 Addict
Have you noticed any issues prior?
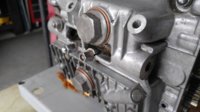
I don't think it is leaking anything from there. I had a small drop or two on the garage floor after a ride. I believe it is the starter seal. The starter came out with absolutely no resistance from the old seal. The starter is sitting on a drip pan and the puddle of oil underneath the starter is slowly growing. I figure it is full of oil. Got the seal for the starter, too.
My feeling is it isn't fatal. But it makes me wonder if this bike had been crashed at some time. Looks like the crown has been knocked off that nut. Also a big scar on the drain plug next to it. There is a dent in the exhaust on the left side and the original headlight bucket and support arms were bashed to one side. They were unusable. Good thing I got it cheap!
I bet it's fixable. BTW, I have the original Headlight bucket and arms from my '79 that I'm not using if you need them.
pckopp
XS650 Addict
BTW, I have the original Headlight bucket and arms from my '79 that I'm not using if you need them.
We'll talk. See you at SUB next Wednesday?
I won't be there (Sounders game)...but maybe backfire the following week?We'll talk. See you at SUB next Wednesday?
Similar threads
- Replies
- 8
- Views
- 467

