Re: comments at stoplights - yup, I've had a few as well.

One guy in a high-end German car pulled up, rolled down his window and asked "what year is that?" I replied that "it's a '76" to which he said, "wow - nice! I had one just like it - does the starter work?" I demonstratd it and then he said, "Rev it up a bit". So I revved it a little and he immediately said "I'll give you $3 grand for it right now. You follow me home and I'll give you the cash - you can take the plates off it and I'll run you home in my car."

I said "Thanks, but I'm having so much fun on it that i don't want to sell it."

Then there was the lady at the diner who said, "I like your motorcycle - it's a bit loud, but not obnoxious, and yet, it doesn't sound like a blender". NOTE: this is a big H-D town and making as much noise as possible appears to be seen as a substitute for riding skill.

Cheers,

Pete
 
Today was my first day off since mid-October and the day after my birthday. I slept in til 8.

After a breakfast made by my sweet wife, I went outside and cleaned Stella in preparation for the consultation with the seat maker. A nice ride in perfect weather and a three hour conversation later, I headed home with high hopes and expectations. Ron seemed to understand what I was going for, asking questions, making recommendations, explaining materials and methods, showing examples. It's clear he approaches each project on it own, yet applies a career's worth of experience. As his pickup's rear window says, 'Custom Seats For Your Ride, Not Ours.'

I left Ron my pan, riding away on a sweet loaner.

IMG_20161107_191457811.jpg
 
Nevr-Dull brand. Available at the local auto parts store, Walmart, Amazon. It's a tin full of polish-soaked cotton wadding. Rip a piece off, polish, wipe with soft dry cloth.

I found it to be a very quick and easy way to bring out some shine on the mostly perfect chrome. Spending a bit more time on the small area of the gas cap, this light polish applied with low-abrasive cotton wadding proved quite effective on the old swirl marks. On the fork lowers, it quickly brought a rough texture down to smooth.

A bit of this butler's polish as a last step on wash day should have really great cumulative effect with very little elbow grease.

This product or another, polishing is going to be fun.
 
Last edited:
Your stalling when braking to a stop may be float level related. I should have mentioned when you were doing your carb work that when checking the floats, you need to measure each one twice, once from each side. Many times the floats are twisted or tweaked on their bracket, one float "bulb" sitting higher or lower than the other. If you don't measure each one, you won't catch this. If they are off like this and you only checked from one side, the fuel level you think you've set may not be what it actually is in operation.
 
Re: comments at stoplights - yup, I've had a few as well.
Pete
The resto gets thumbs up and complements where ever it goes. Maxi Maroon paint helps. I also ride a 79 with Starlight blue and it doesn't get noticed as often.
 
The maroon has definitely grown on me. It is very much a color out of the late 70s, reminds me of long trips in my Dad's Aspen.

Thanks 5twins. I had seen that twisted float tip elsewhere while I was working on the carbs. My floats were measured at all four points.

That said, I figured I'd double check float height and idle circuits if the new and tight boot clamps and subsequent air/fuel mix setting doesn't help the situation. The mix still hasn't been optimized beyond turning out until the decel pop improved.

Those clamps are scheduled for delivery tomorrow.
 
I'm not crazy about those MikesXS replacement clamps. They use smaller diameter screws than the originals. As noted, these clamps need to be tight, actually as tight as they'll go is best, tightened until the two clamp halves touch. You can't always achieve this with the original Philips screws, especially if the heads are buggered up a bit. I switch them out for Allen screws. You might want to try to acquire a used original set. I'm sure gggGary could help you out there. Also, do you still have the tin shrouds in place over the intake manifolds? They add much needed support and I think they aid in the clamping too. Gary could probably help you out with a set of those as well.

ManifoldClamp2.jpg
 
Understood, but at this point anything will be better than the originals on it now. Tightened as much as they will go, I can push them around with one finger. The shrouds do exist, and because they protect the rubber boot I felt I could use commonly found worm driven clamps, but the ubiquitous 1/2" band was too wide. 10mm bands proved difficult to source in small numbers without ridiculous shipping. Hence settling on Mike's offering. If they don't get the job done to satisfaction, thanks for the tip to reach out to gggGary.

Also, thanks for the tip on swapping out for Allen and the fact they are smaller screws than stock. On your suggestion, I had already swapped out the screws on the stockers and had planned to move them over. I'll have to get another set, good thing the hardware store is close by.
 
The original Philips screws on the original clamps are quite long, longer than they need to be. M5 x 16 replacements work just fine. I think you'll find the screws on your new replacements are only M4's.
 
In the middle of a fork oil change over here.

The old stuff started flowing rather well as long as I pumped the forks. I'm not sure of what type of fluid it was, but it smelled of petroleum and had a dark green tinge.

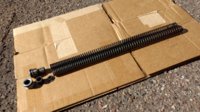
What you see in the photo below is all that was in there. A spring, washer, spacer, top nut on one side. On the other, the washer is missing, but the spacer was made slightly longer to make up for it.

I believe I am looking at an early 77 fork set with no preload adjustment. The springs I would assume are Progressives, as I have a PO's receipt when he bought them from Mike's in '09.

Looking down the tubes, I see the tell tale 77 damper end in need of a special tool. I plan to ride her now with only the oil change, without going into the lowers.

Any comments before I button her back up?
 

Attachments

  • IMG_20161111_120754344.jpg
    IMG_20161111_120754344.jpg
    225.3 KB · Views: 188
Hmmmm - I'd be tempted to see if anyone has a proper spacer and washer set for the one side that is missing these parts. You've gone to so much work - it seems a shame to not get it just right.

Pete
 
I don't think there were "early" and "late" '77 forks, just '77 forks. None had the preload adjuster top caps, just plain plug caps. But you can add them if you like, they are the same diameter and thread size. Yes, those washers on top of the springs were rather special, sort of a tophat shape. That rolled inner edge fit down into the spring top and kept them centered. I don't know if that mattered much. There's no movement really up there. Plain flat washers would probably be fine.

Your spacers are custom made ones. the originals were longer, 39 or 40mm long if I recall. But, your stock springs were also shorter than your replacements. Maybe that's why the guy made up new shorter spacers.

ForkTopCaps.jpg
 
MaxPete, I hear ya. This is where I have to balance 'done right' with keeping it on the road as long as I'm not doing harm.

I'll roll with it as is, but I'll be on the look out for a set of stock guts. MMM suggested I might be happier that route as well. He seemed to feel that the Progressive springs up front were too stiff, especially with my burly 150#.

5twins, thank you for confirming what's going on over here.

Someone, somewhere, recently mentioned that the old questioners are now the answerers. I've been reading old forum posts from when 5twins was first digging into forks and finding Minton was mistaken on a few things. Good stuff.
 
I highly recommend you try the Minton Mods eventually. I think they really help. Sure, the best set-up is probably emulators and custom straight rate springs, but that would set you back like $200. The Minton Mods are basically free.
 
Oh, most definitely. The Minton mods as you and the other regulars have interpreted them.

If I understand and recall correctly, his number, size, and locations of holes was incorrect, but y'all have extrapolated the key info and applied it to actual XS dampers.

My intention was to do the Mintons as recommended by you and others, but also try to source a pair of stock springs upon MMM's recommendation. No emulators, just making the stock stuff work to its best.

Forks are reassembled, this time with out the top spacers. With the spacers, the fork didn't move at all when I sat on the bike. Without the spacers, the fork moved maybe a 1/4". I'll report on the ride feel after tonight's commute/test run.

This suspension stuff is totally new to me, and I have no benchmark to work from. I don't know how it can feel, let alone should.

I do have an understanding of the rearward bias of our bikes. Especially with highway wind, I can feel the front end lighten up at speed.

I've raised the forks in the trees by 1/4", fresh 10w fork oil, and softer 'preload' by removing the 1" spacers. Progressive 14 Series rear shocks supplied by MMM should show up tomorrow. I'll have a completely different feeling bike by the end of the next few days and will appreciate the help as I figure it all out.
 
You used more than the stock amount of oil too, right? That really makes a big difference.
 
Last edited:
Back
Top