-
Enjoy XS650.com? Consider making a donation to help support the site.
XS650.com receives a small share of sales from some links on this page, but direct donations have a much greater impact on keeping this site going.
You are using an out of date browser. It may not display this or other websites correctly.
You should upgrade or use an alternative browser.
You should upgrade or use an alternative browser.
Steveair2
XS650 Addict
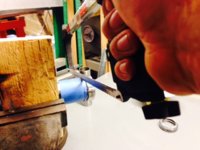
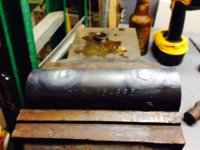
I thought I had my neck bearings figured out. After messing with them a bit more, I really didn't like what I had. I decided to do the Vintage Voodoo neck tube conversion.
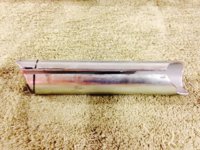
It's a bit pricey, but it gets the job done. It's pretty easy. I cut my neck tube to five and five eighths inches, then welded the insert in with eight rosette welds.
The Harley neck cups would not fit right in. I'm in the process of enlarging the inserts openings to accept the Harley neck cups. It's taking more time that I thought it would.
I want the cups to fit tight, but not as tight as they are now.
Also, I found a better way to align my back bone with the hard tail. I clamped a piece unistrut to the back bone. It works much better than my wood set up.
Attachments

Steveair2
XS650 Addict
If you run out of beer, don't drink all your wife's Coors Light.
You won't get a good beer buzz, but you will hear her bitch.
You won't get a good beer buzz, but you will hear her bitch.
- - - The Harley neck cups would not fit right in. I'm in the process of enlarging the inserts openings to accept the Harley neck cups. It's taking more time that I thought it would.
I want the cups to fit tight, but not as tight as they are now. - - -
Hi Steve,
bore the housings out to a 0.002" clearance and stick the neck cups in with Loctite.
We pioneered that technique back at Bristol Aeroplane Co about 50 years ago
and it caught on so well that Loctite now market a bearing retention sealant.
Steveair2
XS650 Addict
Fred, Wow! You worked for Bristol! That's awesome! Thanks for the advise, I need all I can get.
Steveair2
XS650 Addict
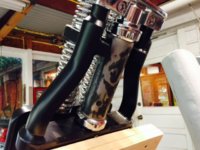
The Voodoo Vintage neck tube conversion worked out great. It took a bit of enlarging the tube to accept the neck cups. The neck cups I have are from KC International SKU 95-HS-1633-59. They came with bearing races installed, top shelf bearings and really nice bearing dust covers. I'm really happy with the installation.
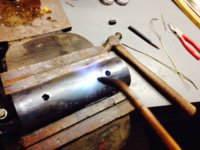
My welding today came out great. I can damn near make a gas weld look like TIG.
My next step involves making long cuts in the back bone. I decided to get out my new welding rig that I have not used before.
It's the DHC 2000. It's supposed to cut like a plasma, and weld like TIG with oxygen and acetylene. Can't wait to try it. I hope it will make cutting of the back bone easy.
I think it will.
Attachments
L_Brown
XS650 Enthusiast
I thought I had my neck bearings figured out. After messing with them a bit more, I really didn't like what I had. I decided to do the Vintage Voodoo neck tube conversion.
It's a bit pricey, but it gets the job done. It's pretty easy. I cut my neck tube to five and five eighths inches, then welded the insert in with eight rosette welds.
The Harley neck cups would not fit right in. I'm in the process of enlarging the inserts openings to accept the Harley neck cups. It's taking more time that I thought it would.
I want the cups to fit tight, but not as tight as they are now.
Also, I found a better way to align my back bone with the hard tail. I clamped a piece unistrut to the back bone. It works much better than my wood set up.
The build is looking good. Voodoo did my hard tail and mine was the first they did the neck conversion on. I cant wait to get it back from them, getting more work done to it.
Good luck with the rest of your build.
Steveair2
XS650 Addict
Thanks Larry, If your ever in the east Dallas area, swing by for cold beers.
Steveair2
XS650 Addict
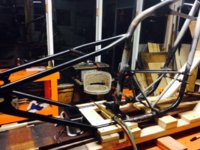
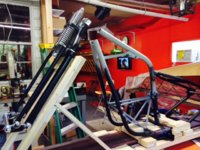
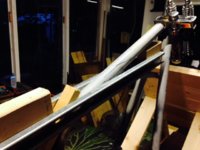
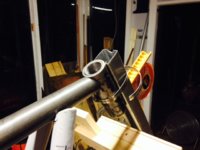
I don't know what I was thinking needing a torch to make this cut. It was only about nine inches. I made some guides out of thin unistrut and zipped right through it with my saws-all. This cut drops the back bone fifteen degrees from stock.
I can't believe how clean and rust free the stock tubing is on the inside after thirty five
years.
.
I can't believe how clean and rust free the stock tubing is on the inside after thirty five
years.
.
Attachments

Steveair2
XS650 Addict
Steveair2
XS650 Addict
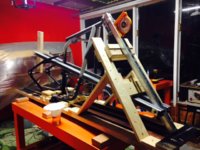
This has been a weird project for me so far due to the fact that everything seems to fall right into place with little or no effort. This is my first bike build. It's fun!
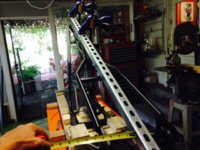
Today I built my neck tube jig.
Today I built my neck tube jig.
Attachments

Hi Steve,
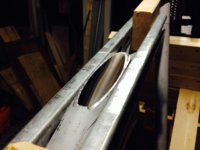
the shrinkage in the neck to top tube weld is highly likely to pull the bearing pocket out of round.
You got a plan for that?
the shrinkage in the neck to top tube weld is highly likely to pull the bearing pocket out of round.
You got a plan for that?
Steveair2
XS650 Addict
Fred,
Thank you very much for bringing this to my attention. I guess maybe I'll get it tack welded and then install my neck cups before final welding.
Thanks for you input, I really appreciate it.
Thank you very much for bringing this to my attention. I guess maybe I'll get it tack welded and then install my neck cups before final welding.
Thanks for you input, I really appreciate it.
Hi steve,
I'd recommend moving the welded junction down, away from the ring where the bearing cup is to go.
Bend or relocate the top tube &/or move the head tube up, whatever best suits your intended frame geometry.
That's step 1).
Step 2) is that even with the weld being moved the head tube is still gonna warp a little.
I'd say, bore out the head tube to have a few thousandths clearance on the neck cups and insert them after the welds are completed using Loctite bearing retention compound.
If a trial assembly shows the cup pocket has gone too oval for the cup to slip into place, ease the pocket out with a die grinder.
Steveair2
XS650 Addict
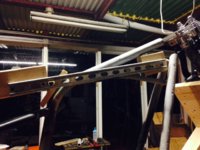
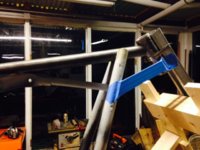
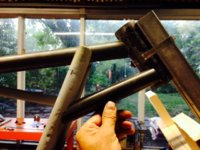
Thanks for the advice Fred. The backbone is not in it's final position as shown in that last picture. I'm working on lowering it right now. Slowly with a file. The weld will end up about a half inch below where is is in that last picture.
This will be time consuming. I have to go slow, I don't want to screw it up.
Thanks again.
This will be time consuming. I have to go slow, I don't want to screw it up.
Thanks again.
Hi Steve,
I'm assuming you will be adding a lower frame tube to meet the stem tube?
Same deal there, keep it away from the lower bearing cup pocket.
Welding all round the stem tube will warp it less than only welding on it's rear half.
How about a 12ga or 14ga gusset that wraps around the front of the stem tube
with it's backward sweeping edges lined up with the frame tube centerlines?
Before it's bent into a U-shape to fit round the stem tube it'd look like a butterfly bandaid.
Steveair2
XS650 Addict
Steveair2
XS650 Addict
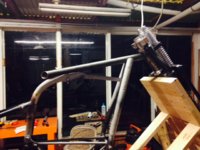
So I'm goosing my neck. It has been the most challenging part of my build so far.
It is certainly not "falling together" I have learned very much from this forum and would like to contribute any way that I can. Today I'm showing how I'm fabricating the lower goose neck tubes.
I first use electrical conduit to mock up the first tube. It's cheap!
Then I split the tube and slide it over the 4130 aircraft grade tubing. It's expensive!
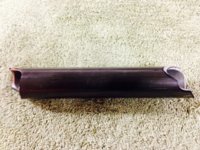
I trace the tube with a sharpie and rough cut it with a hack saw and grinder.
Then I finish fit the tube with a file.
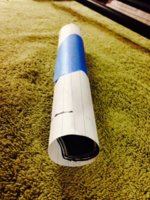
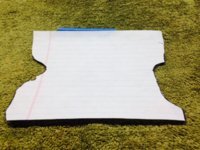
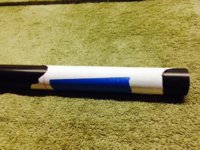
Once I have the first tube fit, I wrapped it with paper and traced the outline inside the paper tube. Then I cut this pattern out and reverse wrapped it around the next tubing to be shaped. Then traced it with the sharpie. This gave me a mirror image for the other side tube. Then I rough cut with a hack saw and grind to the line.
Then final fit with a file. I'll post a picture sequence next.
The first tube took three or more hours to fit. The second tube took much less time.
It is certainly not "falling together" I have learned very much from this forum and would like to contribute any way that I can. Today I'm showing how I'm fabricating the lower goose neck tubes.
I first use electrical conduit to mock up the first tube. It's cheap!
Then I split the tube and slide it over the 4130 aircraft grade tubing. It's expensive!
I trace the tube with a sharpie and rough cut it with a hack saw and grinder.
Then I finish fit the tube with a file.
Once I have the first tube fit, I wrapped it with paper and traced the outline inside the paper tube. Then I cut this pattern out and reverse wrapped it around the next tubing to be shaped. Then traced it with the sharpie. This gave me a mirror image for the other side tube. Then I rough cut with a hack saw and grind to the line.
Then final fit with a file. I'll post a picture sequence next.
The first tube took three or more hours to fit. The second tube took much less time.
Last edited:
Steveair2
XS650 Addict
Now THAT's a fab tip! Mirror-image symmetry of two complementary parts. I'll remember this one...
Similar threads
- Replies
- 20
- Views
- 5K